Important Message From JewelryMonk

Hello everyone!!

Thank you for all your support at http://www.JewelryMonk.com, I really mean that. I have been doing this for a little over a month, and have gotten so much support from all of you! I am truly humbled.

I mentioned a few days ago that the website will be going through some changes and the first one just happened. (Change of Site Hosts)

If you are not receiving the emails in the next few days, please go to http://www.JewelryMonk.com and re-subscribe to the Blog via email. Because I will be adding content and I am not sure if the email list transferred to the new web-host.

That is all I got for now. Thanks again for coming on this Journey with me and stay tuned for some more changes, all exciting!

Oh, there is a Podcast in the making as well!!!

Doug

Day 38 Making Round Beads or Balls

Soldering Balls Header 1

At some point in your soldering, you will want to make little silver beads or balls. This isn’t as easy as you might think. If you have tried this before, you might have gotten frustrated with deformed balls with flat sides and pits.

Soldering Balls Header 2

Well, I will try to help you get less frustrated. Start with silver wires cut the same length. You will have to experiment with different lengths to get different size balls. If you have Pure Silver as opposed to Sterling Silver this will work much better and give you less pits. (I used Sterling here) Melt the wires into balls on a Soldering Block. Use a little Handy Flux to help in this first stage. After this, the balls are not round and are fairly deformed.

Soldering Balls (1) Soldering Balls (3)

Soldering Balls (4) Soldering Balls (5)

Now you will want to make little “Divots” in your soldering board, or better yet, if you can find a Honeycomb Soldering Board made for melting balls. Use a bushy flame and melt the balls slowly, you don’t want to use flux this time. Once the ball starts to melt, slowly move the flame away and let it solidify slowly. (again, Pure Silver works better for this) I use my Mini Torch for this.

Soldering Balls (8) Soldering Balls (9)

Soldering Balls (10) Soldering Balls (11)

In this instance I am going to solder a post onto the balls and make earrings. I dip all the parts in a mixture of Denatured Alcohol and Powdered Boric Acid. I mix about a tablespoon of powdered boric acid to about 1 ounce of denatured alcohol. Then I solder a post onto the balls.

Soldering Balls (13) Soldering Balls (14)

Soldering Balls (15)

Next, polish and enjoy!

Have an awesome day and make sure to pause and enjoy it!

Doug

Day 37 Waxing and Casting Prep

Today we will continue talking about casting and Casting Prep. I know some of you, maybe a lot of you do not do your own casting but bear with me…. I have always known that some of the stuff we talk about is not for everyone, but it IS for someone, Every Day. Today we will be “treeing up some waxes getting ready to cast them into Silver.

Wax Treeing Header

Start with your base. You will want to get a weight of your rubber base in grams or dwt, which ever you will be using to weigh your metal. I used grams in this instance and I write the weight on the Rubber Base. This is my “tare weight” which I will subtract from the total weight when I am done to find out how much wax I have, therefore how much silver to use. I am using a 4″ base here, but they make them in different sizes as well.

Wax Treeing (1)

I now add a Wax Stem to the base, you can get these in different sizes and shapes. I use a straight one, but they make them tapered as well. Make sure you have a good seam between the base and the wax. We do not want any pits or holes here or it will cause trouble in the casting process by breaking off investment and getting it in the casted metal. I use a Paddle Wax Tip on my Wax Pen which I have modified a bit to make it a little slimmer.

Wax Treeing (2) Wax Treeing (3)

Wax Treeing (4)

Now trim some of the excess sprue off of the wax you are treeing up with the wax tip. Make sure you wipe the tip off on a piece of paper towel or a napkin. If you don’t do this, the tip will have extra melted wax on it and this wax will drip onto your pieces or tree in places you do not want it, making a mess or destroying your waxes.

Wax Treeing (5) Wax Treeing (6)

Next, start applying your waxes to your tree. In most cases you will probably only be casting a few pieces at a time, I have a bunch to do here. I try to get them as close as I can, while still leaving a little room between pieces. Make sure you leave room between your waxes and your metal can (I will show this later) minimum 1/4″ or so. Also do not get to close to the top of the can. (approx 1″)

Wax Treeing (7) Wax Treeing (8)

Wax Treeing (9)

There you have it, and that is why they call it a tree…..

Wax Treeing (10)

Have an awesome day and go make something pretty!

Doug

Day 36 Wax Cleaning and Casting Prep

Since I am in the midst of a casting project, I thought I might as well use the opportunity as a tip/blog entry. Yesterday I injected some waxes and now I have a pile of waxes that need to be cleaned before casting. Today I will go through the cleaning process in preparation for casting.

Wax Cleaning Header

Now I have my waxes, but I have to inspect them for defects, pits, and flashing before I put them on a “tree” for casting. Even though the model was cleaned up good before molding, there are still mold lines, pits, and extra “flashing” (wax that gets in the airlines and between the 2 halves) that need to be cleaned before getting turned into metal. it is usually easier to clean in wax than metal.

Wax Cleaning (1)

Wax Cleaning (2) Wax Cleaning (3)

I use my Wax Pen and I have modified a wax pen tip for this process. I took a regular tip and soldered (silver solder) a silver wire to the tip. I tapered the wire and added a little “curl” to the end so it grabs the wax better. I use Perfect Purple Wax to fill pits and defects. It is a low temp wax that is easy to work with and clean.

Wax Cleaning (4) Wax Cleaning (5)

Wax Cleaning (6) Wax Cleaning (7)

After I have filled all the pits and defects, I use a #11 Straight Surgical Blade that I have altered. I sharpened the tip with a Separating Disc to make it thinner and easier to get into tight areas. I use this to trim away flashing and mold lines. Also to trim off the extra purple wax I added to pits. If there is a lot of cleanup to do to a wax, it is easier to toss it away and inject a new one.

Wax Cleaning (8) Wax Cleaning (9)

Lastly, I rub the waxes down with a Q-tip lightly soaked with Lighter Fluid. This will give the wax a smooth finish and take out any scratches you have. Be careful not to use this Q-tip too much because it will take away detail the more you use it.

Wax Cleaning (10) Wax Cleaning (11)

There ya go, Clean waxes, ready to cast.

Have a great day and don’t spend too much time at the bench….. it’s Summertime!!

Doug

Day 35 Mold Injection

 Wax Injection Header

Eventually, if you make jewelry long enough, you will find that you make some of the same things over and over, either multiple parts on the same design or the design multiple times. You say to yourself….”Self, it would be so nice if I could make it once and have a way to reproduce it”. Whether you do your own casting or have someone do your casting for you, it is beneficial to have a mold made so all you have to do is inject the wax and cast the piece, sometimes multiple times.

I will cover making a mold at a later date, but today let’s look at the wax injection process. Here is a piece I needed multiples of, so I made a model, added a sprue and a sprue button, and made a mold.

Wax Injection (1) Wax Injection (2)

Here is the mold I will be using, notice when I cut the mold, I cut it with “locks” in it so the 2 halves won’t shift and the mold line will be less visible and less cleanup in the wax. I cut the mold with a #12 Surgical Blade in a Scalpel Handle. I used Castaldo Gold Ready Cut Rubber in this instance.

Wax Injection (3) Wax Injection (4)

I also cut airlines in the mold so the air can evacuate and helps the waxes fill more easily. I lightly coat the airlines with talc (Baby Powder) to help in this process. I fill a towel with baby powder and tap the inside of the mold while spreading the mold open. I also use a Makeup Brush to brush out any excess powder. An air hose blown into the mold will do the same thing.

Wax Injection (5) Wax Injection (6)

Wax Injection (7) Wax Injection (8)

After the airlines are powdered, spray a little Mold Release to the inside of the mold to help the wax come out of the mold easier. To inject the wax, I have made 2 Aluminum Plates that I use to hold the mold at a constant pressure so the mold doesn’t bulge or have inconsistent thicknesses. The aluminum plates are about 1.5mm thick.

Wax Injection (10)

Wax Injection (9) Wax Injection (11)

Now set the air pressure on your Wax Injection Machine, I like to start around 10psi. Hold the mold to the injection nozzle, press in and count to about 10 (one thousand one, one thousand two, etc.) Wait for a couple of minutes for the wax to cool, and open the mold. If the wax doesn’t fill, add more pressure, and if it overfills, (flashing), decrease the air pressure. Remove and repeat. Re-powder the mold about every 20-30 injections and spray the mold release about every 5 or so injections.

Wax Injection (12) Wax Injection (13)

Wax Injection (14) Wax Injection (15)

Wax Injection (16)

I hope you had a great 4th of July!

Now go enjoy your jewelry making.

Doug

Day 34 How to Modify Your Tweezers

Happy 4th of July!! I wish I had a patriotic lesson for you today, but all I could dig up was an old picture of a piece I did years ago.

Eagle Head Pin

Today we will talk about refining the edges on our tools, namely our Tweezers. Most people don’t think about it, but many of our tools are an extension of our hands, and the better we prepare out tools, the easier our tasks will be. Heck, I even prep my nails with a #2 Flat Hand File once a week, but that is for another day…..

In soldering, setting, filigree work, and many of the intricate tasks in jewelry making, nothing is more frustrating than picking up a small piece of solder, or a stone, and having it “flick” out of your tweezers into the great unknown. There is nothing that will stop this from ever happening again, but today I will show you how to keep it to a minimum.

Tweezers Header

When we buy a new set of tweezers, even a quality pair, the tips will look somewhat good and clean, but if you look close, they look something like this:

Tweezers New

When you think of tweezers, you think that you want the tips to come to a point at an angle to be able to pick stuff up, like fingers. Well in my experience, I have found that if the tips come together more parallel, the “flick-rate” is much less and they seem to pick up stuff easier. Also if the inside edge is flat and the very tip is flat, they work much better as well.

Tweezers (2) Tweezers (3)

Tweezers (4)

I usually file the edges with a used up #4 Flat Hand File to get the edges close, then I will run a Snap-on Sanding Disc over the filed surface to get rid of the deeper scratches. Last, I rub the edges of a piece of 400 Grit Sandpaper , flat on my desk to finish the edges flat. I also place a piece of sandpaper inside the tweezers, close them, and pull the sandpaper out a few times to make sure the two surfaces are parallel to one another.

Tweezers (5) Tweezers (6)

Tweezers (7) Tweezers (8)

I hope this helps you reduce your “Flick-rate” (my made up word of the day) and you can spend less time on the floor with a flashlight, and more time admiring your beautiful handiwork!

Now, go have a wonderful 4th!

Doug

Day 33 Exciting Changes and Questions

Exciting Changes Coming!

Well today’s lesson will be less of a lesson for you and more of a lesson for me, and I will need your help, I am in the process of changing “domain hosts”, (computer geekery stuff) and hopefully you won’t notice and it will be seamless. But in the process, the site might be down for a bit. (I hope not) Over the 4th of July seems like a good time to change. I am also trying to create a good logo. (I welcome your input)

Well, good things are happening here at JewelryMonk.com, I am starting to do the groundwork and homework to start a weekly (or bi-weekly) Jewelry Making Podcast, kind of an internet radio program that you can listen to on your computer or your Smartphone. I will do some interviews of jewelers, tool reviews, jewelry tips, and whatever I can come up with.

logopodcast

But I could use your help.

I need some good questions about jewelry making that I can talk about on the first few programs, until I get my broadcasting bearings so to say. These programs probably won’t be too long, and I am going to try to give tips and such without the visual help of pictures or videos. (God help me) This ought to be interesting, but fun and a growing experience.

All this to say I would like your questions and input to add to the JewelryMonk Podcast. If you have something you want help with, tool suggestions, tips, etc. let me know and I will do my best to answer them. Honestly, I am a little intimidated by the whole idea, but I am willing to dive in and learn in the process. I figure if I ain’t learning, I ain’t going anywhere.

Wish me luck and stay tuned for an updated website and a podcast on this site and on itunes!

This is getting exciting!

Doug RaceTalk1

So go ahead and comment with some questions or subjects you would like addressed in the future podcast.

Thanks for getting what I am trying to do, now go shine your world.

Doug

Day 32 Shaping a Band

There are always quick ways to go about most jewelry techniques, with all the Foredom tools available, sanders, grinders, shapers, etc. but truthfully, I find “therapy” in working a piece of silver or copper by hand into shape. In fact, I think before you grab a sanding disc or a mechanized grinder, you should master working the metal by hand, or at least get a good understanding of it. Today we will take a look at shaping a piece of shank into a beautiful dome ring.

Shaping a Band Header

After the soldering illustration we did yesterday, we were left with a square shanked band. I use a #4 Crossing Needle File to take off the extra solder on the inside of the shank. When I soldered it together, I made it about 1/8th of a size shy of a size 10 to give me room to round and file the inside so it would come out at a size 10. After rounding it on a Steel Mandrel, I sand the inside of the ring with 400 Grit Sandpaper, then 800 Grit Sandpaper.

Shaping a Band 1 Shaping a Band 2

Shaping a Band 3 Shaping a Band 4

Shaping a Band 6 Shaping a Band 7

The next thing I do is to flatten the ring by placing the ring between a Steel Bench Block and a Chasing Hammer and flattening it by hitting the chasing hammer with a Rawhide Mallet.

Shaping a Band 7

Notice how I have shaped my bench pin, on one side, there is a notch on top to place pieces against it to help support while I file. I flatten the side of the shank with a #2 Flat Hand File, then a #4 Flat Hand File. I finish the sides with using my Aluminum Sanding Sticks (400 grit and 600 grit) that I demonstrated in the Day 24 Blog post.

Shaping a Band 8 Shaping a Band 9

Shaping a Band 10 Shaping a Band 11

Also the other side of my bench pin is a notch to hold rings to help support when filing the outside. Here I I again used a #4 Flat Hand File, and my Aluminum Sanding Sticks.

Shaping a Band 12 Shaping a Band 13

Shaping a Band 14 Shaping a Band 15

Now we have a beautifully crafted clean, square shank….. but we will not leave it here.

Shaping a Band 16

Now I will try my best to describe how to use a bench light and the reflection from it to shape this square shank into a domed shank. Using the reflection from my bench light is something I do automatically and is kind of hard to explain, but I will try to do my best. As I am grinding, filing, sanding a piece of jewelry, I am constantly holding it at my bench pin and rotating it and watching the reflection from my bench light. This is the best way I can see the true shape and form I am working with. It is hard to explain, but you have to keep working the metal and checking the shape of it in the light. Sorry for the bad explanation but look at some of the images in this lesson close, if there are blemishes, the light won’t lie.

On the Square shank, I use a #4 Hand File to take the edge off the corner, trying to keep the same angle. After I have done this on both sides, I take the next edge off of both sides of the new surface created, (so I have 3 new surfaces) then repeat again. (so I have 5 new surfaces) The only way I know to do this effectively is to use the light and see where the file is working the metal. Sometimes I cover the piece in a black sharpie so I can see the new edges better. Again I am sorry for the bad explanation of using light reflection to shape your metal.

Shaping a Band 17 Shaping a Band 18

Shaping a Band 19 Shaping a Band 20

After I have the new surfaces filed, usually 5 – 7 new angles on each side, I take the ring and a piece of 400 grit sandpaper and blend the edges. I place the ring on the bench pin, hanging over the side, and roll the sandpaper over the surfaces, blending the “facets” until they flow together. I do this on both sides. Then I take the sandpaper and blend the scratches the opposite way, sanding with the shank. After I am satisfied with the blending, I repeat the same thing with 600 Grit Sandpaper, sometimes using water on my sandpaper as a last step. Polish if you like and it will be amazing, or leave as is.

Shaping a Band 21 Shaping a Band 22

Shaping a Band 23 Shaping a Band 24

Shaping a Band 25 Shaping a Band 26

There you have it, the best Therapy I can give you. Again there are quicker, more efficient ways to get the same effect, but I believe until you work the metal by hand and understand what you are looking for, getting the feel, using your eye and the reflection of the light, all the tools in the world will never give you the results you can get by working with your hands.

Now, go work that metal!

Doug

Day 31 Back to Soldering Basics

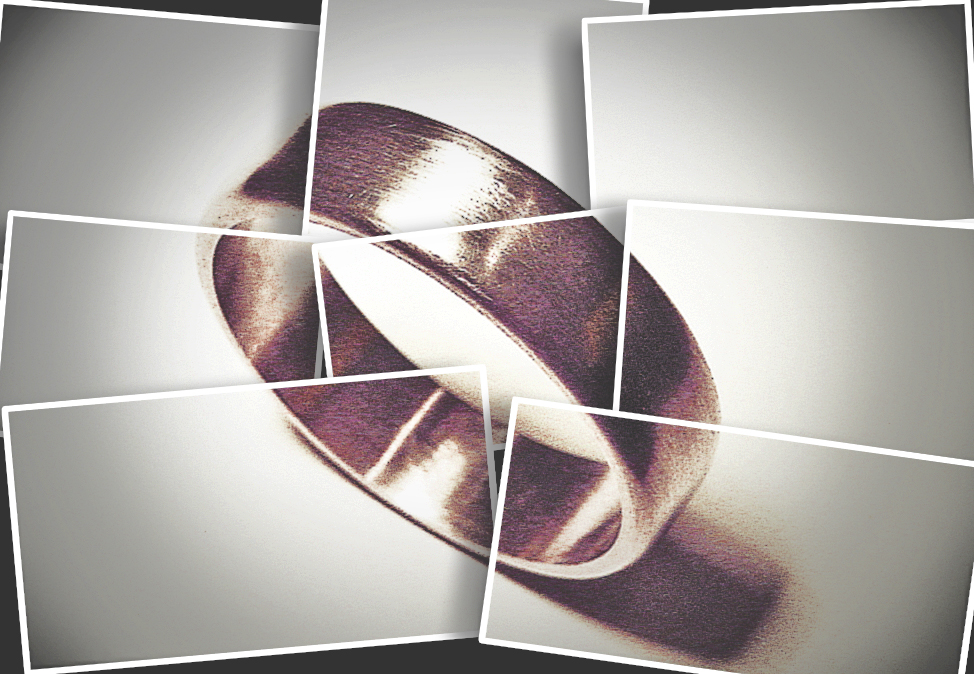
The great thing about putting together this JewelryMonk site is all the people who have visited it in the past month, over 12,000 visits! This blows me away and truly humbles me.  I have had comments from some you and so far I seem to have hit a note with quite a few of you, and all different levels of jewelers from beginners to experienced masters. Yeah, that’s right, I have been doing this “Blog-Thing” for a month now. I am amazed because I have never blogged before and I have realized what I have been missing all these years. I have been making jewelry for close to 30 years and I have accumulated a whole bunch of jewelry tips, tricks, and nuggets of knowledge, and it is a joy to share some of them.

THANK YOU ALL for pushing me forward, and I promise I will keep it up and make this site better and bigger. Ok on with today’s lesson.

Soldering Basics Header

Today let’s talk about some basic soldering techniques. Like I said earlier, there are all levels of jewelers visiting this site, and some of you have never soldered, or have done some very limited soldering. I want help you get over your hesitation of getting into the soldering world, and assure you that you can do it. First if you haven’t read Day 5 on Safety and Torch Setup, I suggest you start there.

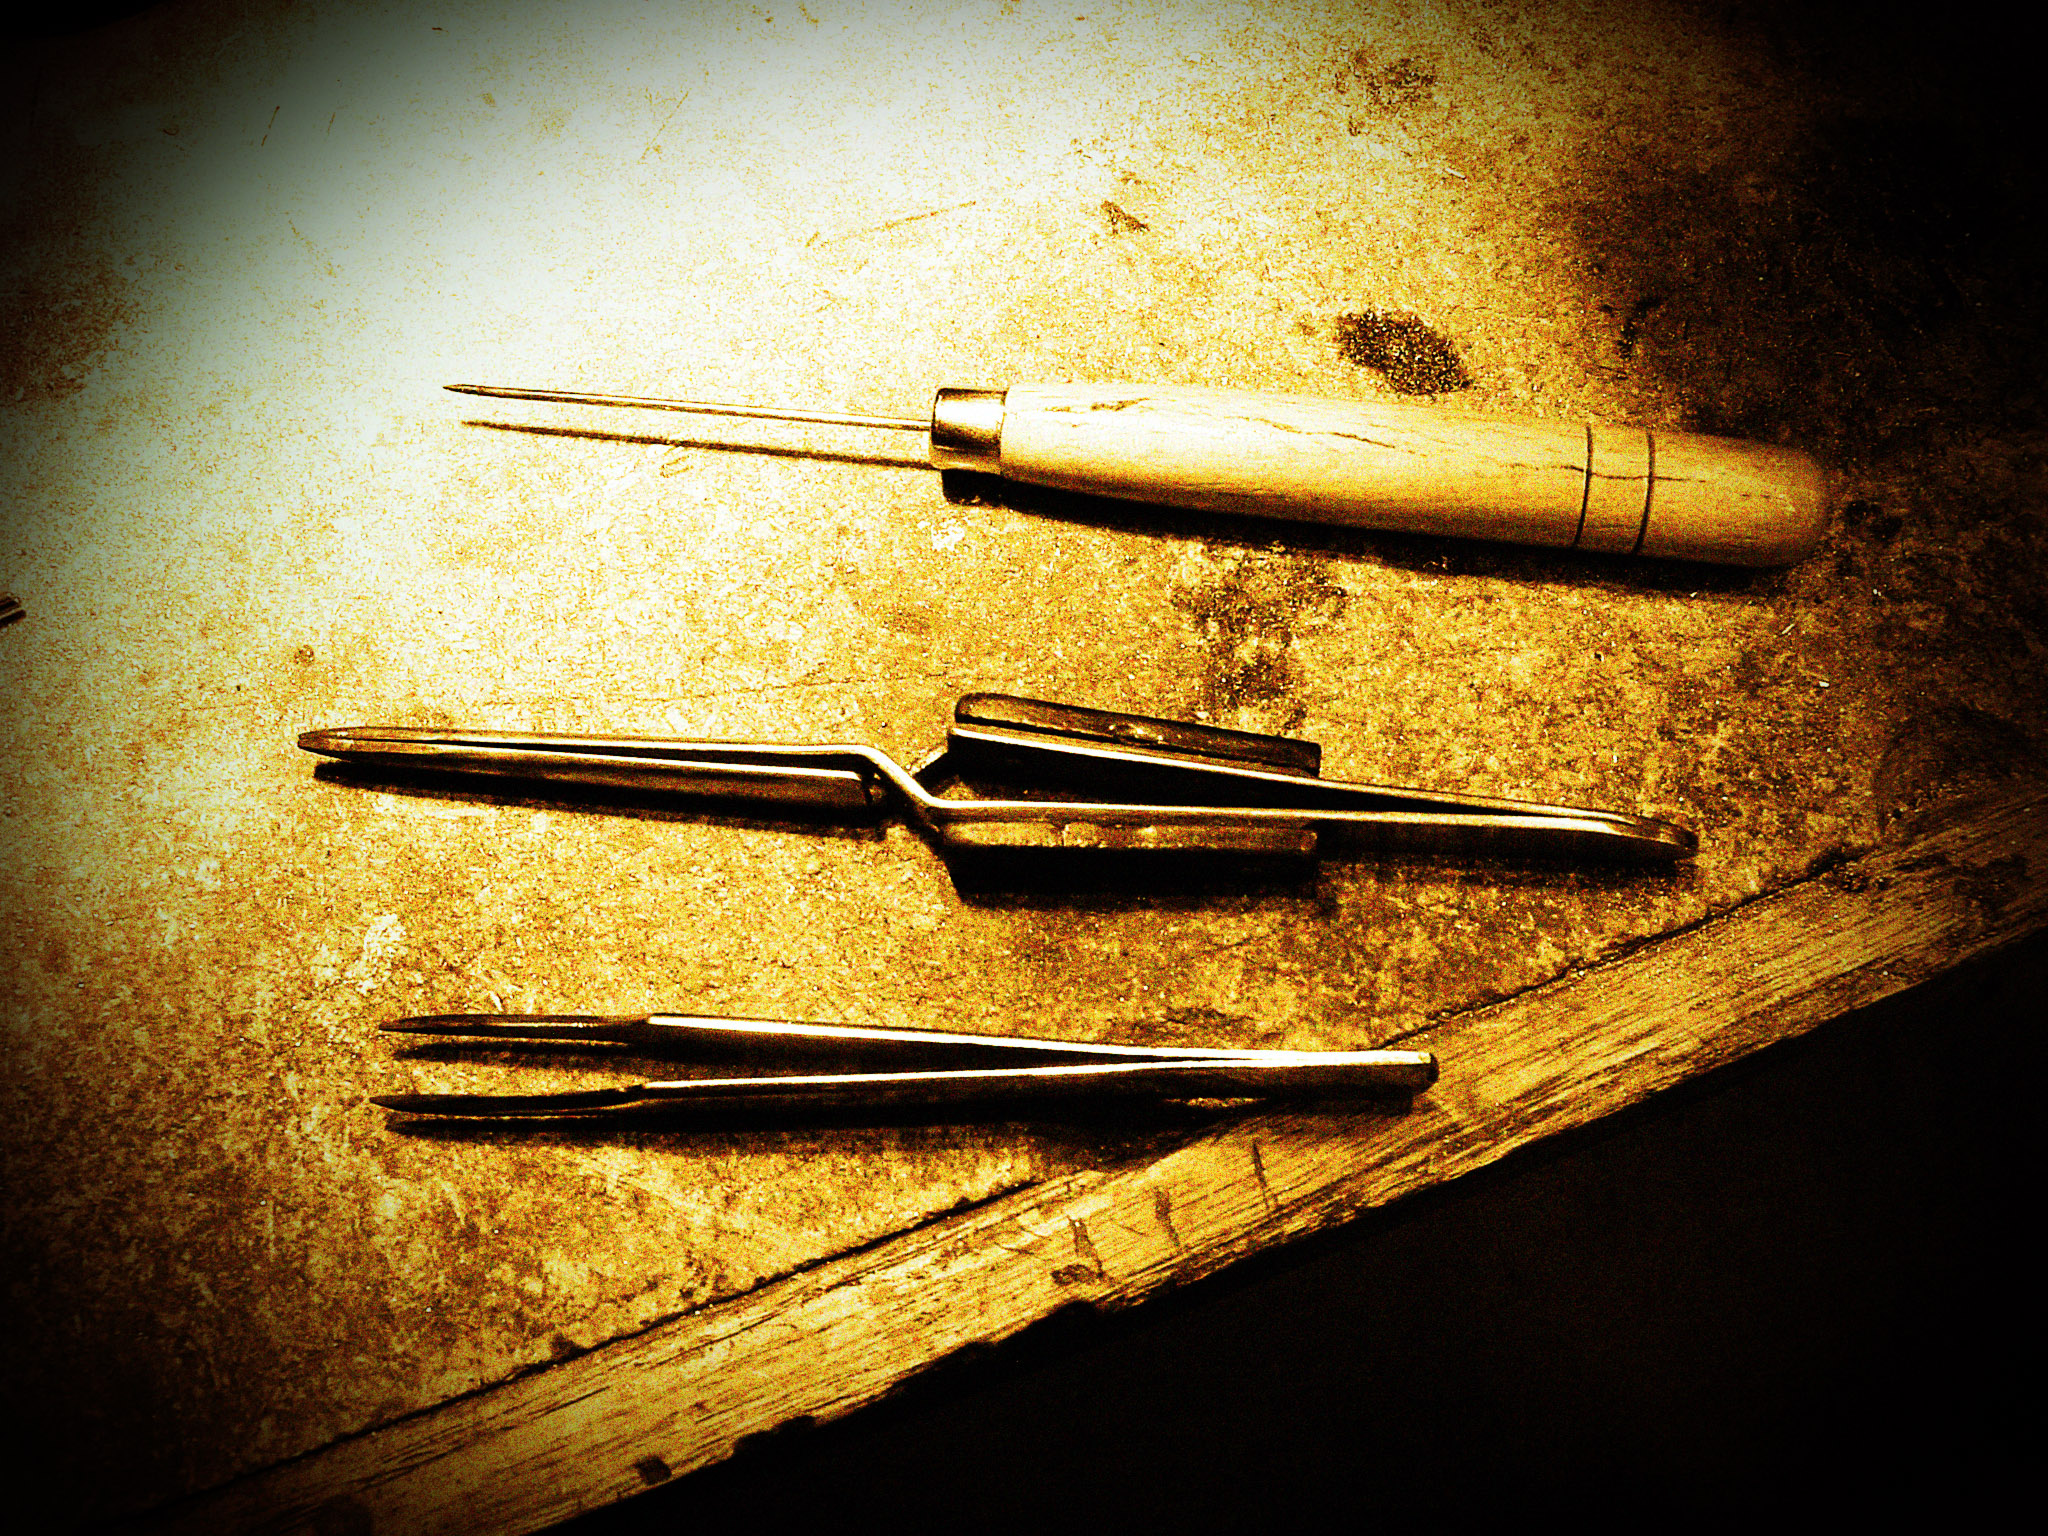
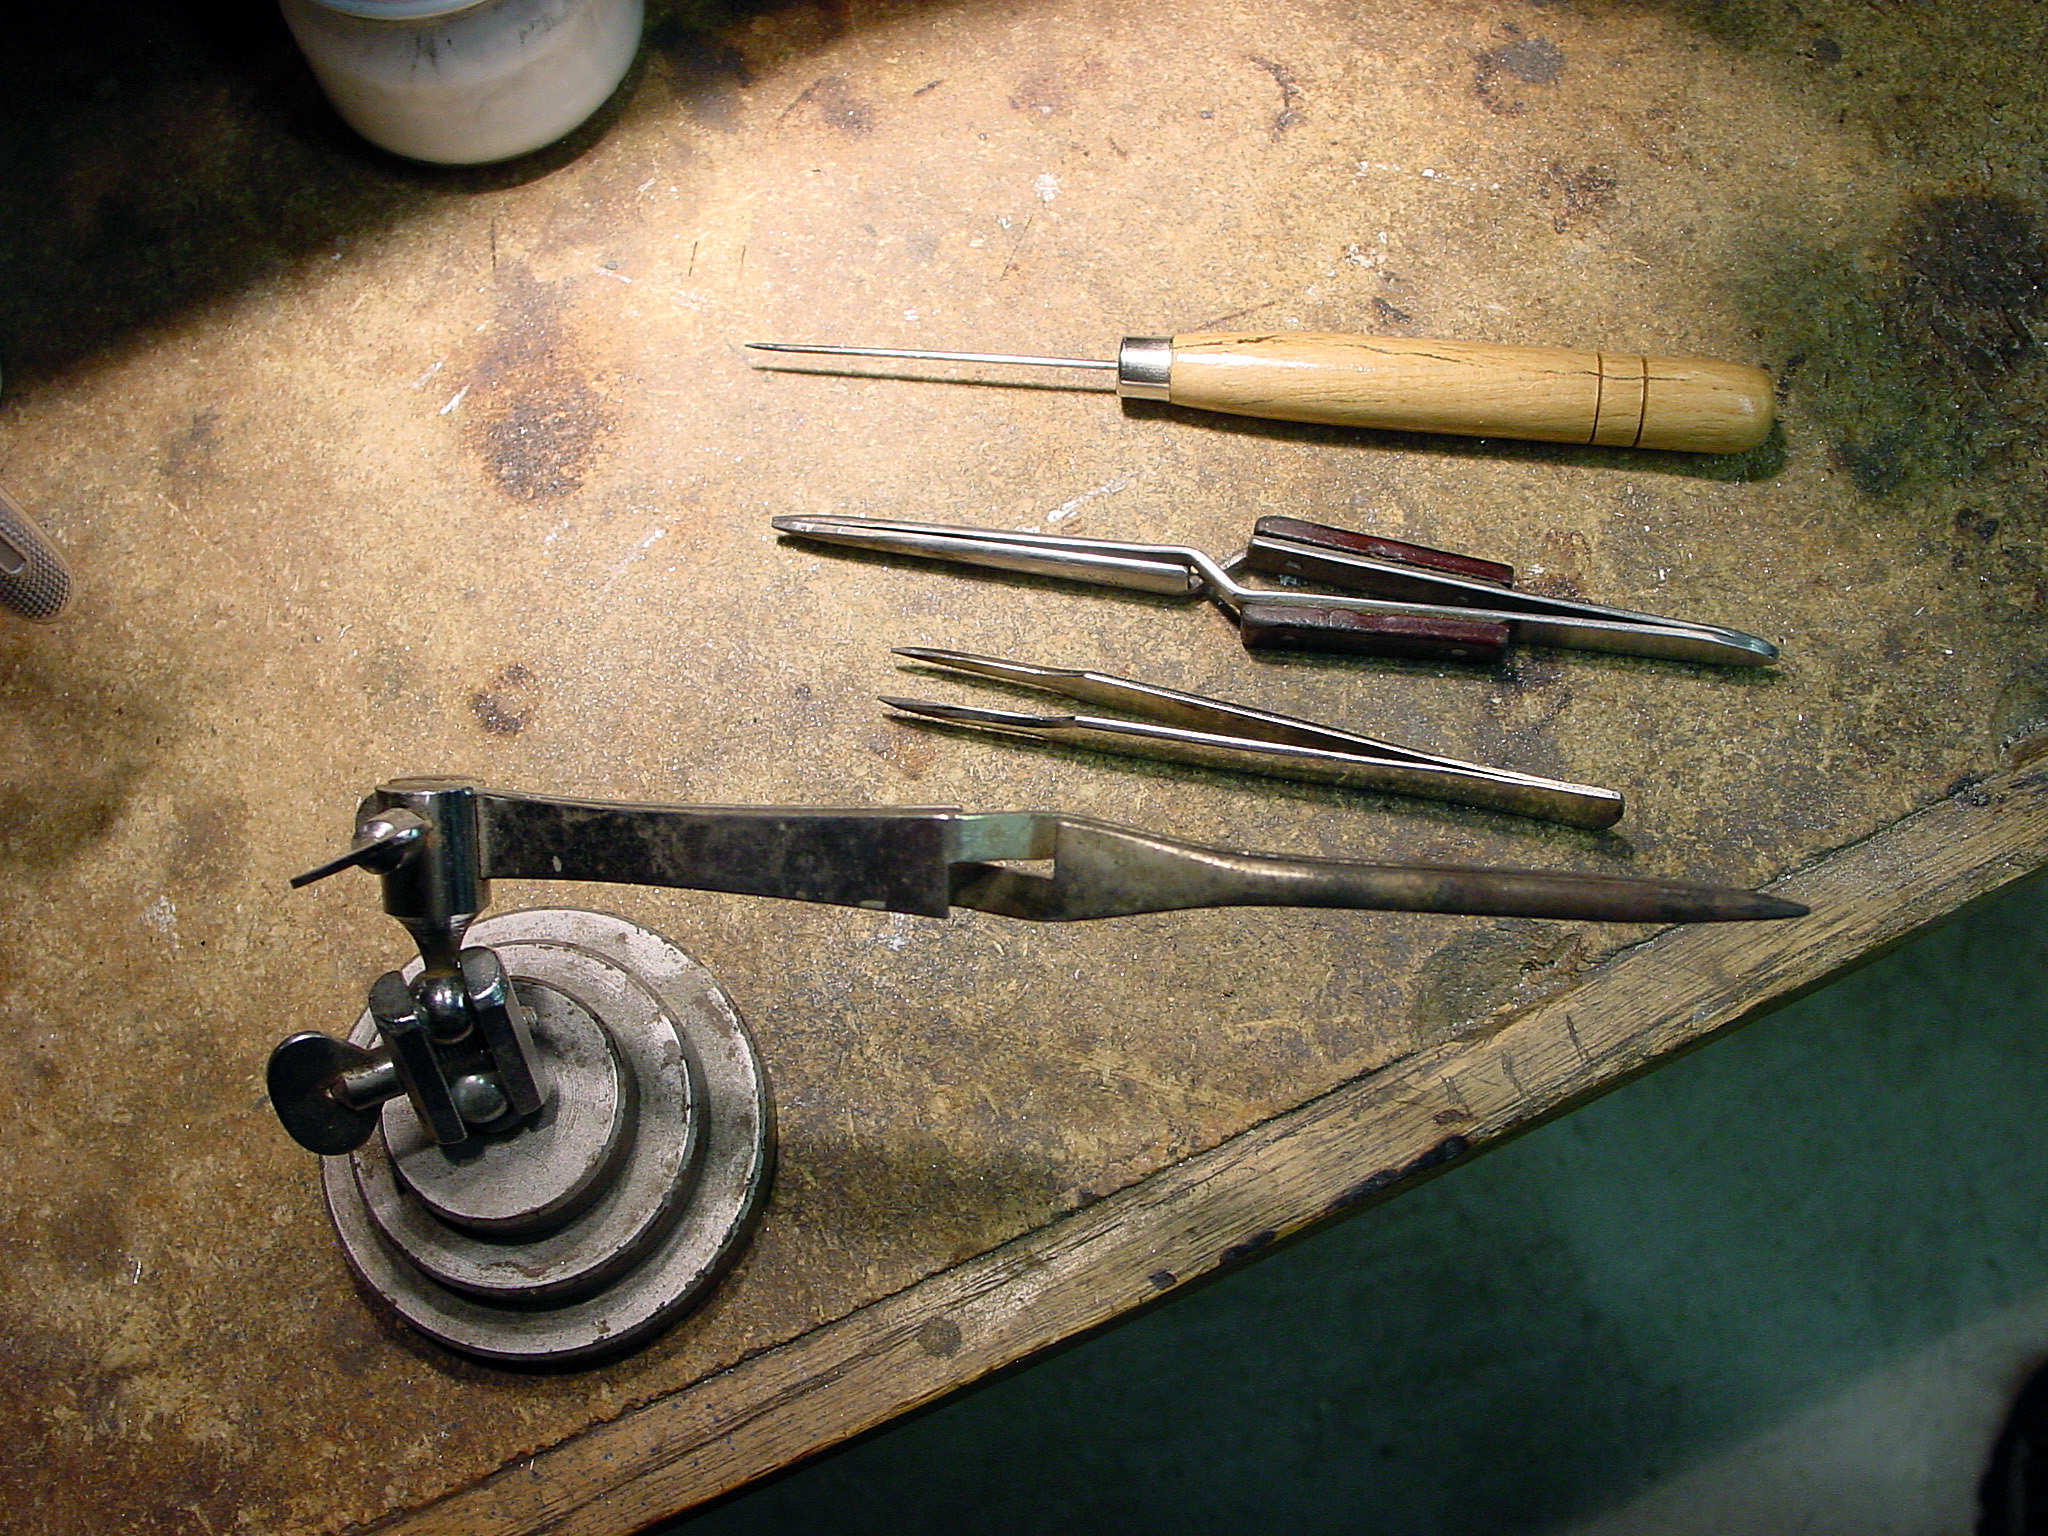
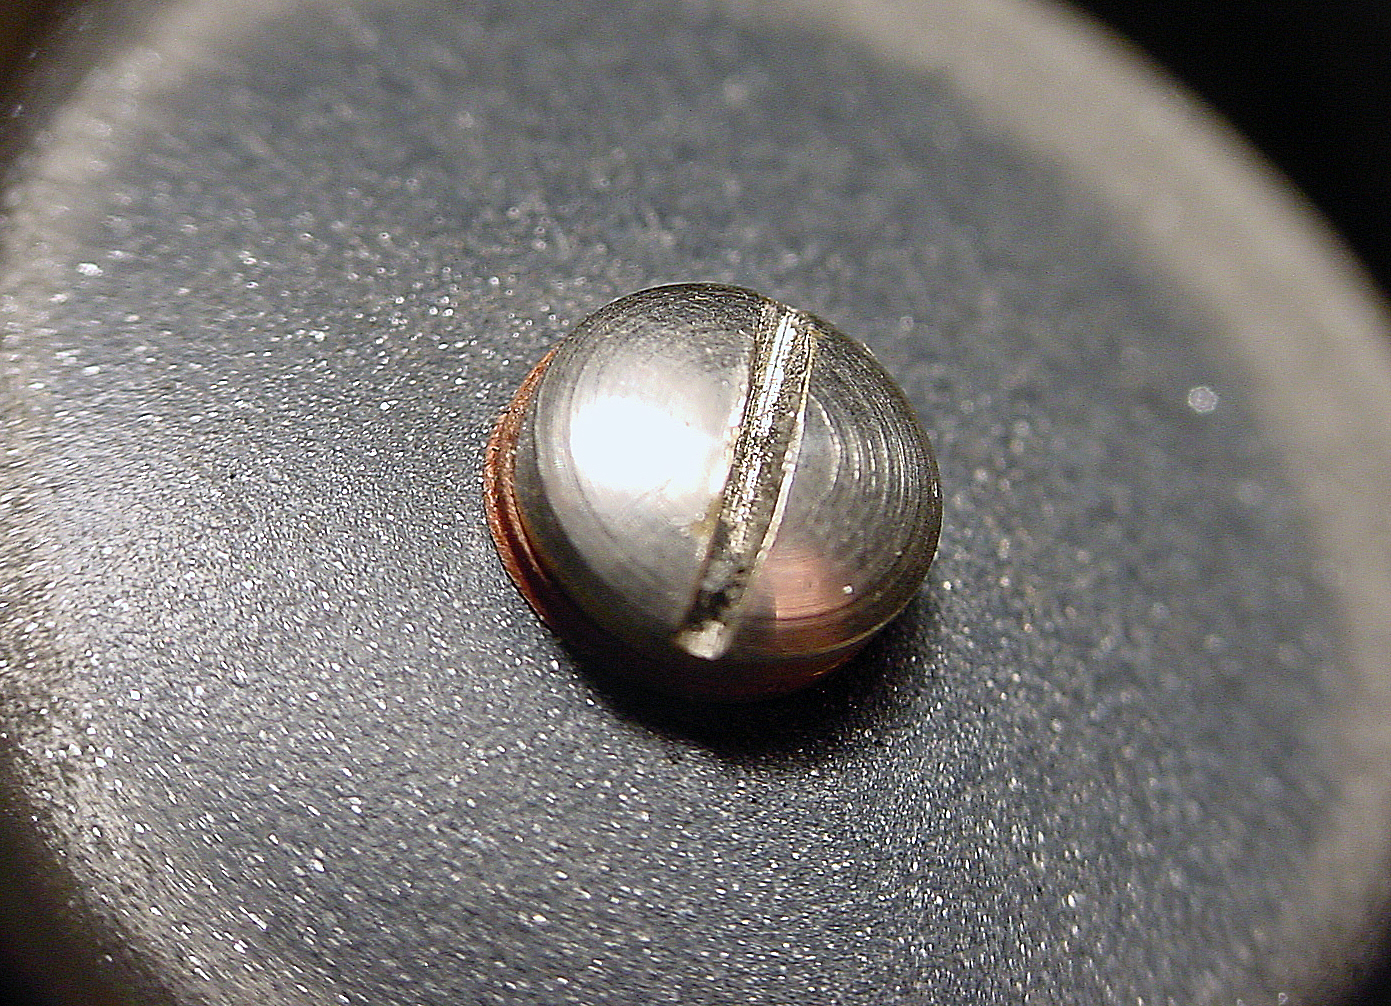
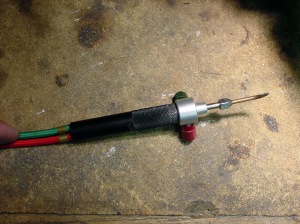
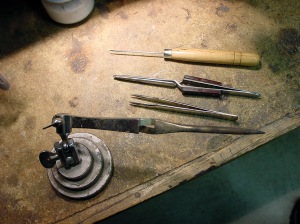
Here are some tools I can’t solder without:

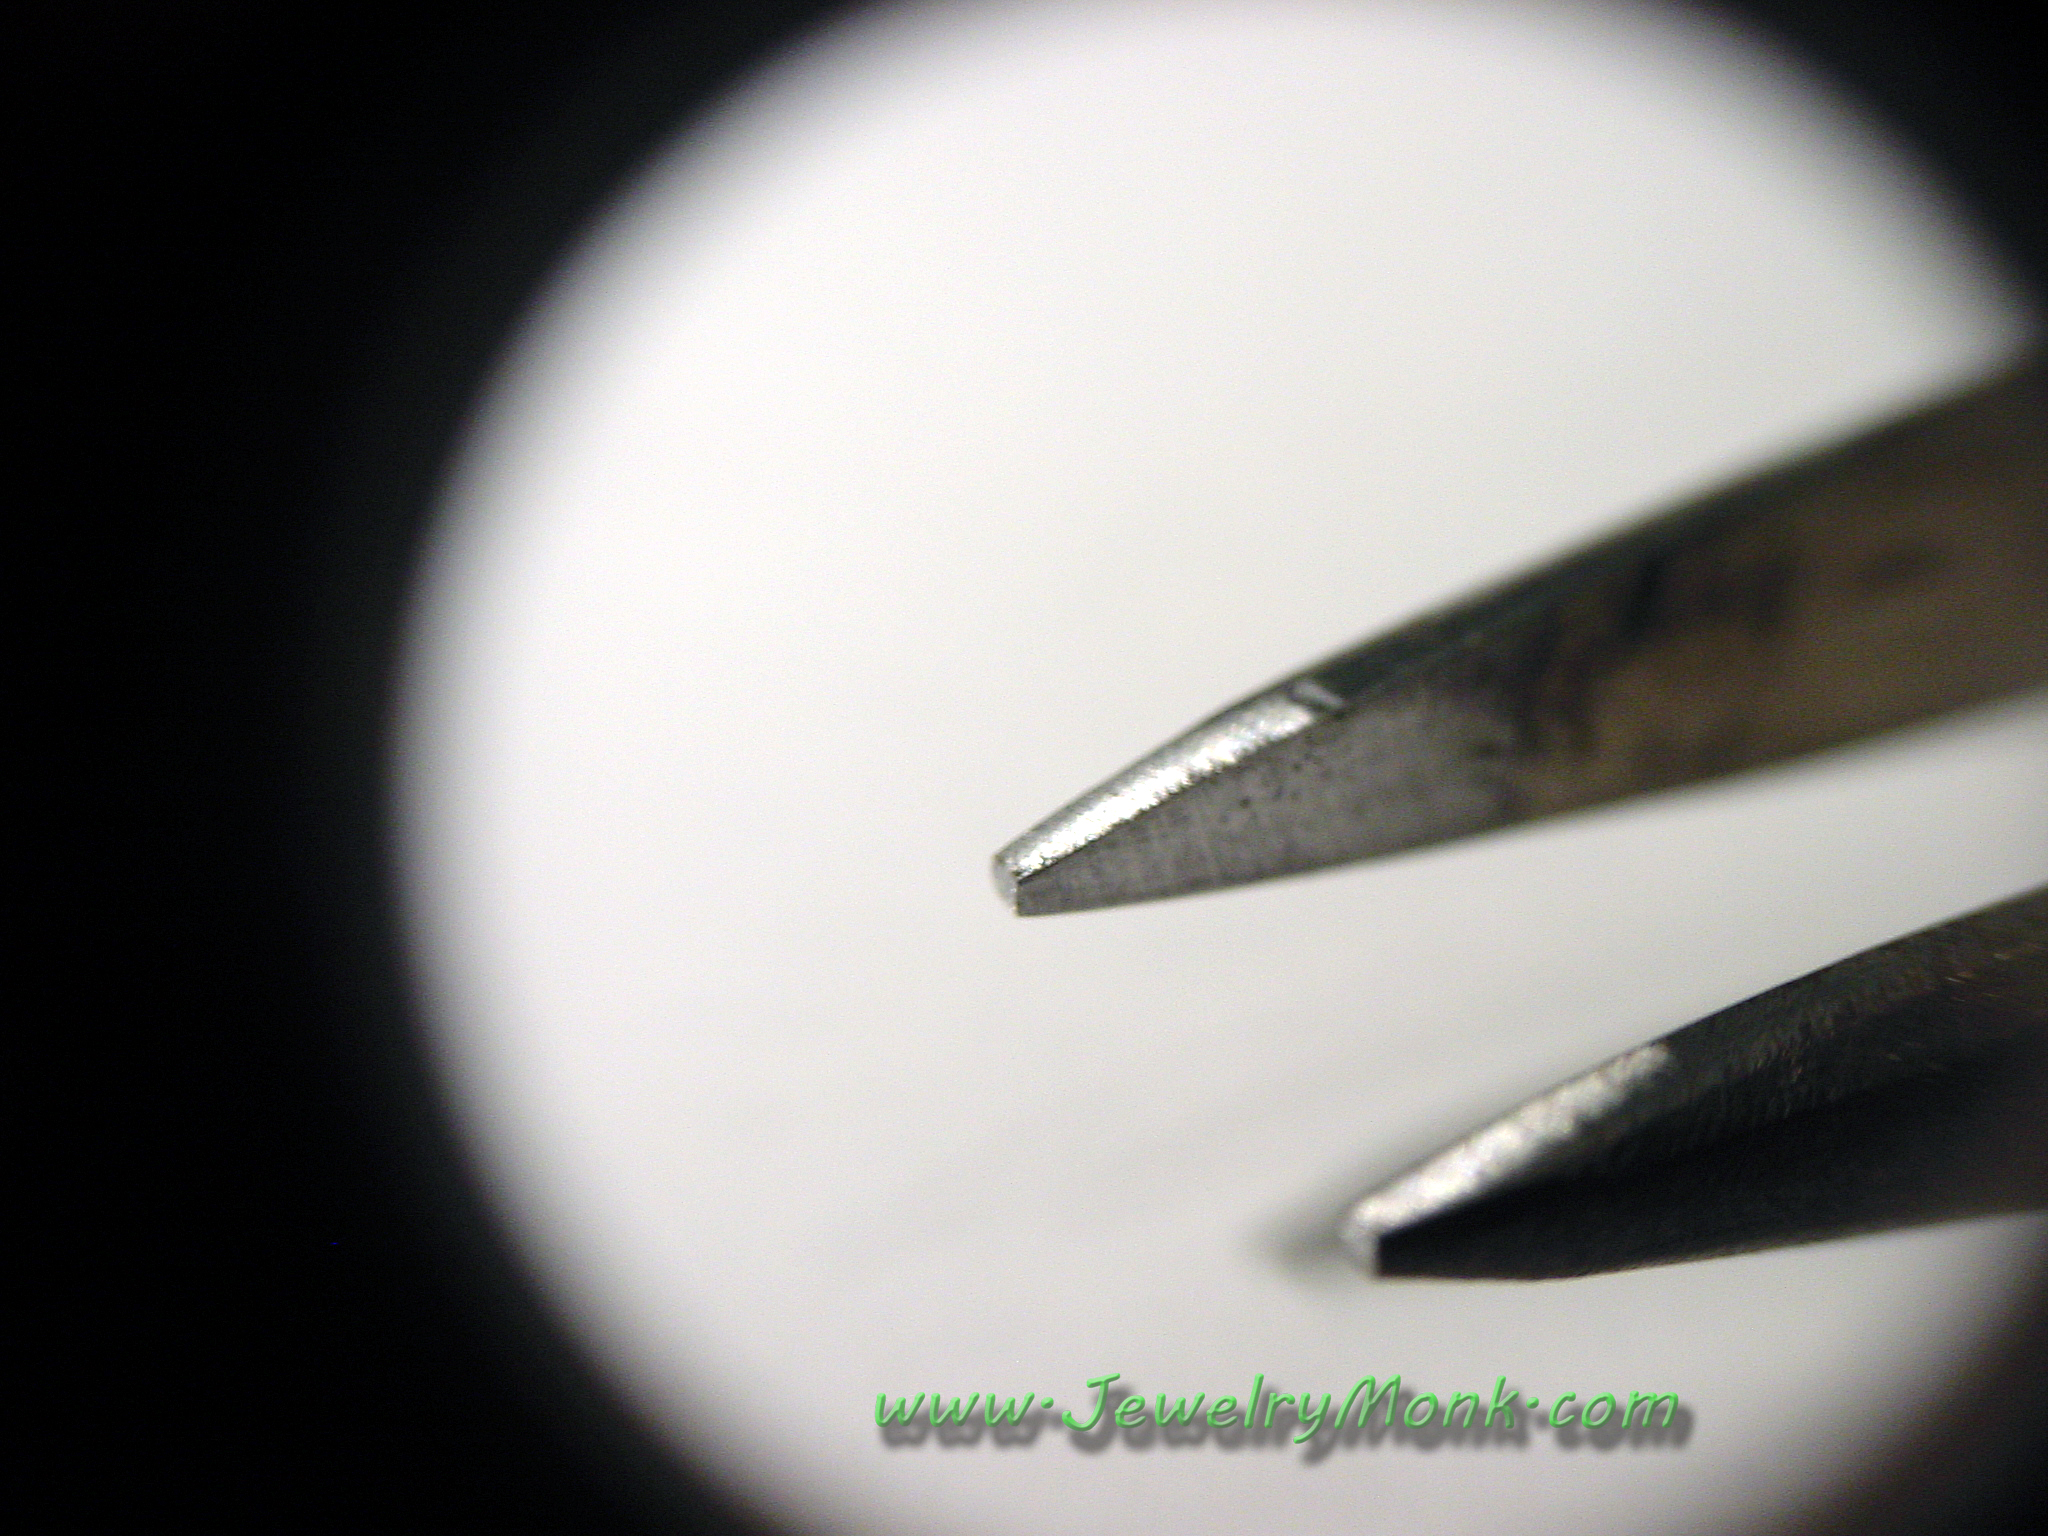
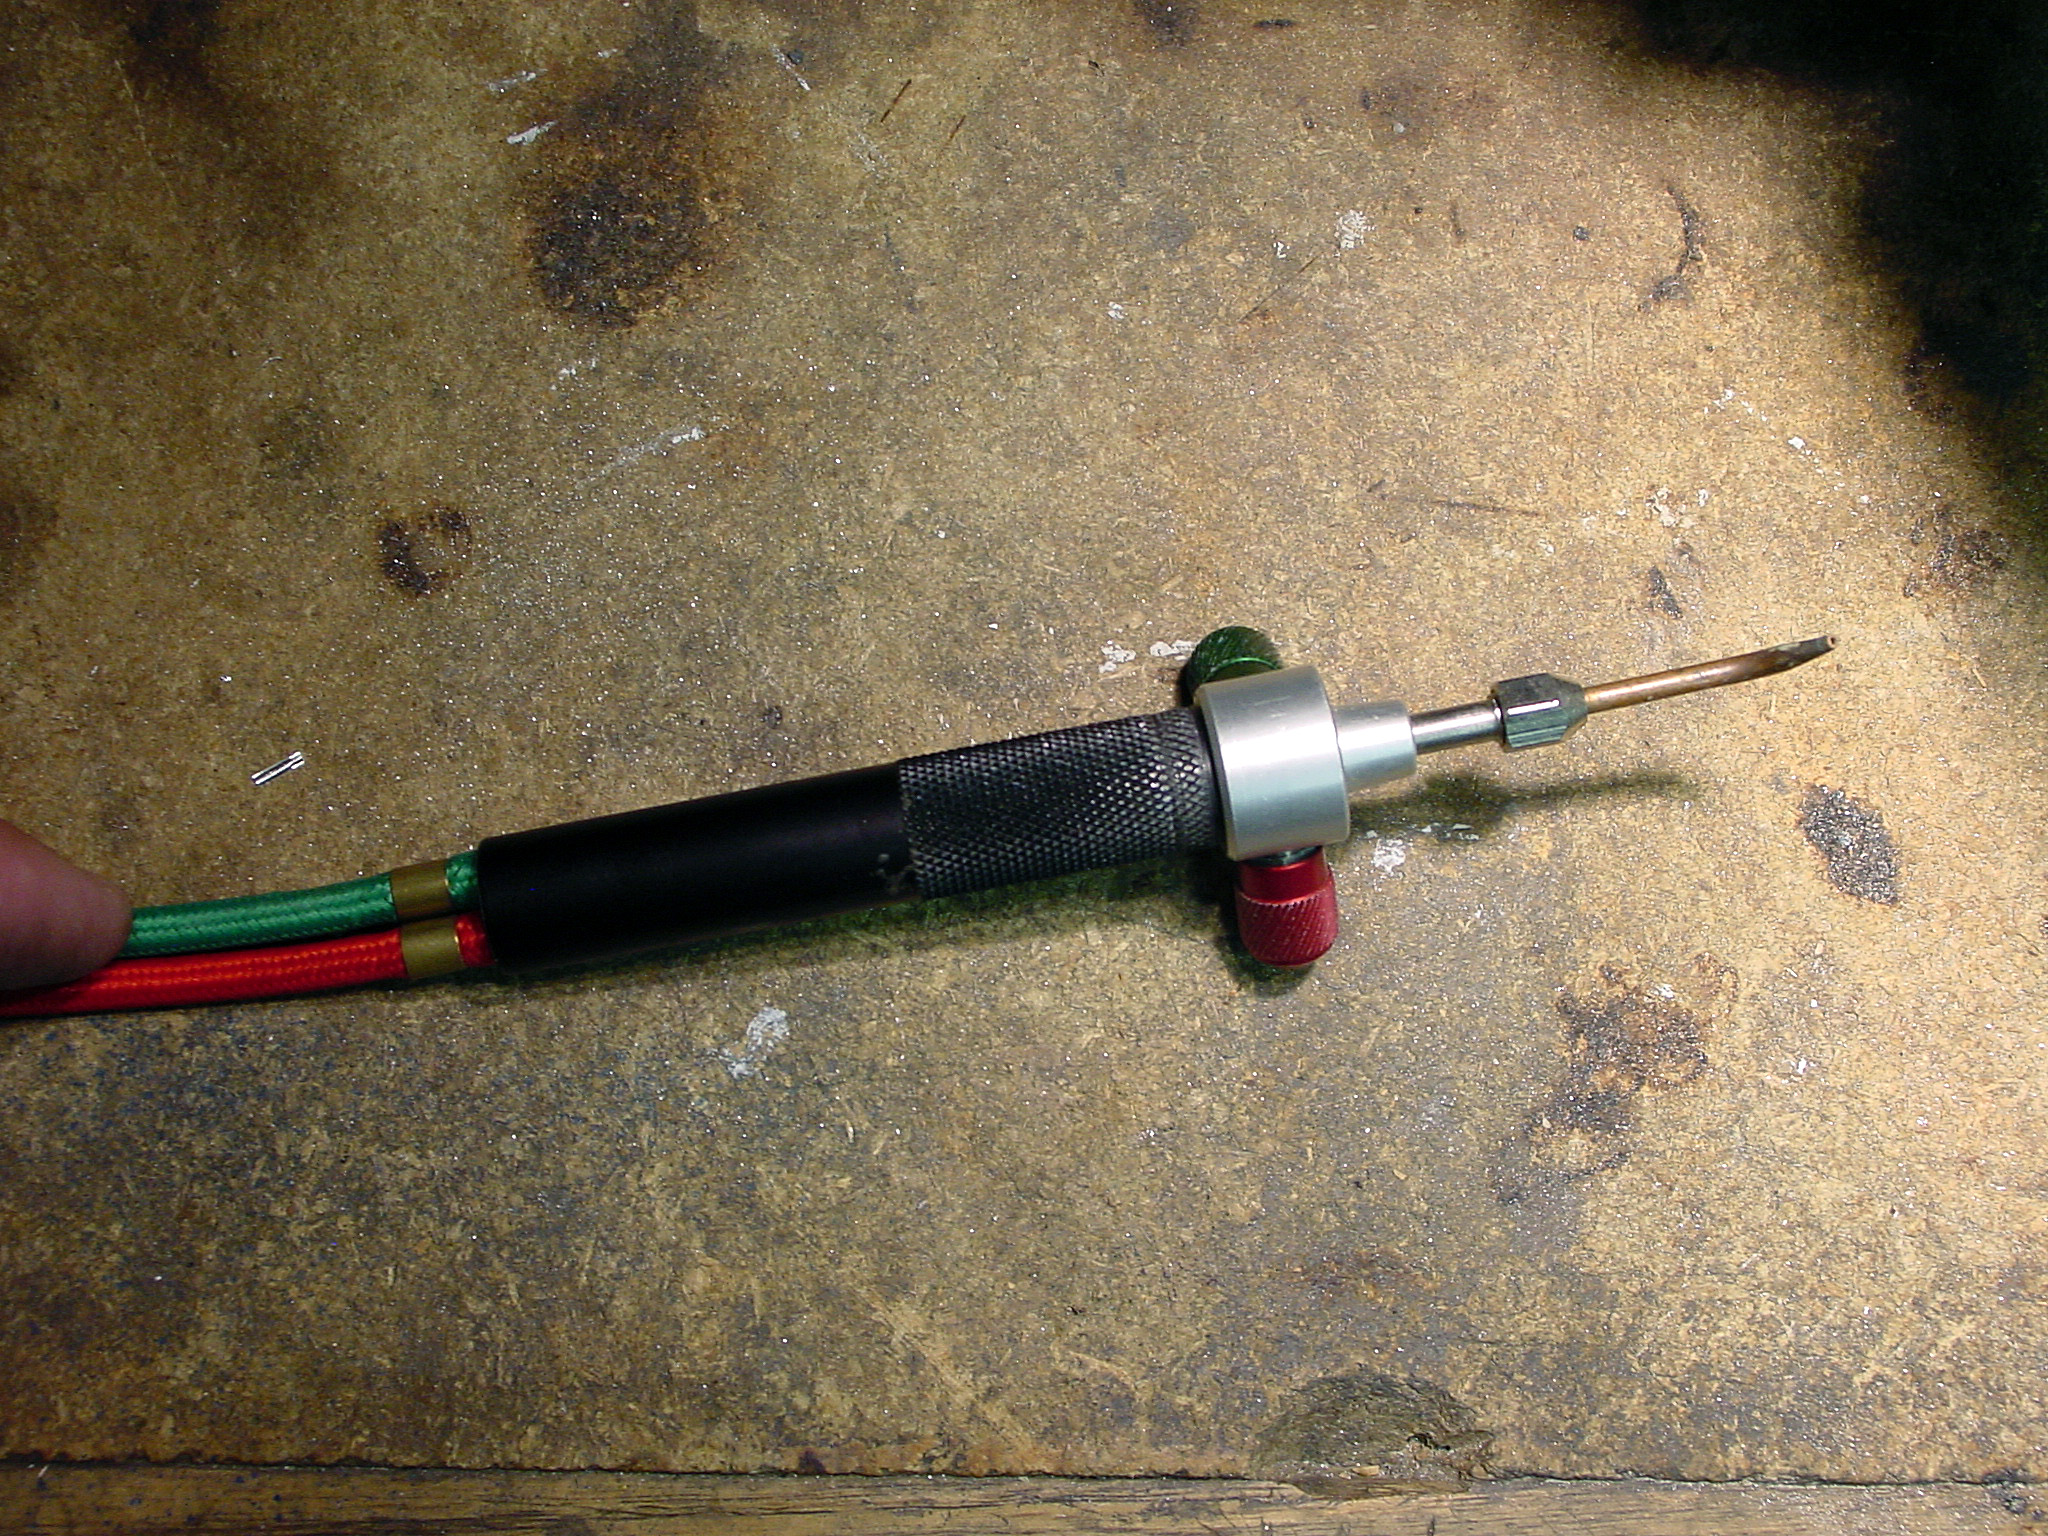
Mini Torch and Tanks, Tungsten Soldering Pick
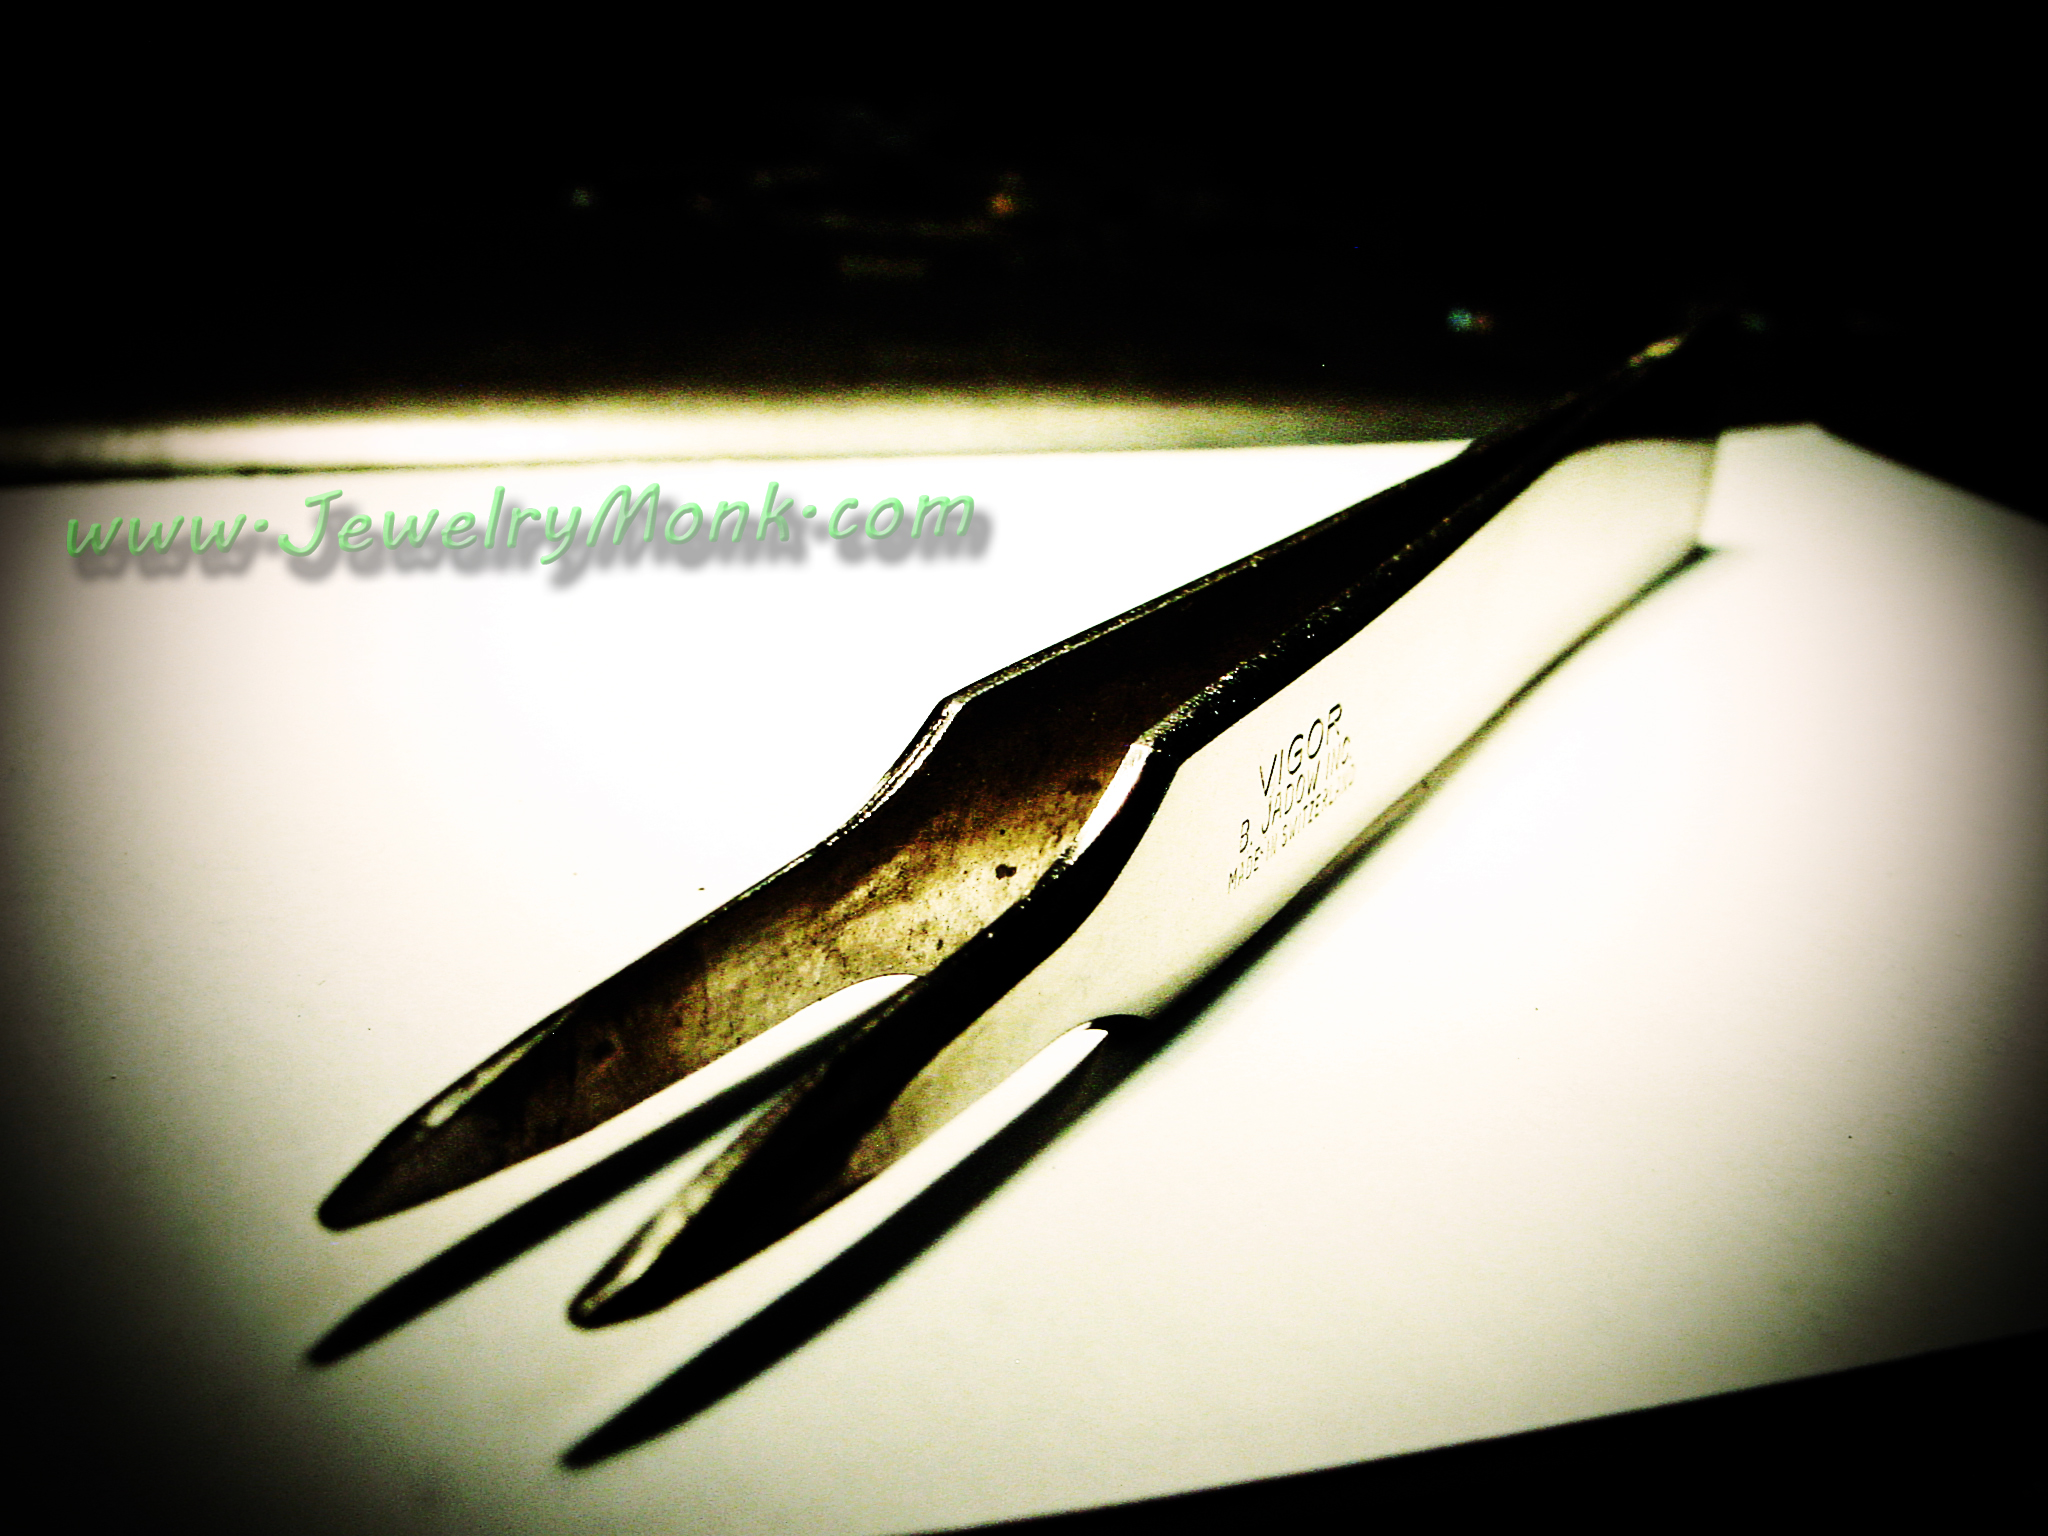
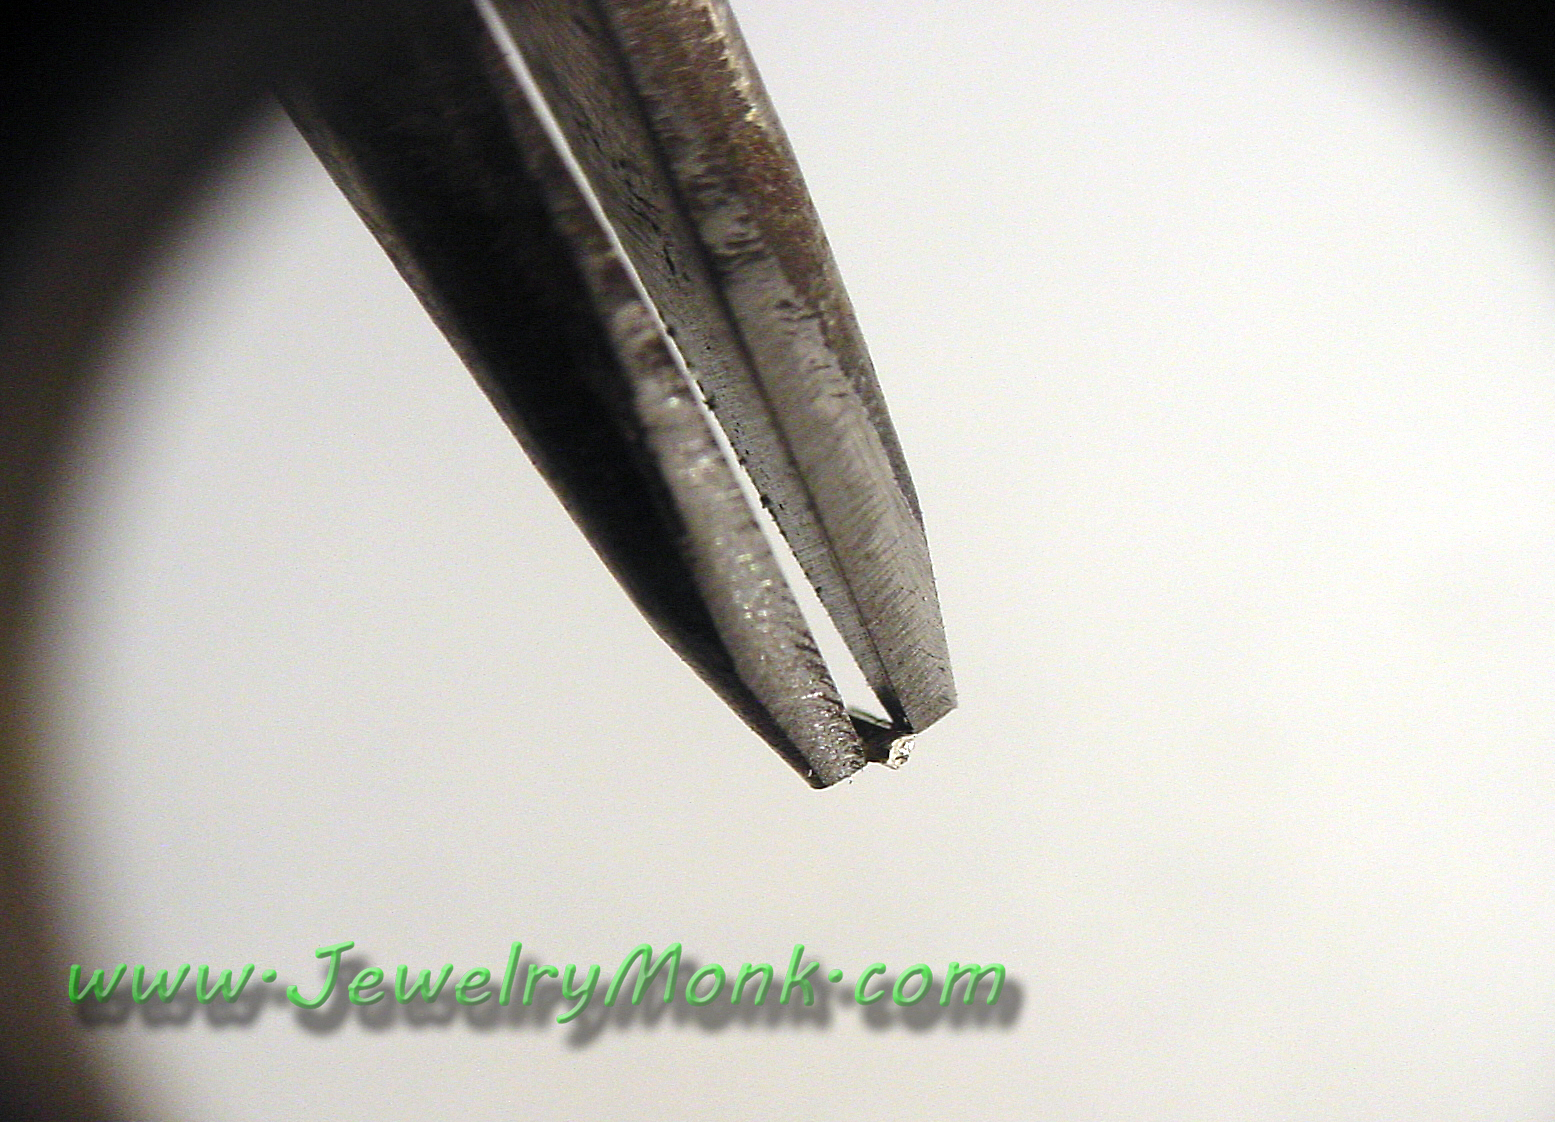
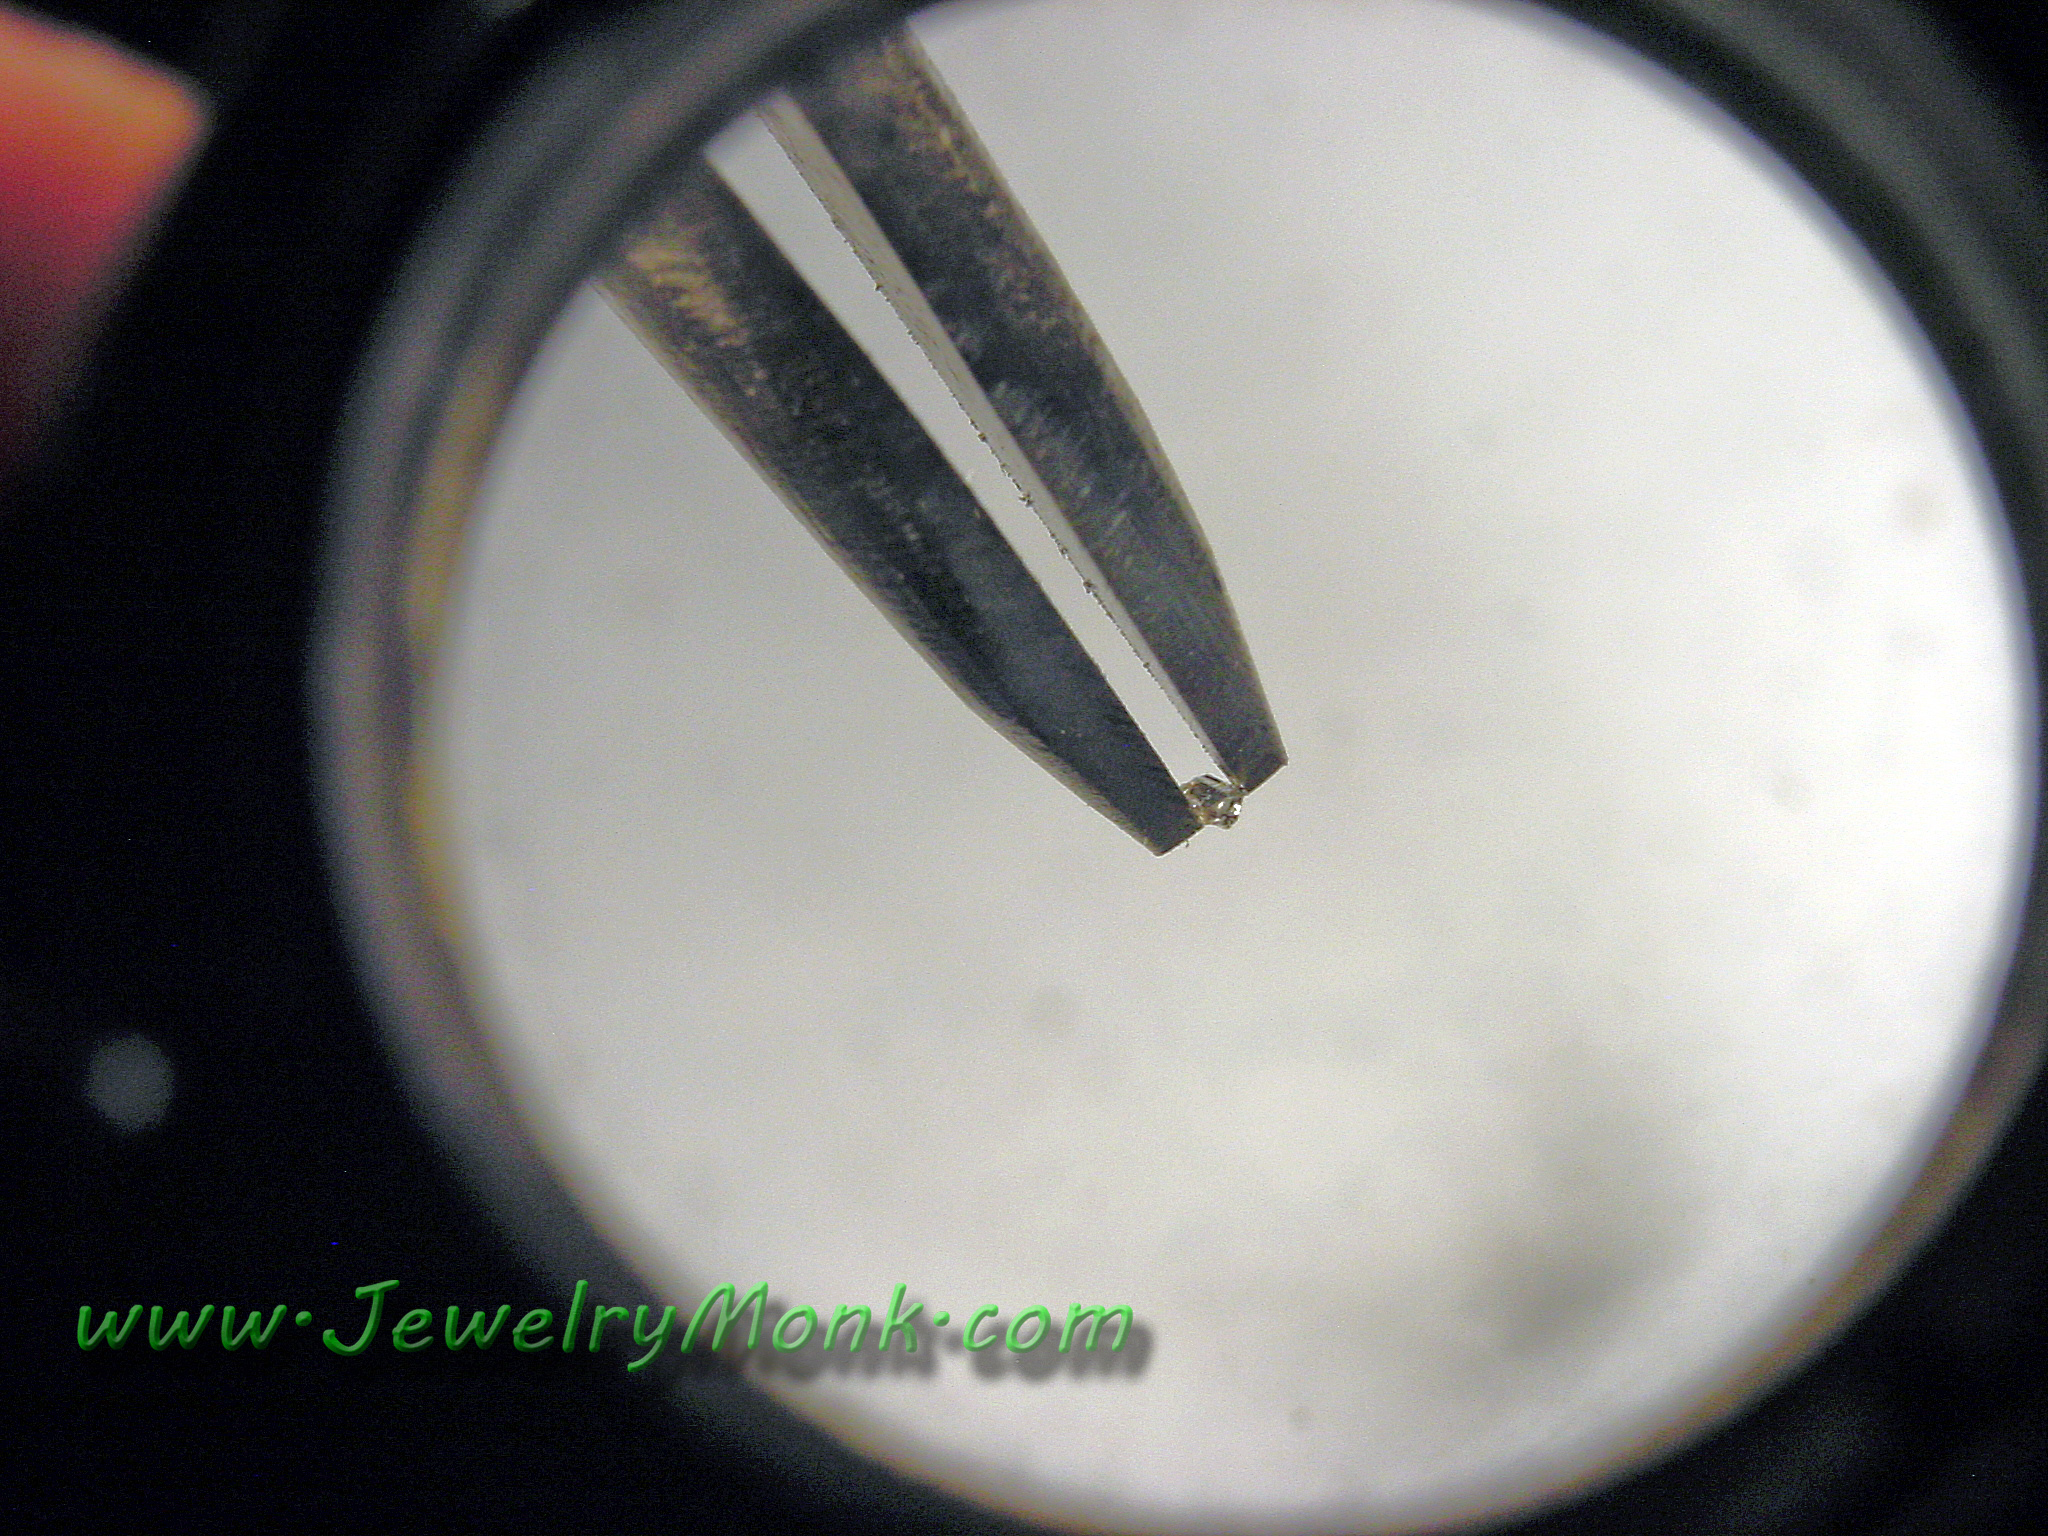
, Soldering Tweezers
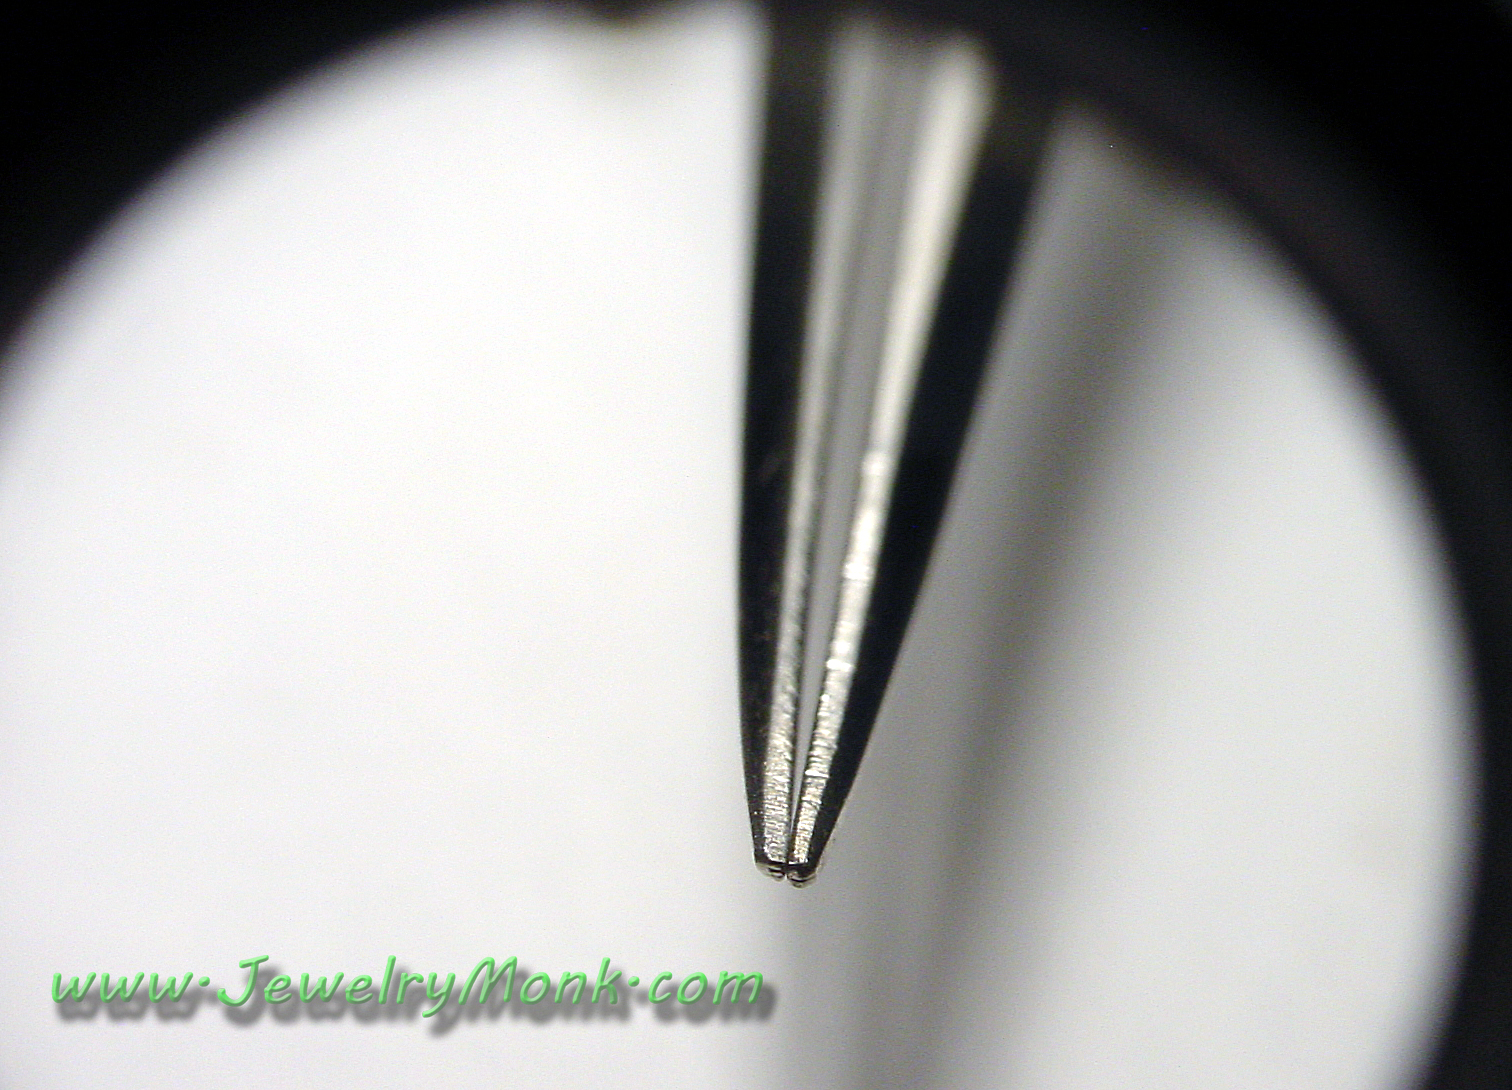
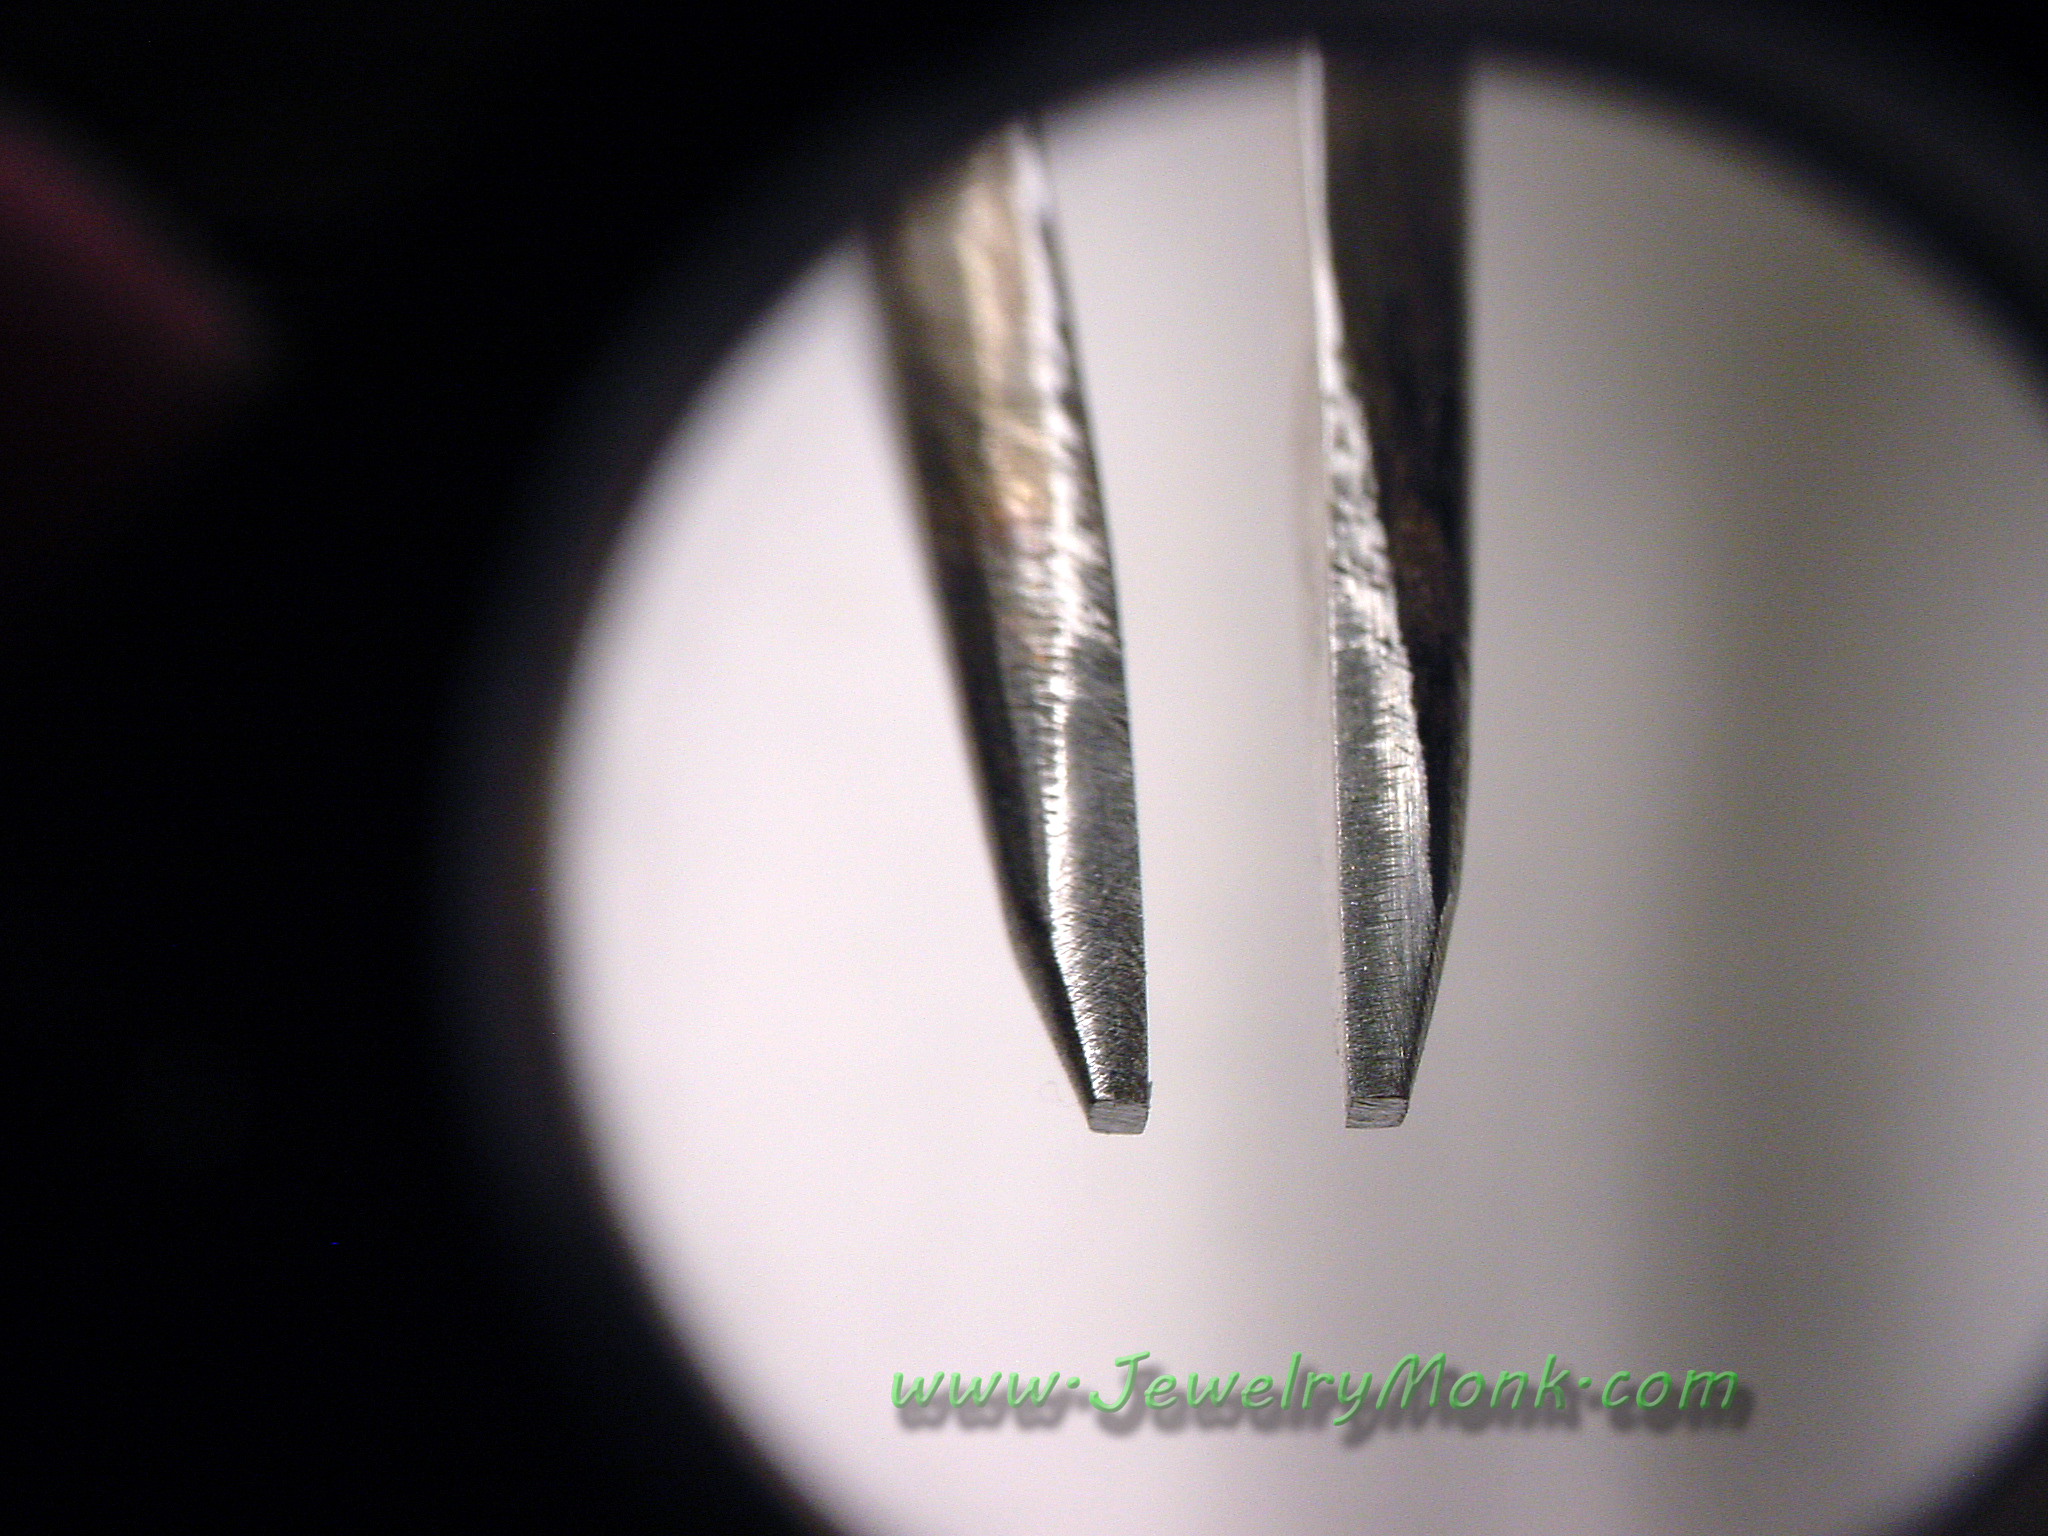
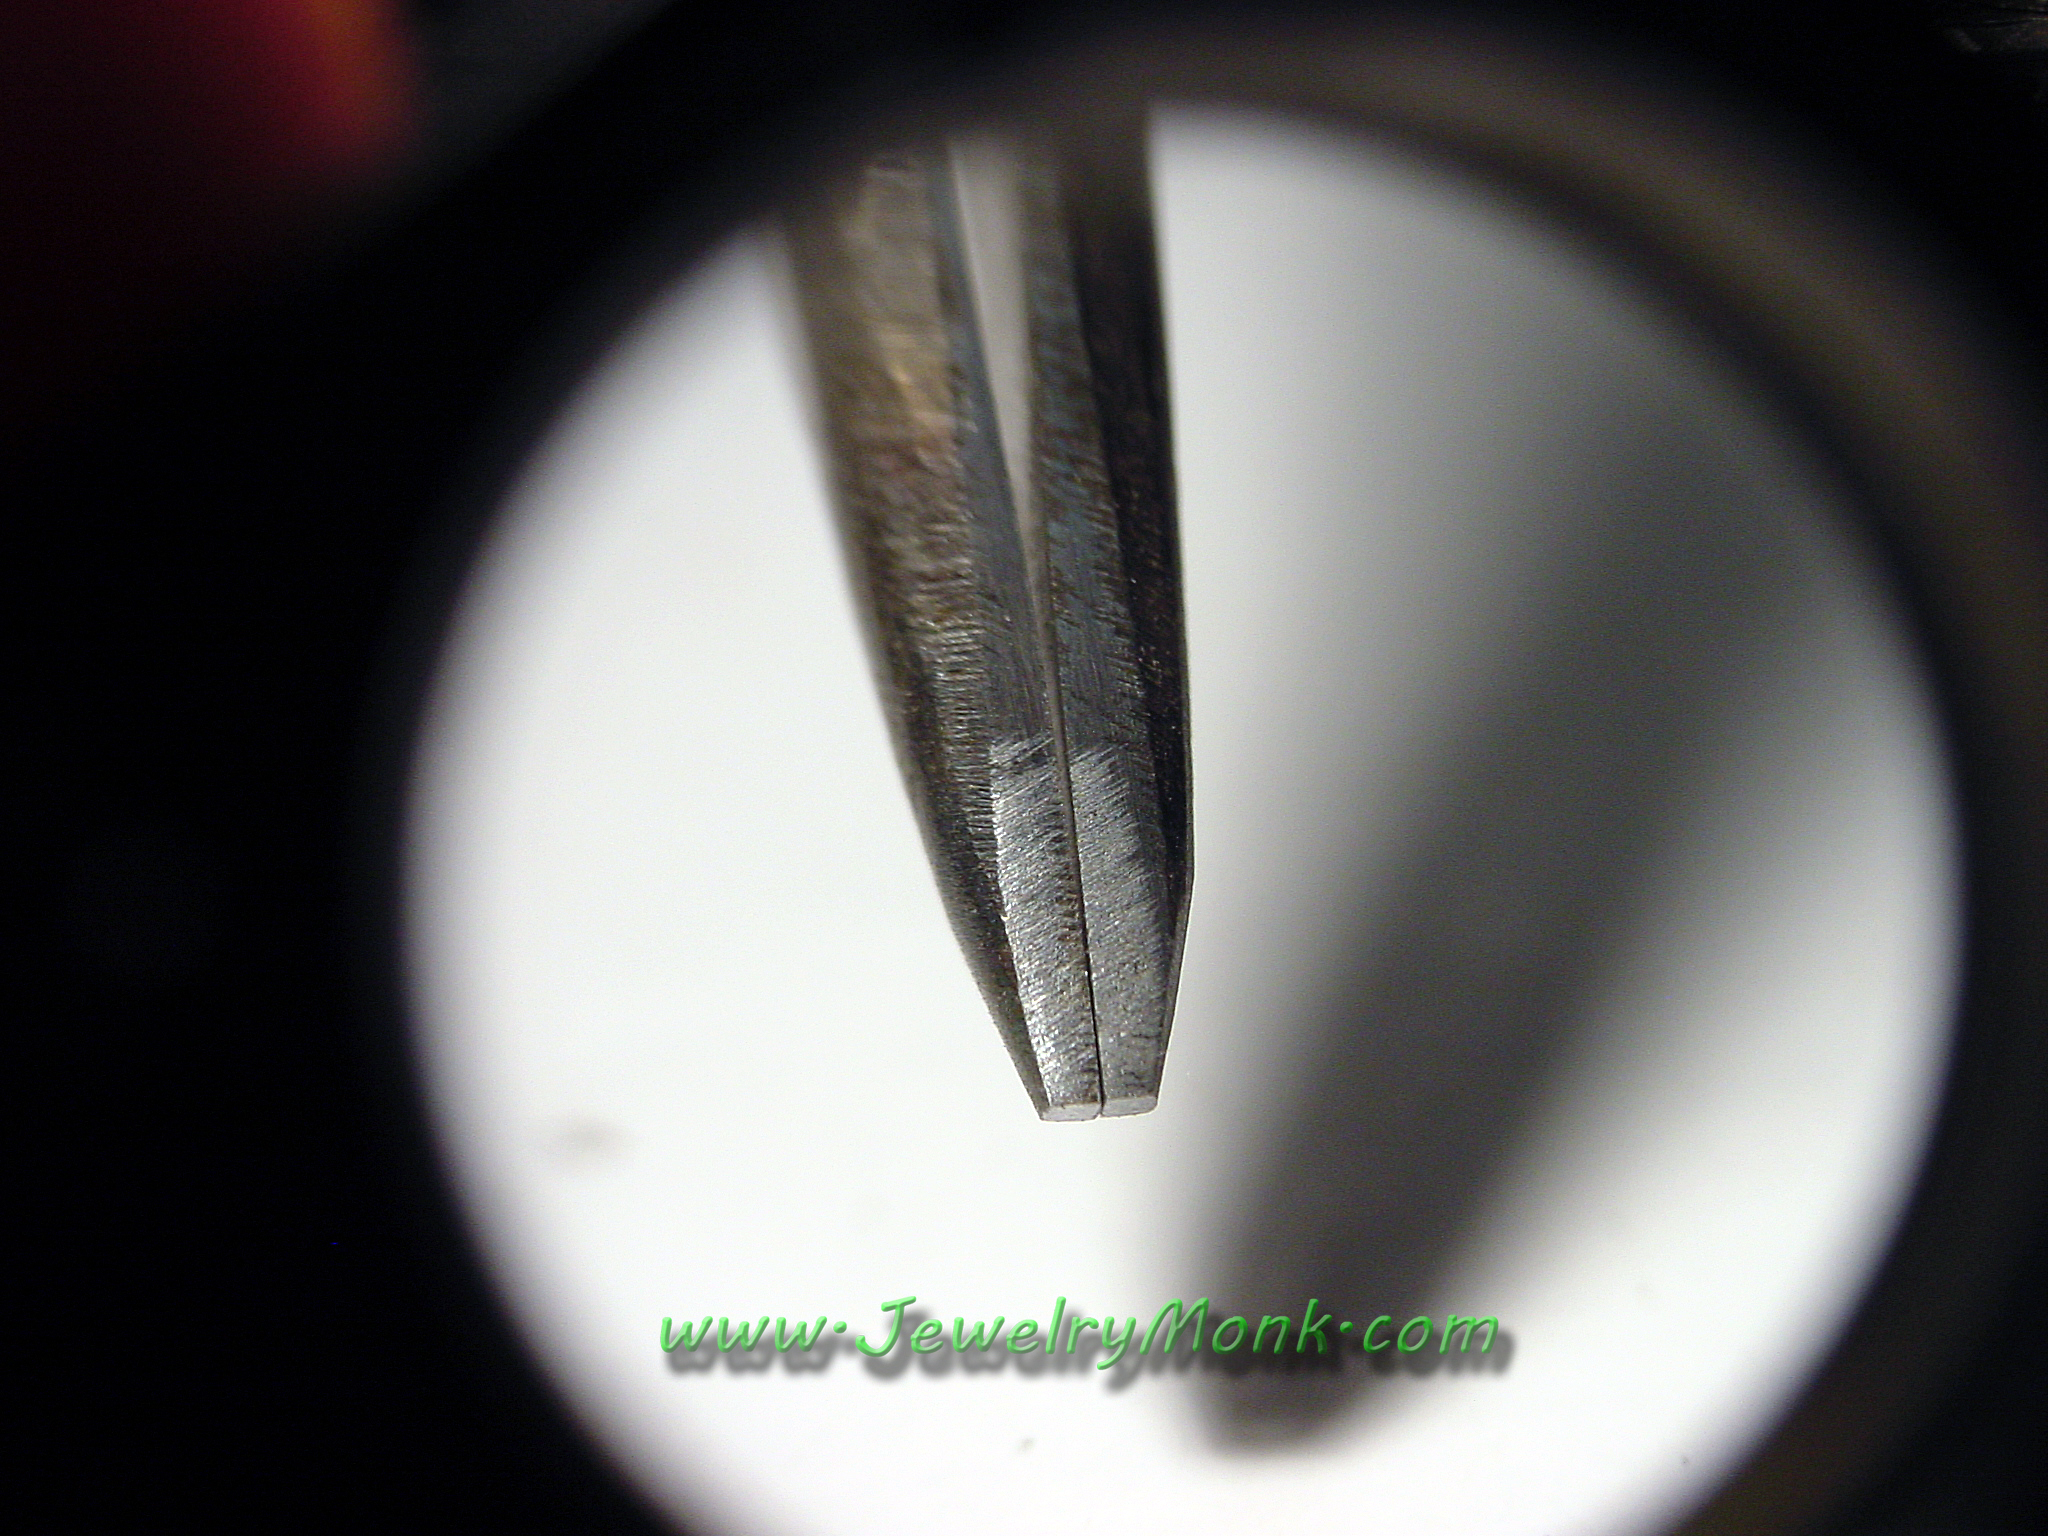
, Soldering Spring Tweezers, Third Hand, Soldering Board.

Soldering Basics (18) Soldering Basics (17)

For starters, I learned a “trick” very early in my soldering that I notice not many people do. I am right handed, and I learned early that it is easier to hold the torch in my LEFT hand, so I can use my soldering tweezers and soldering pick in my right (dominant) hand. This just made sense to me, because I need a steadier hand to hold pieces in place, to adjust solder, and control the piece I am soldering. I would suggest learning this way if you are new to soldering, or if you haven’t gotten a soldering habit formed. (if you have a habit formed already, keep refining your skill) Also always try to steady your right hand on your bench pin, or bench, or something to steady it or you will be shaking like crazy.

I will go through this lesson kind of quick, so follow along, or ask questions in the comments section.

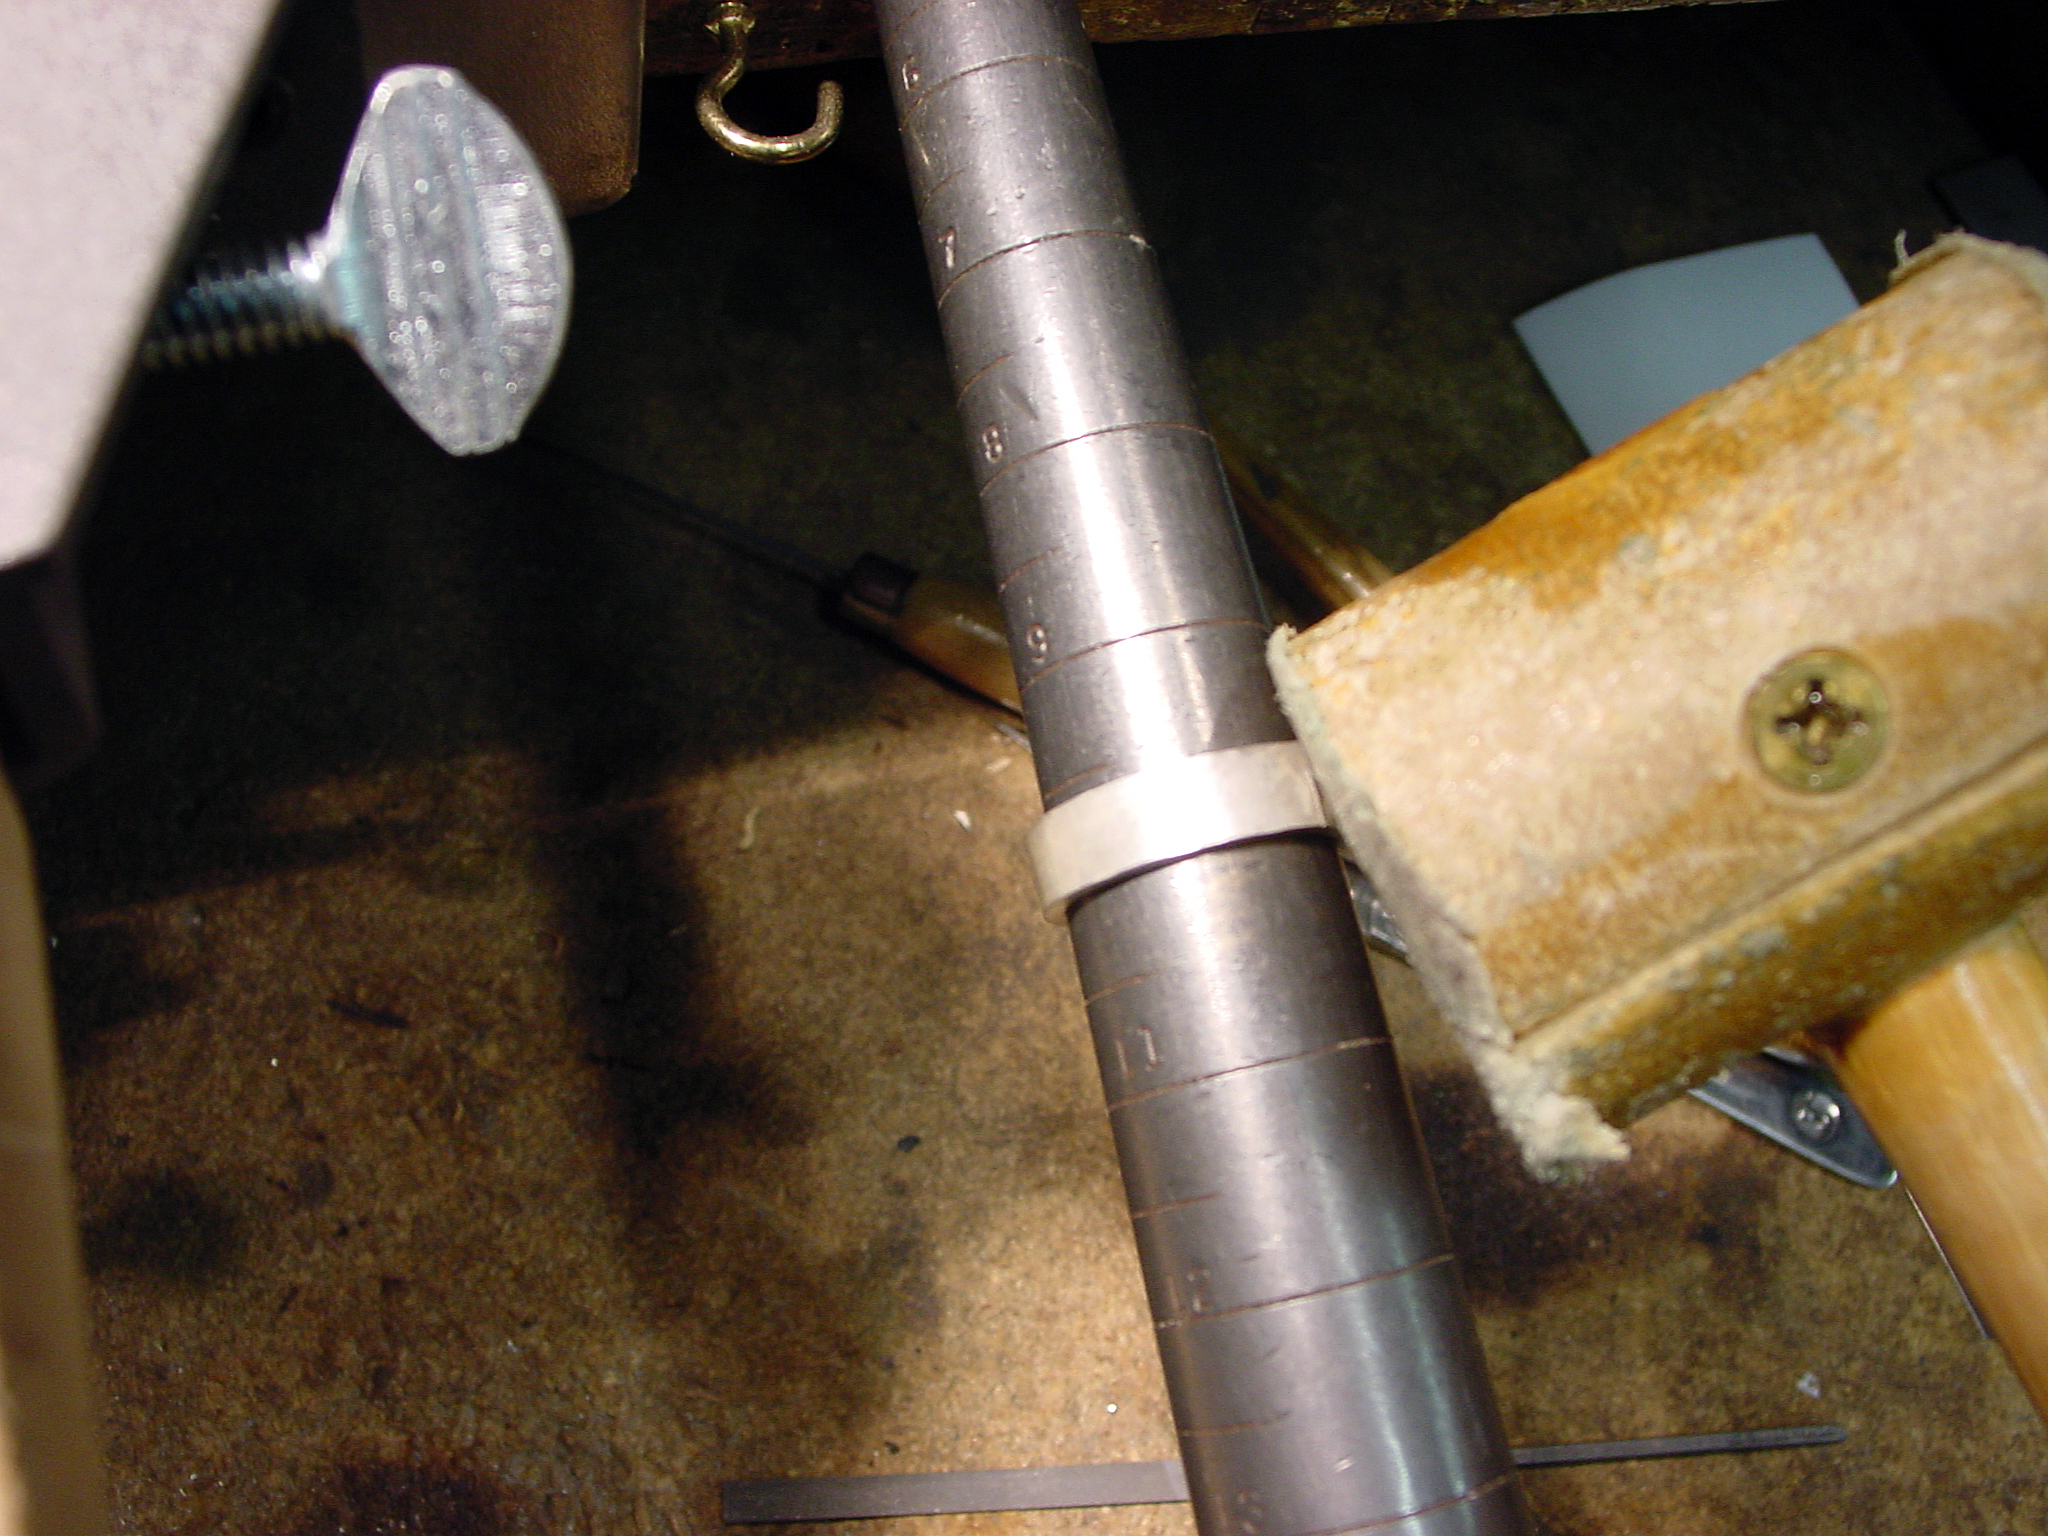
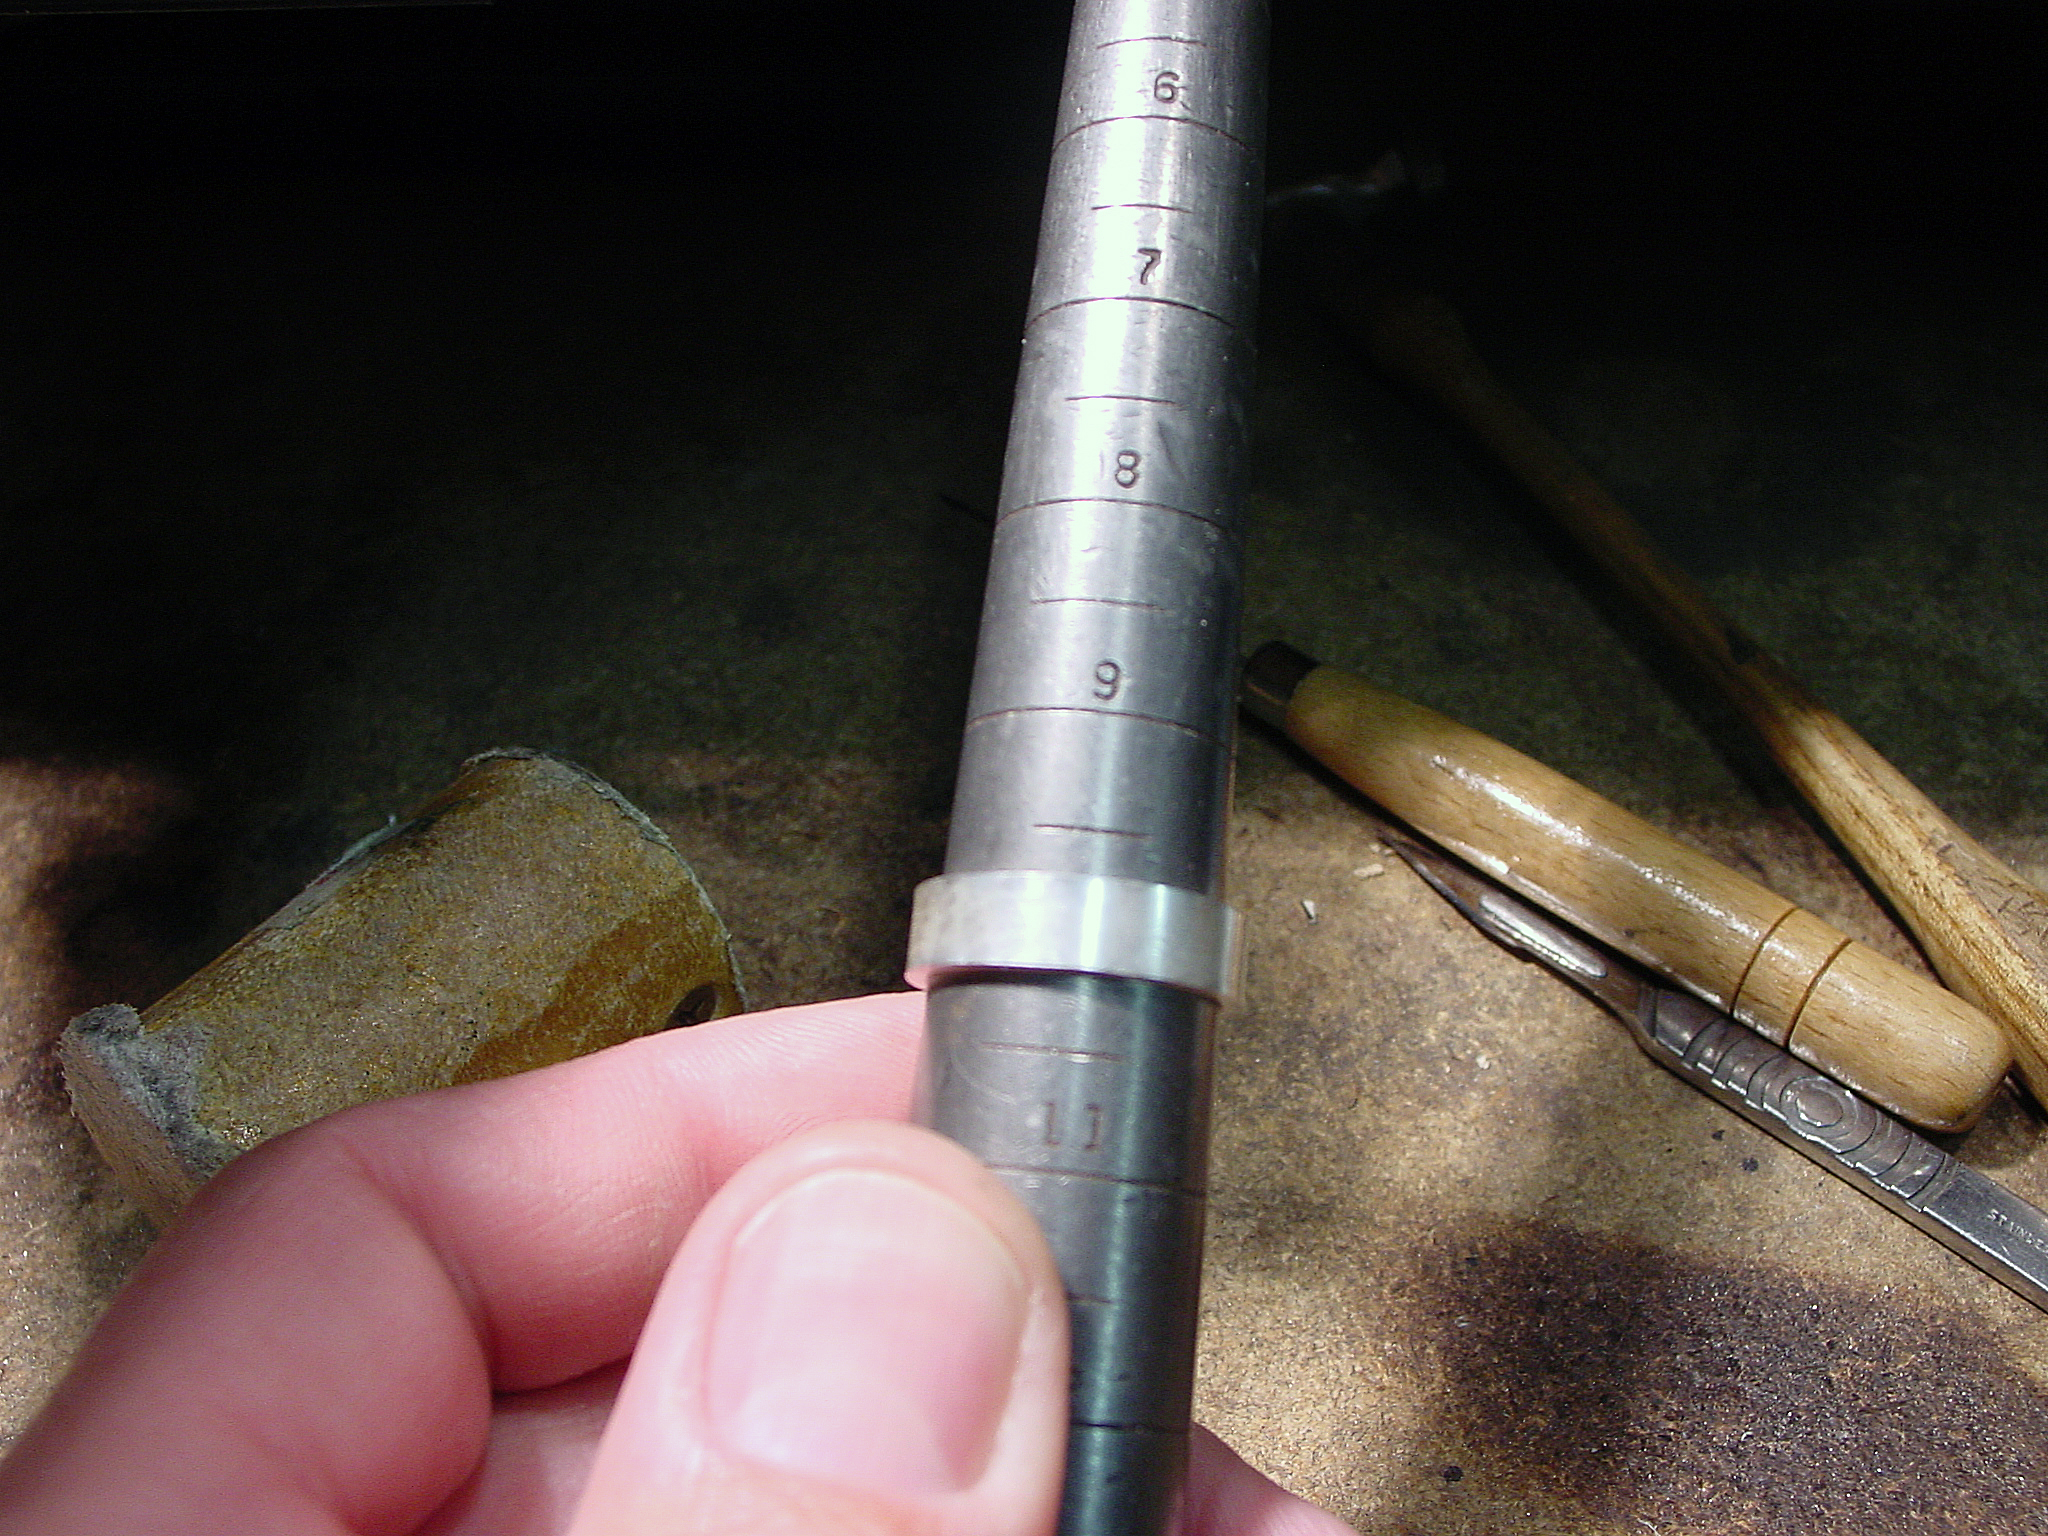
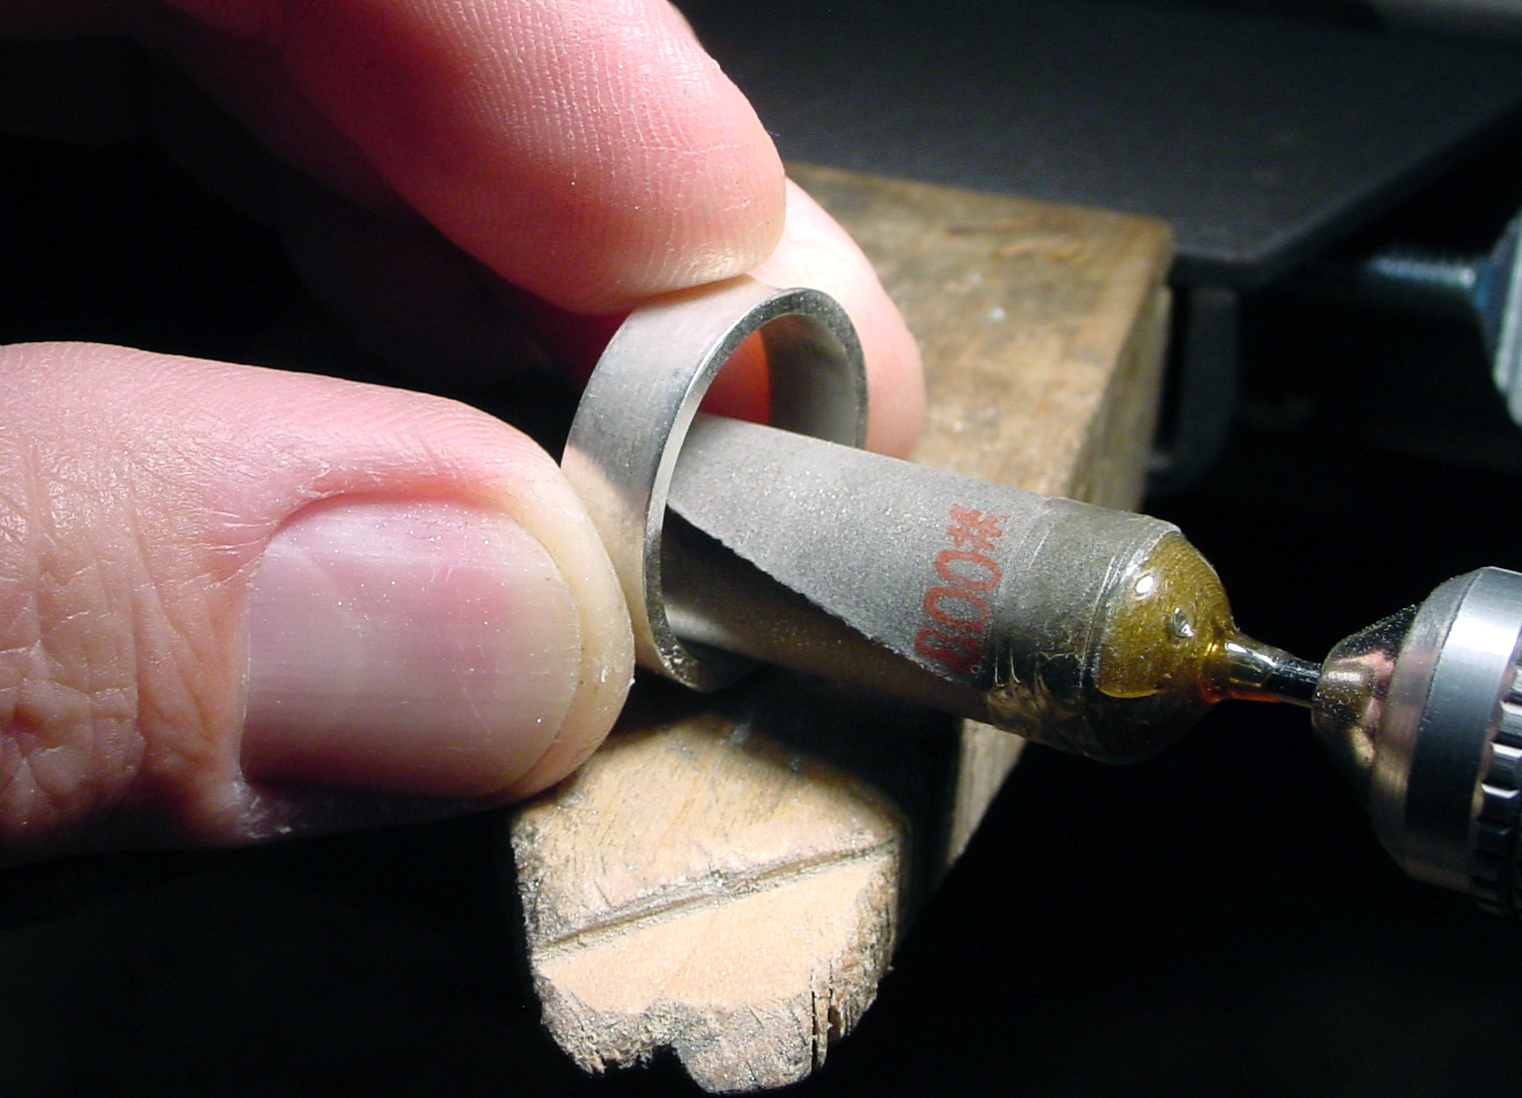
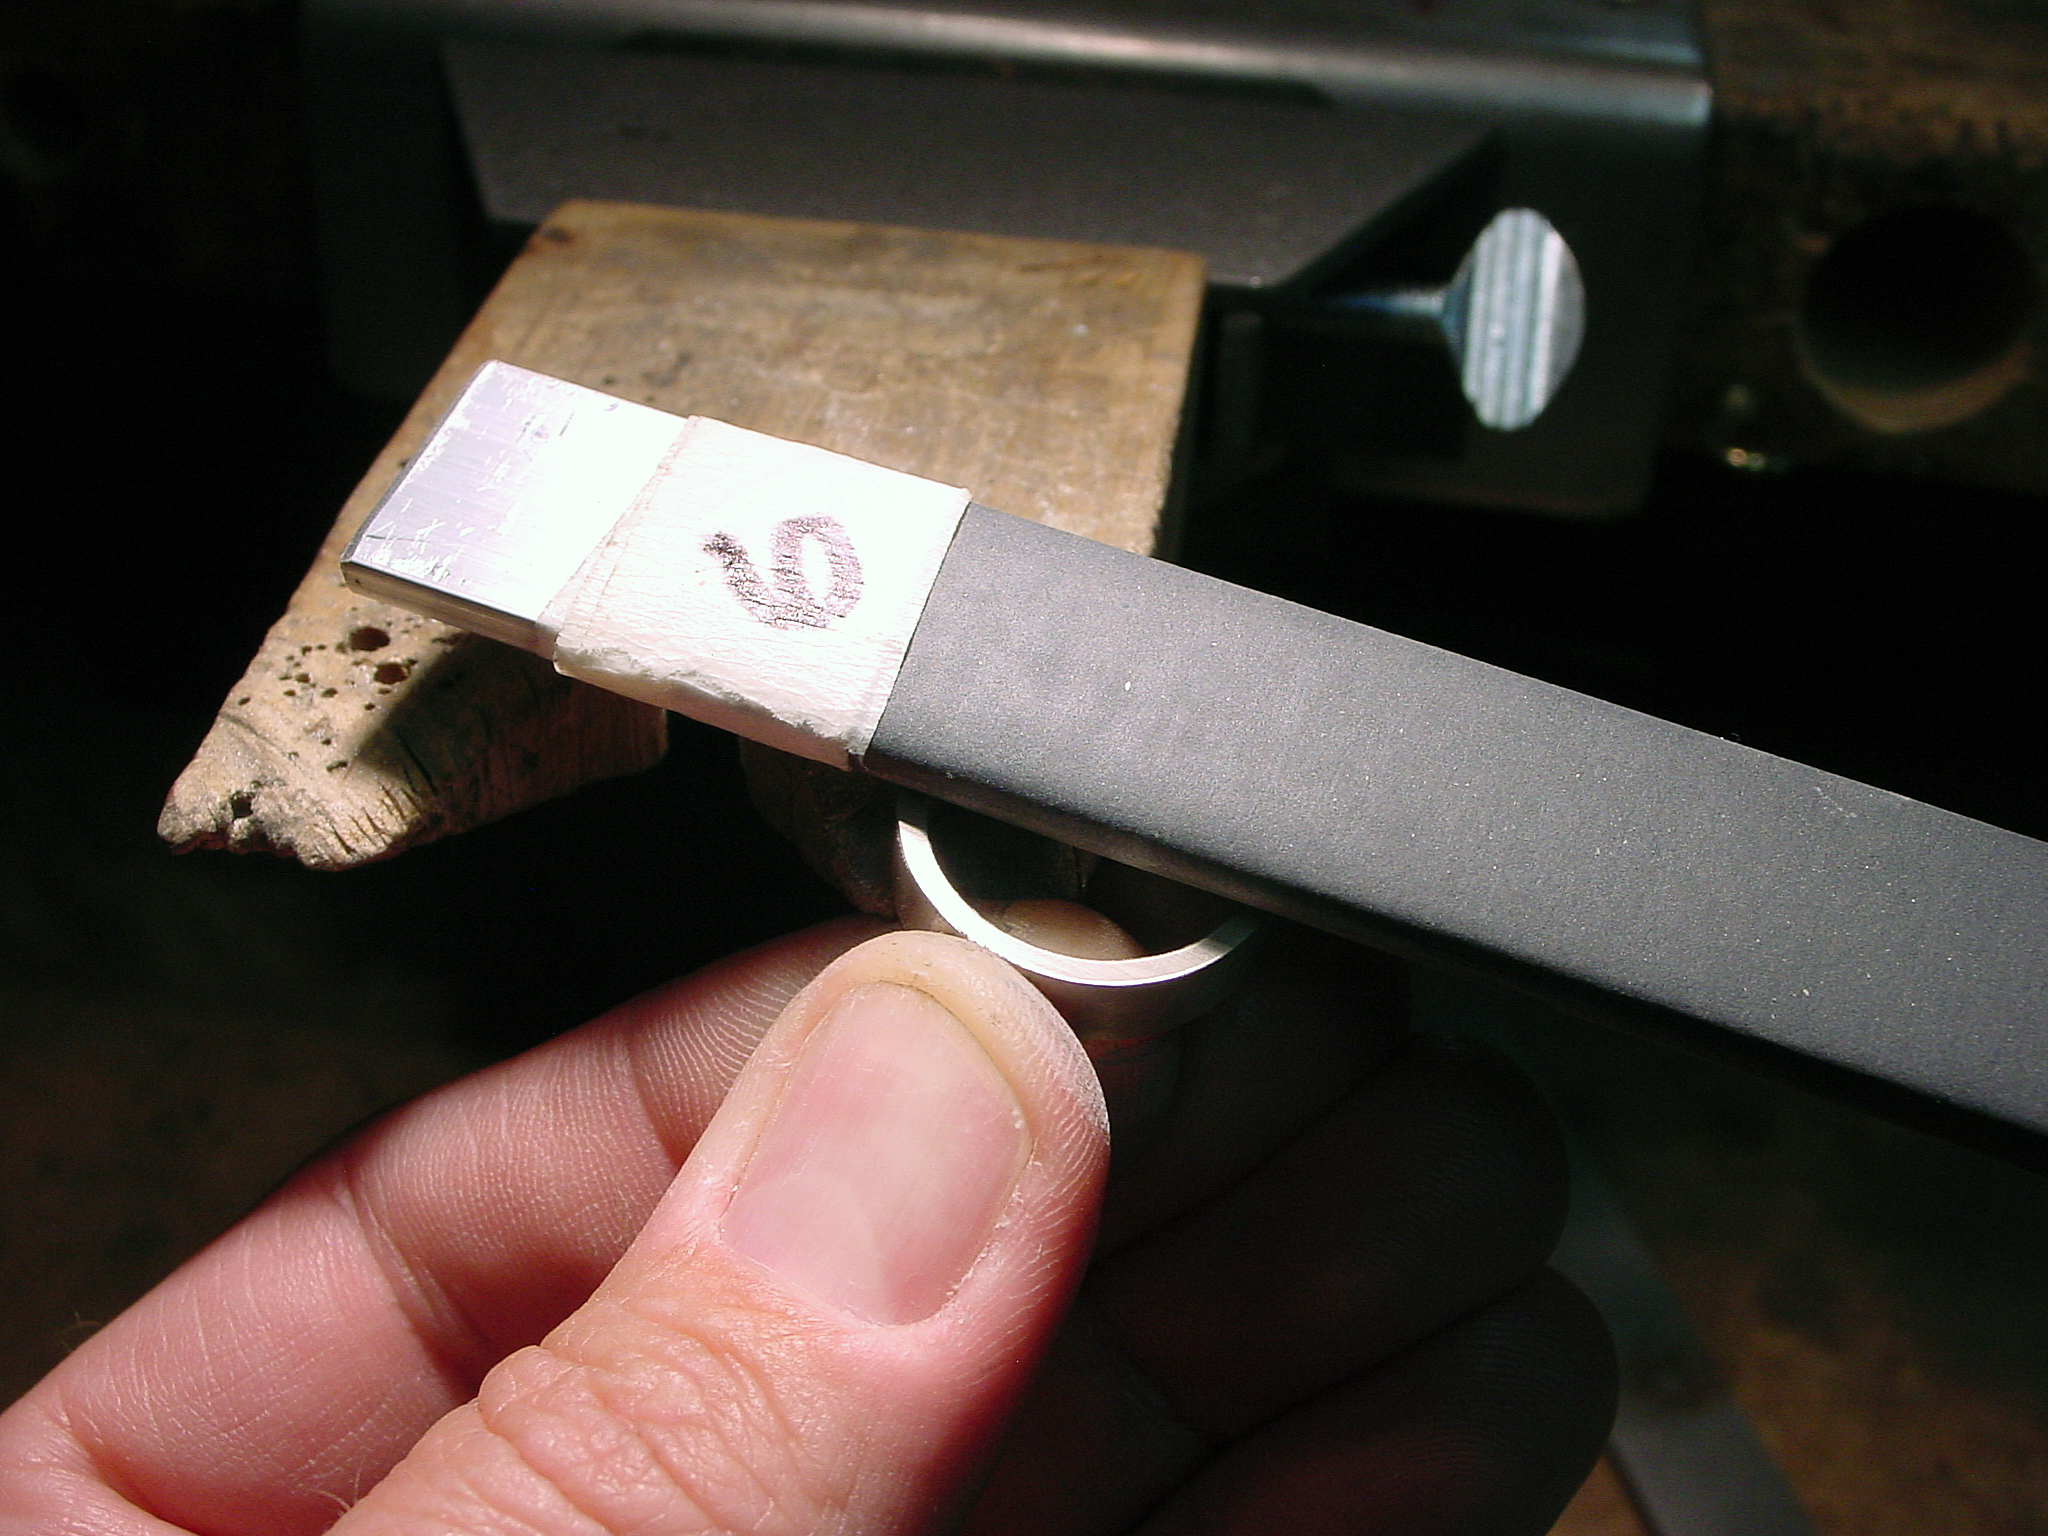
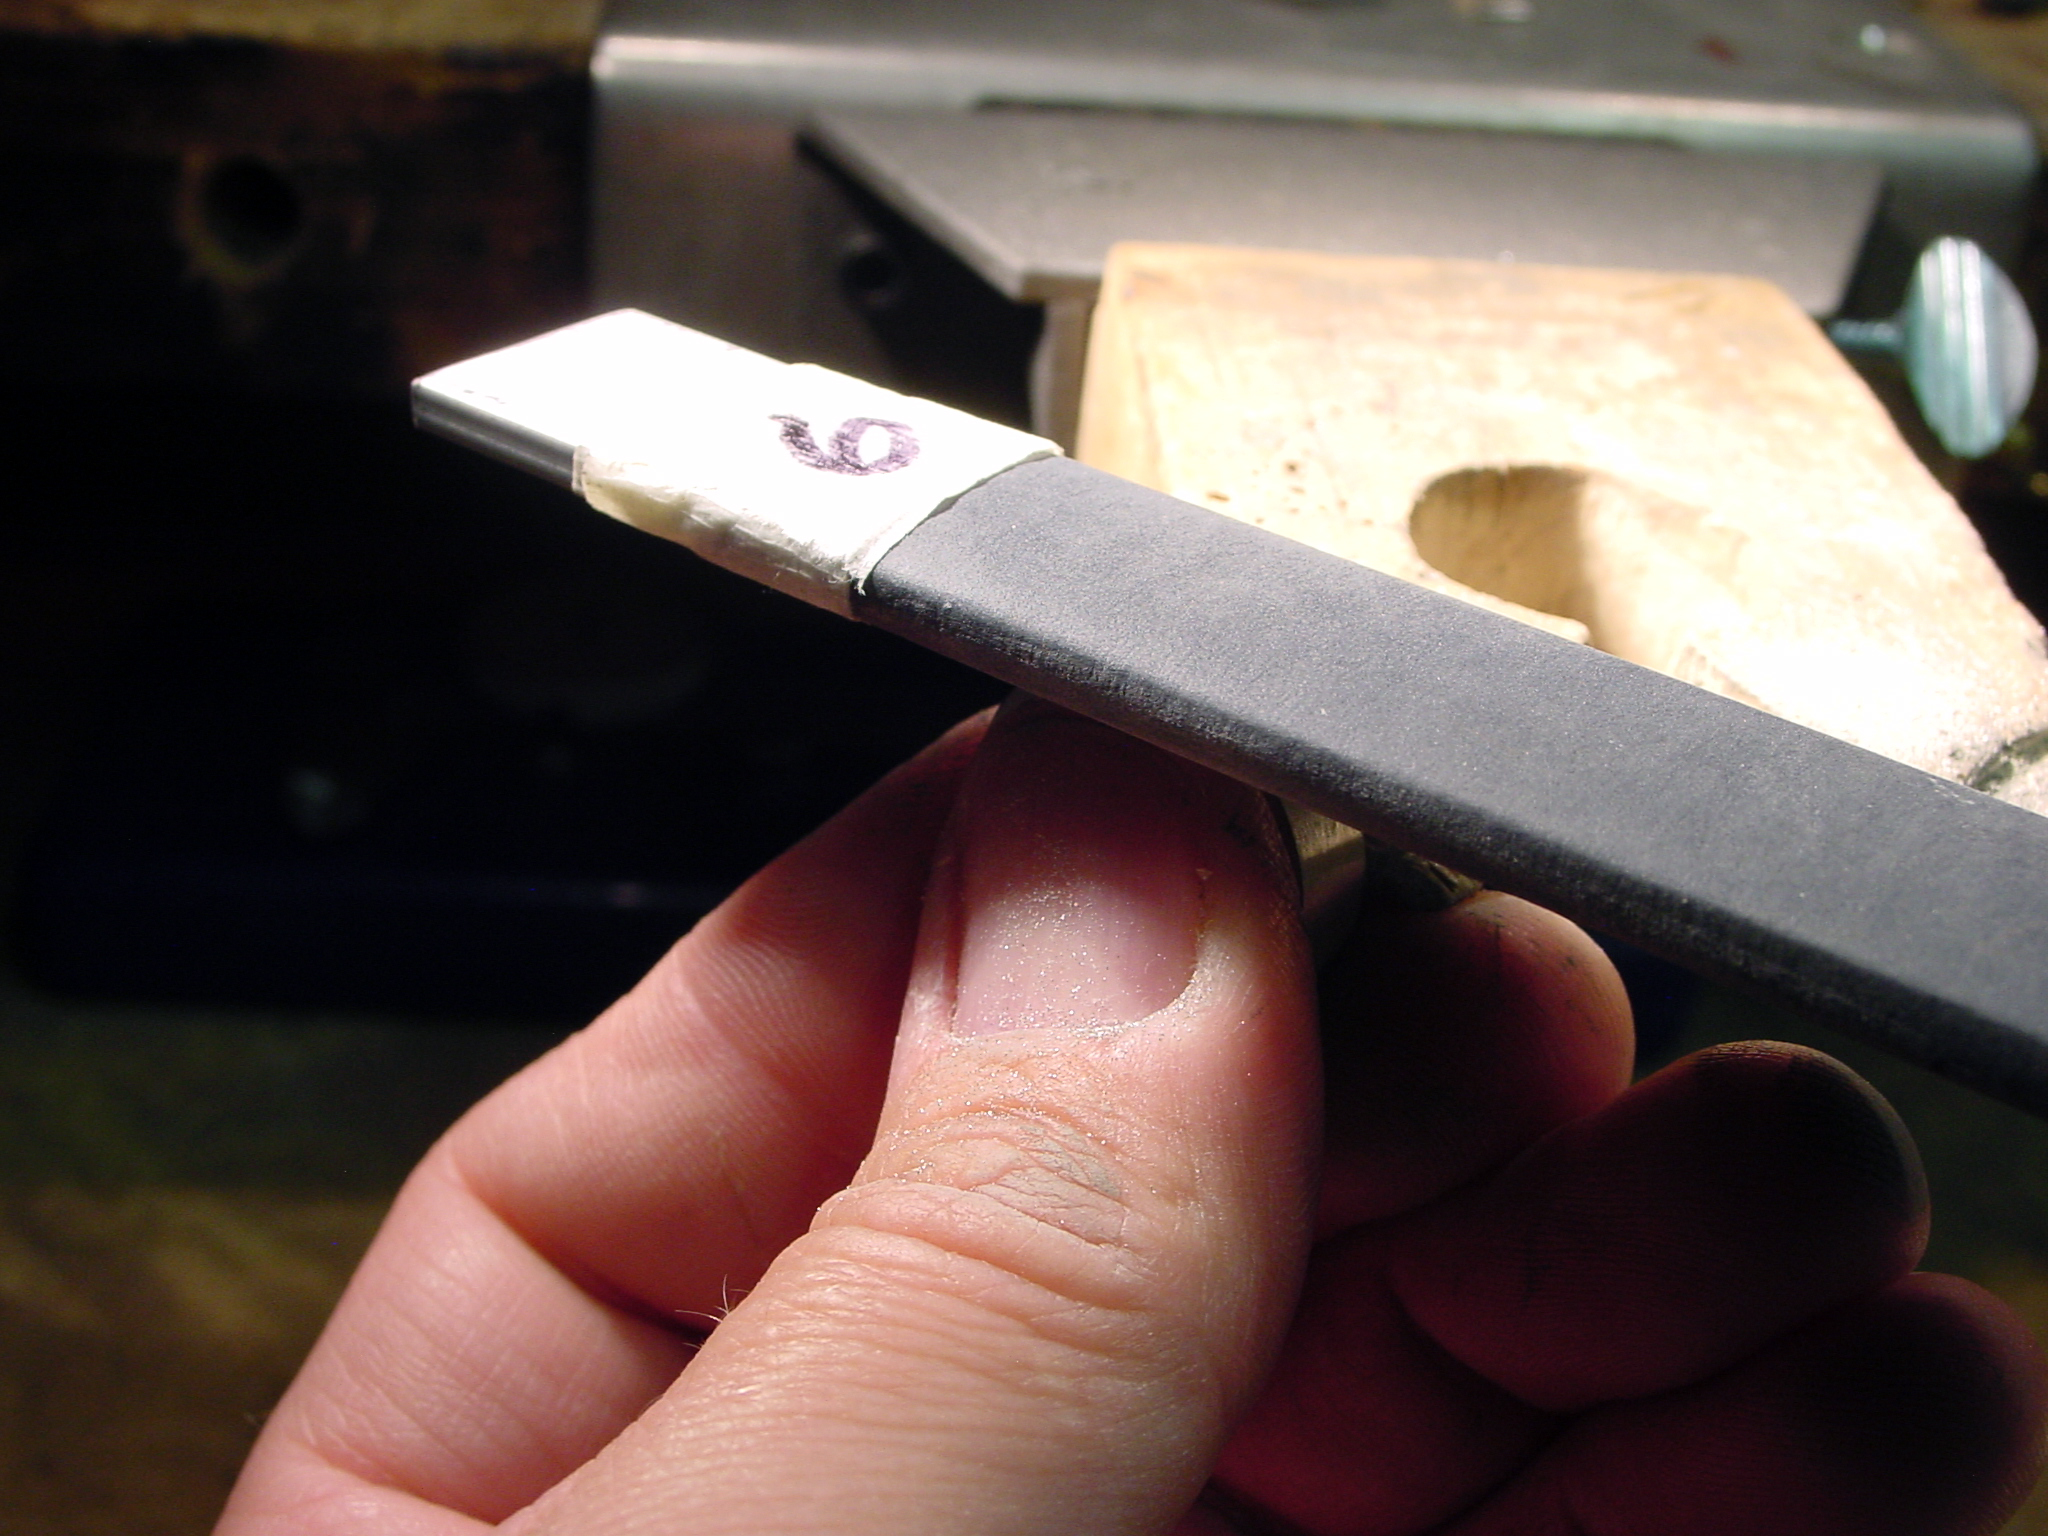
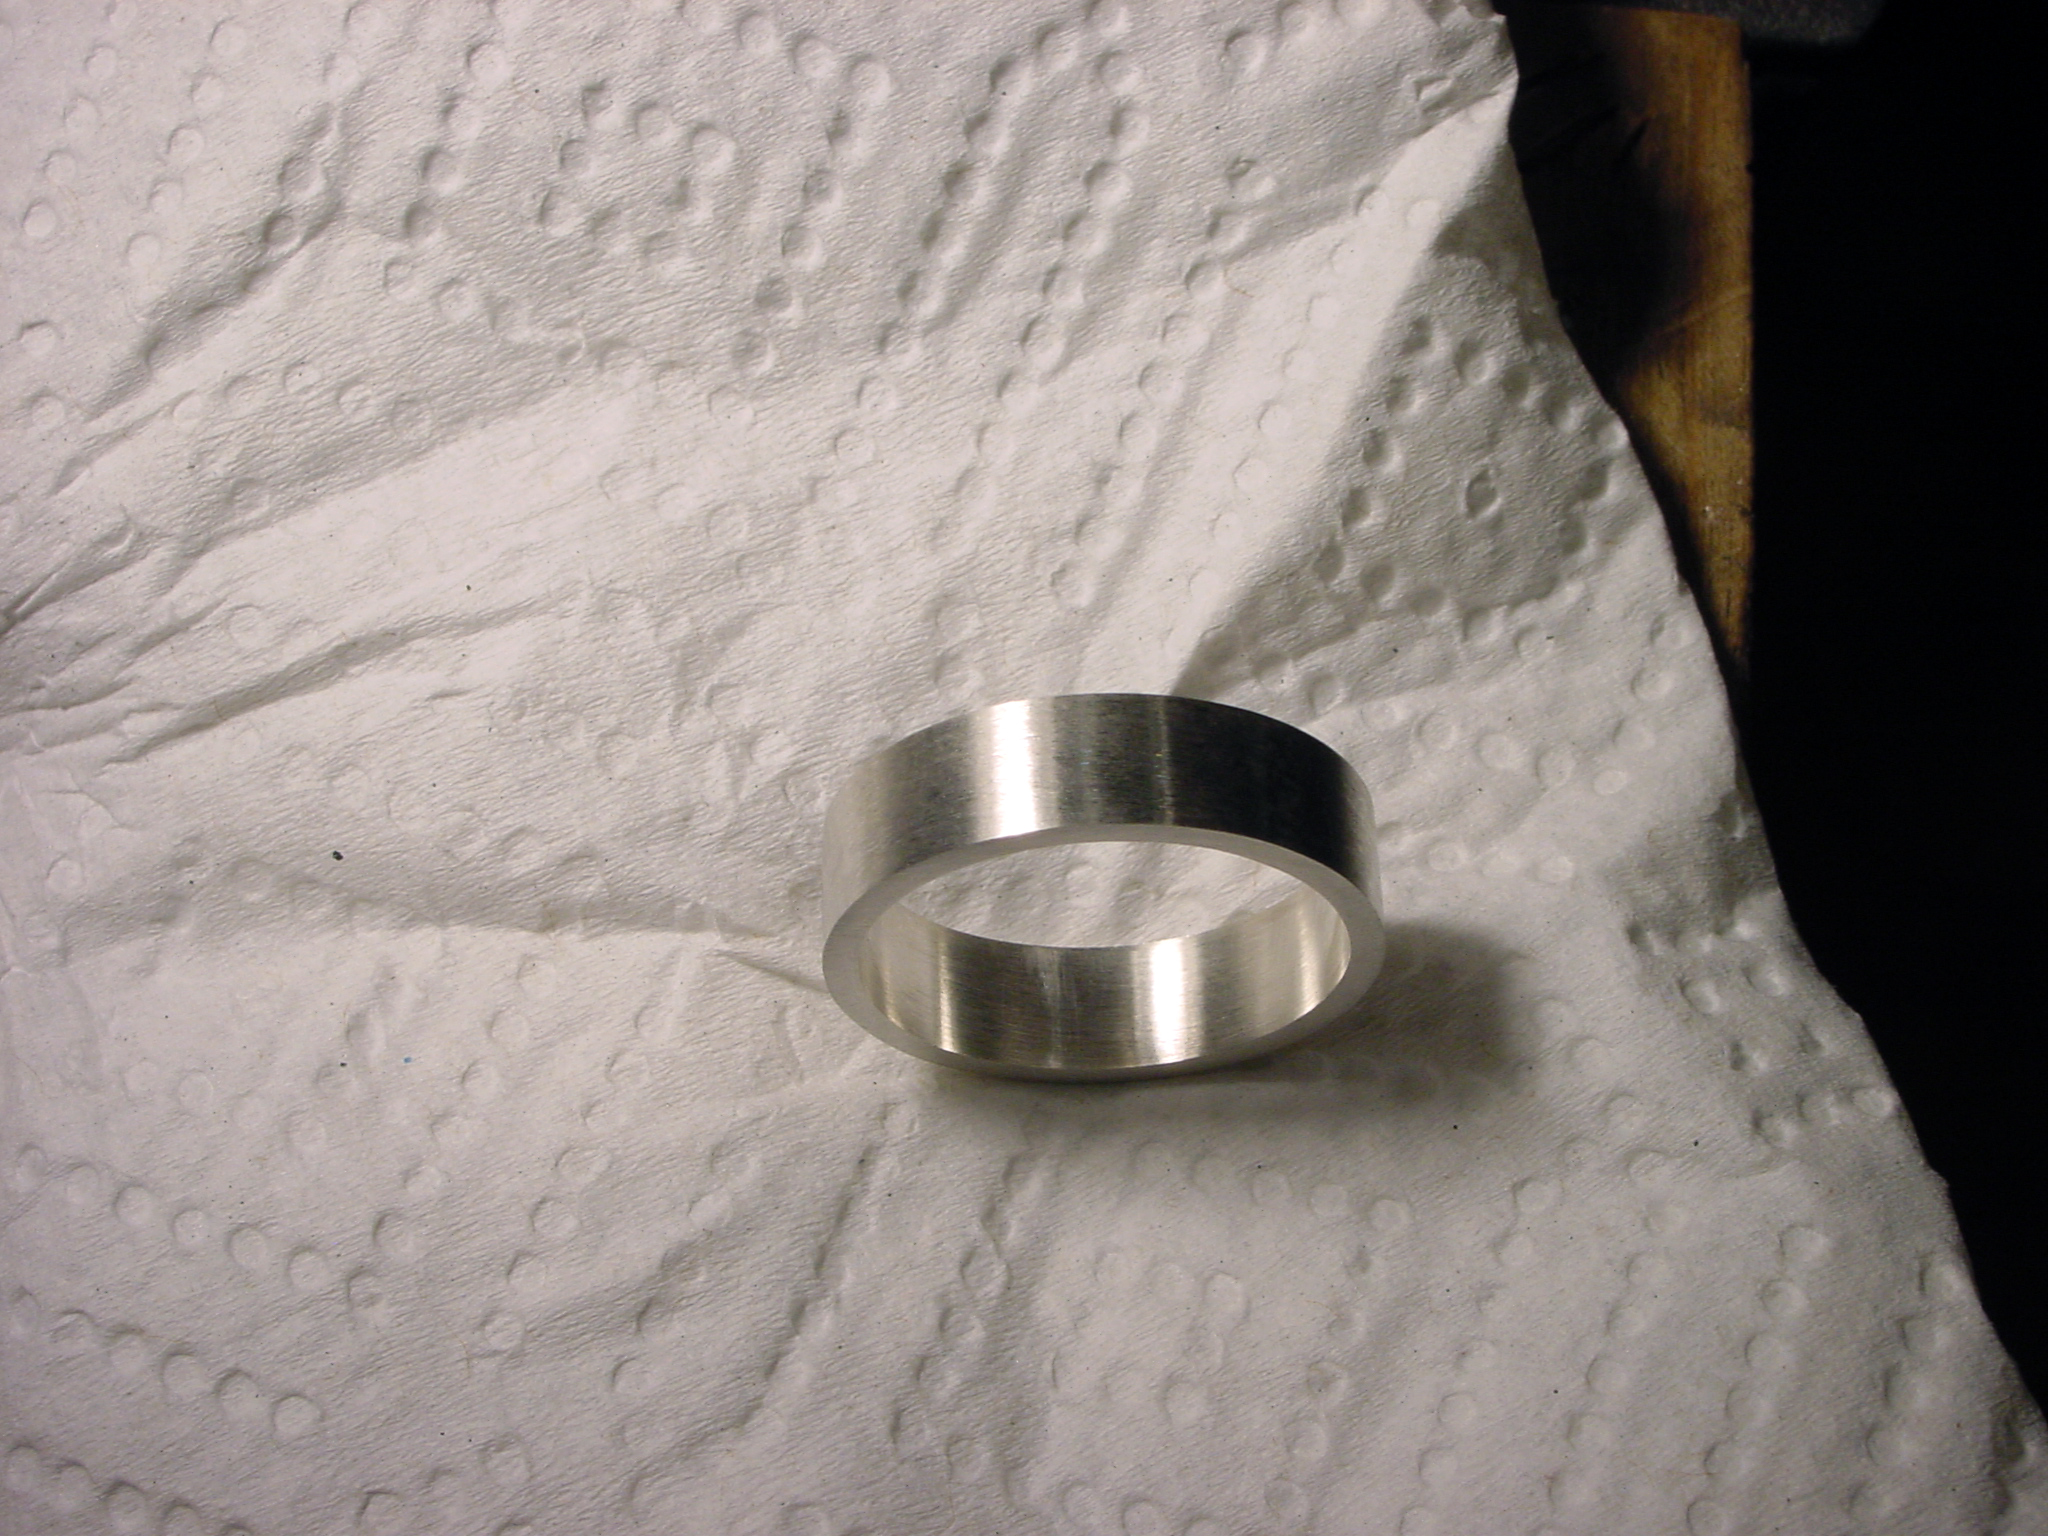
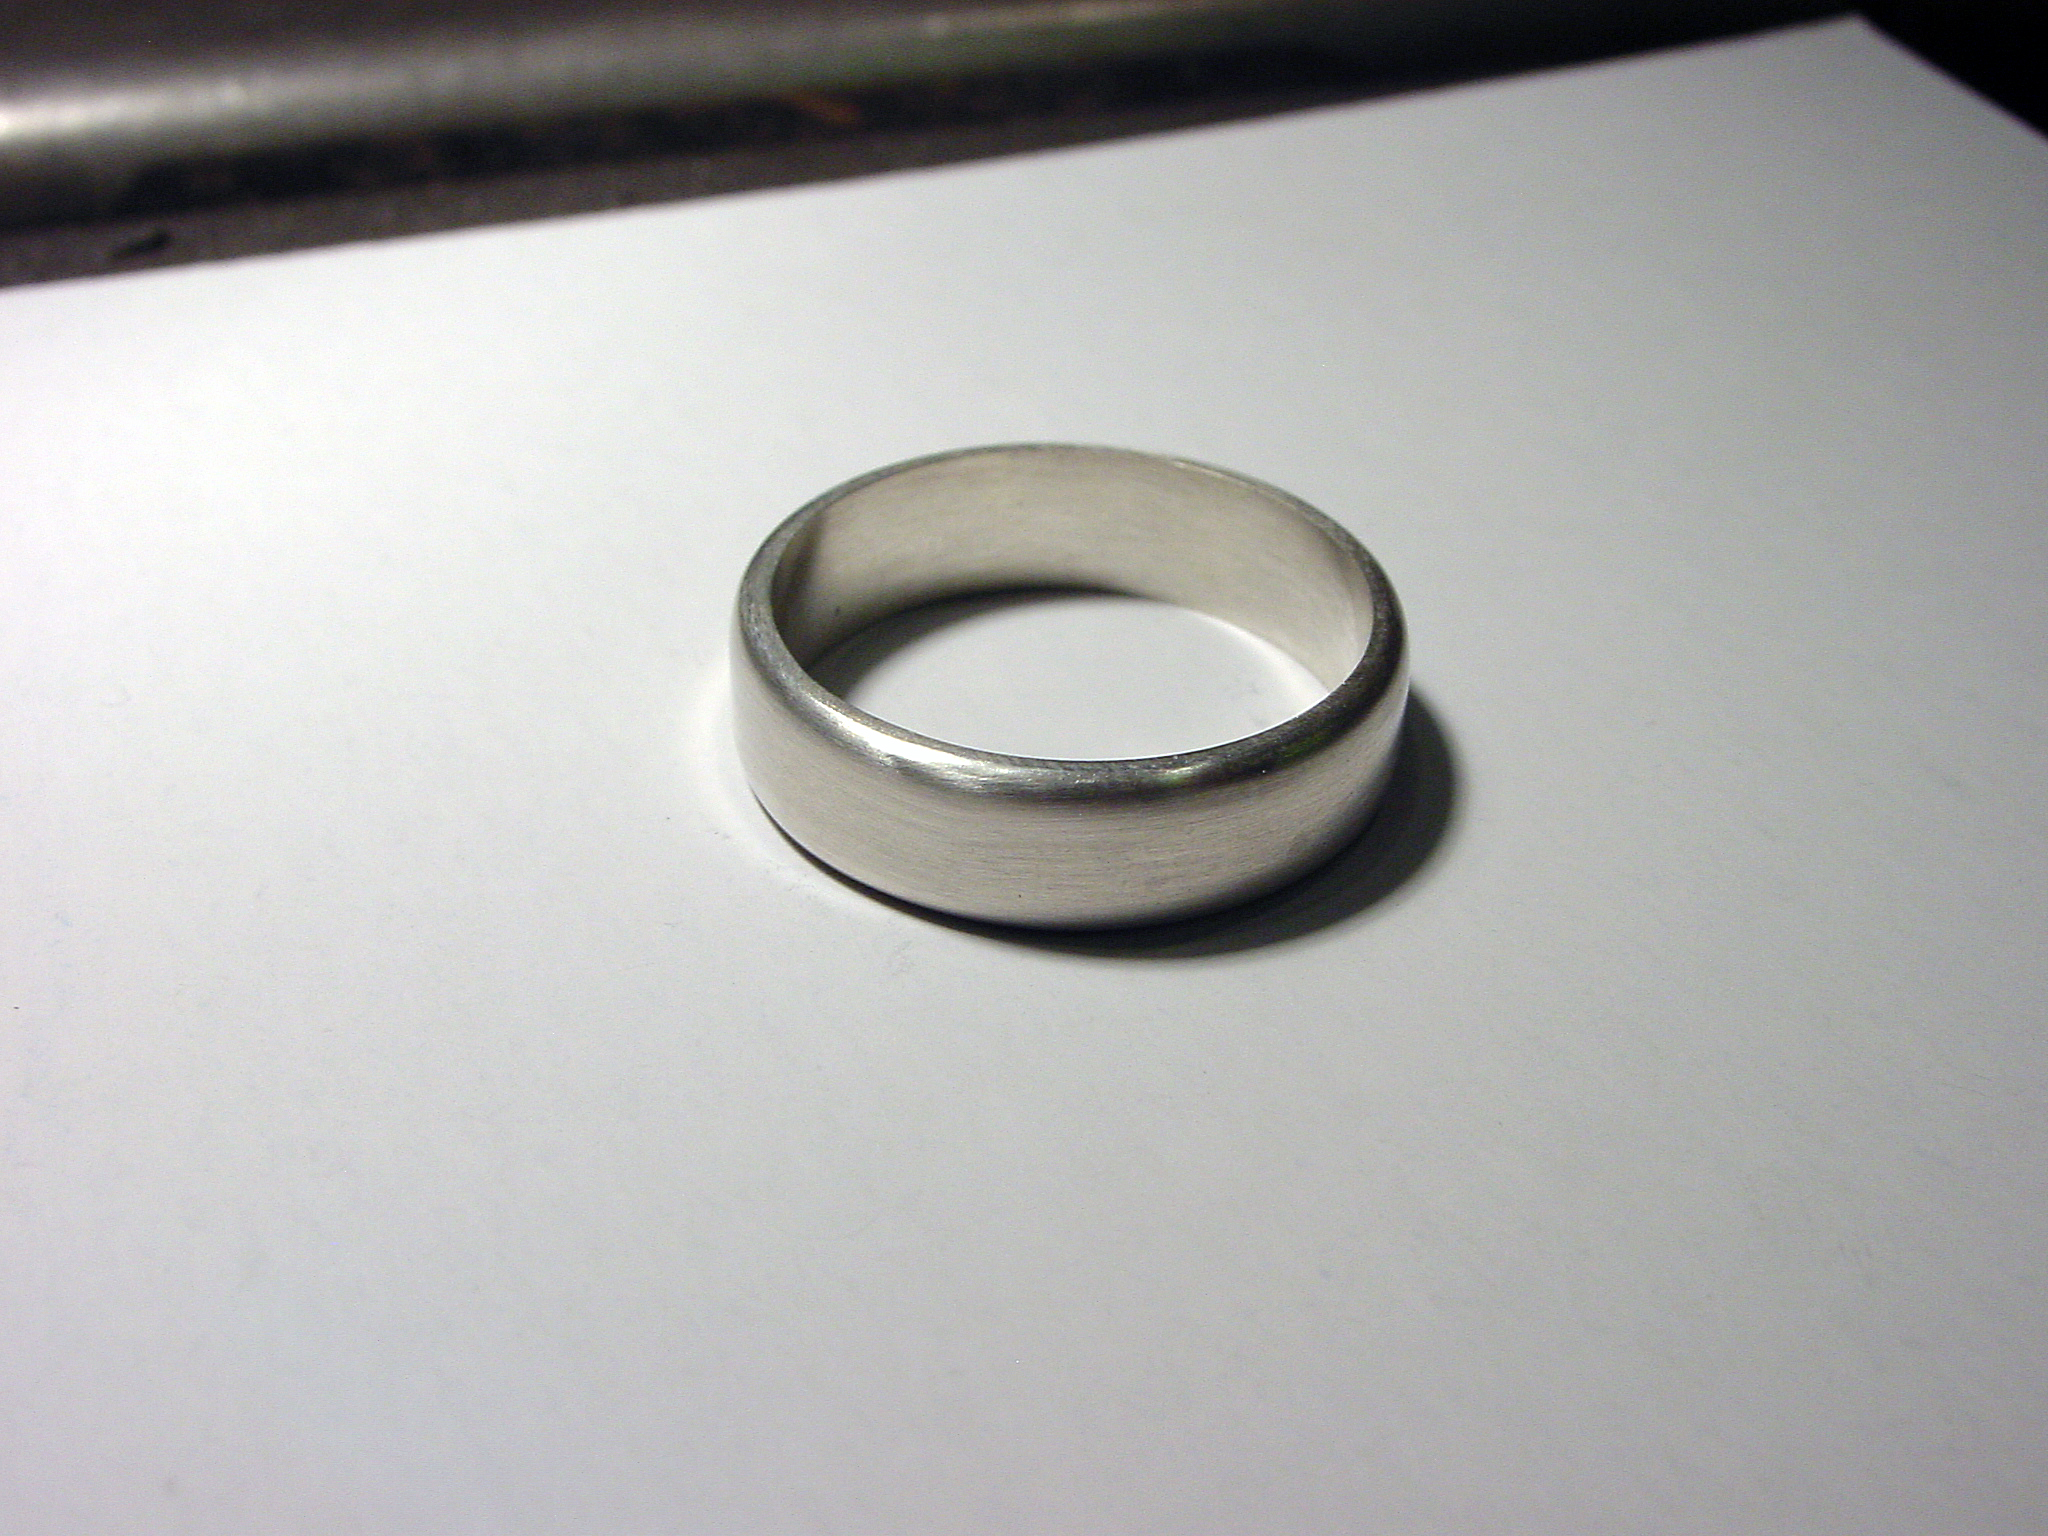
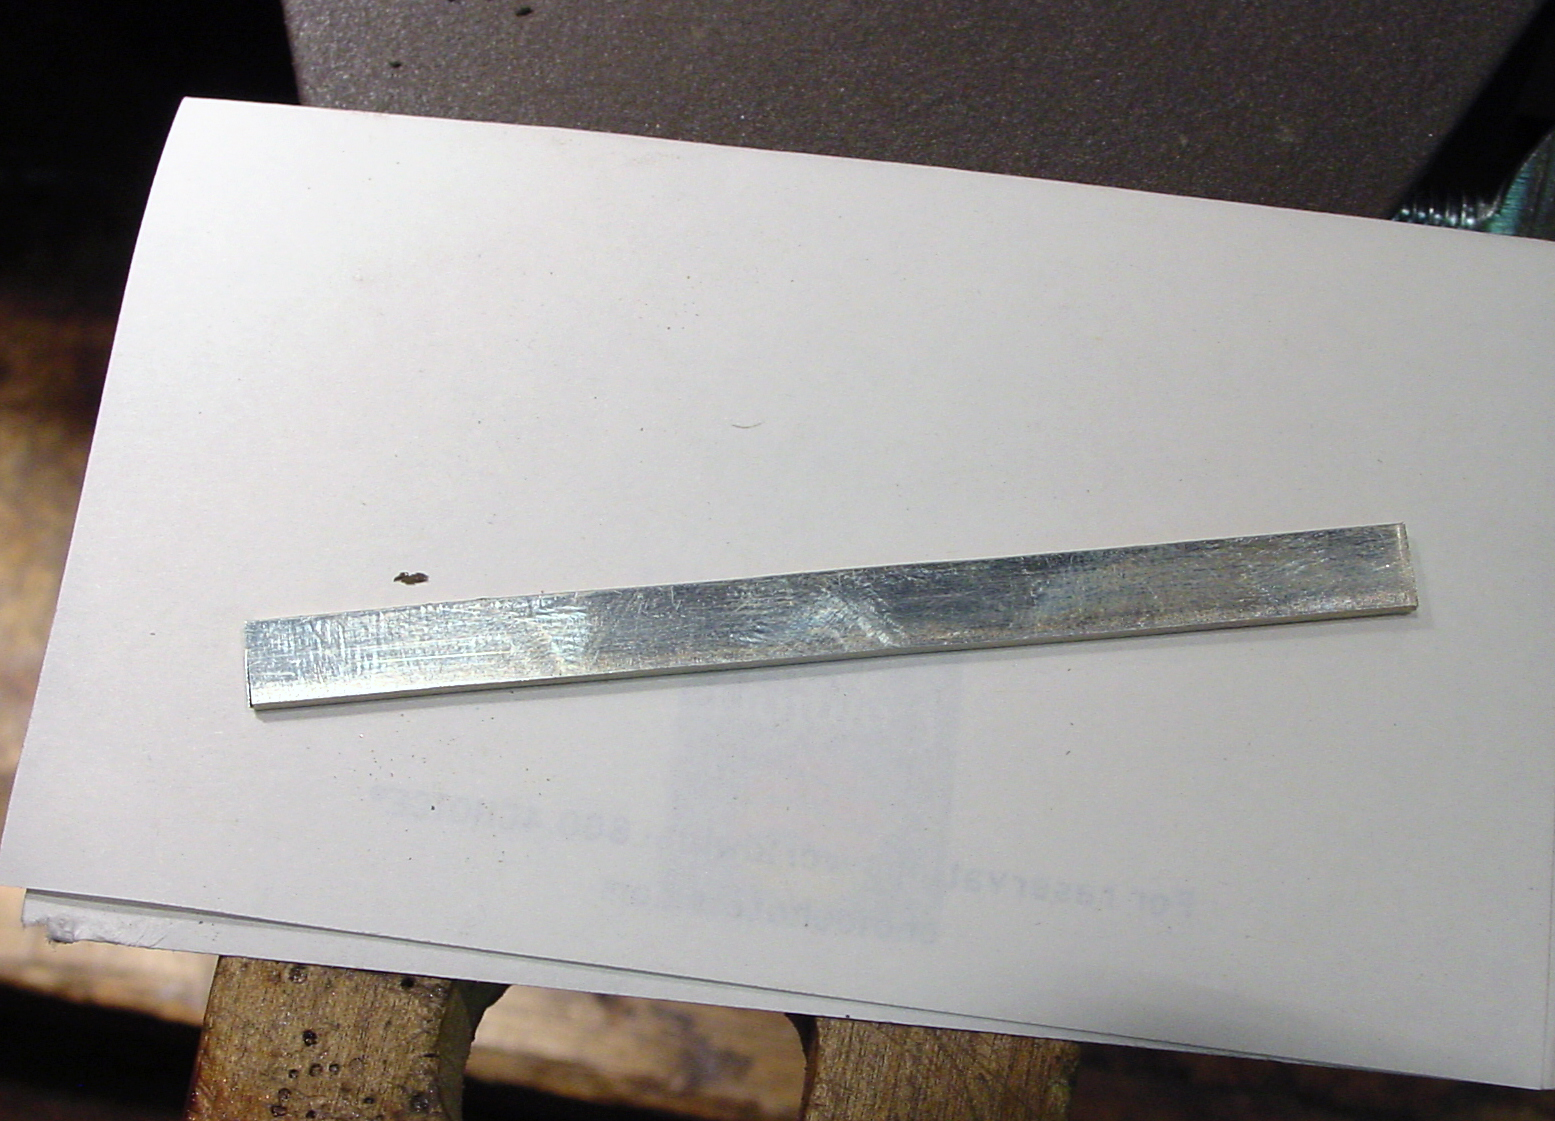
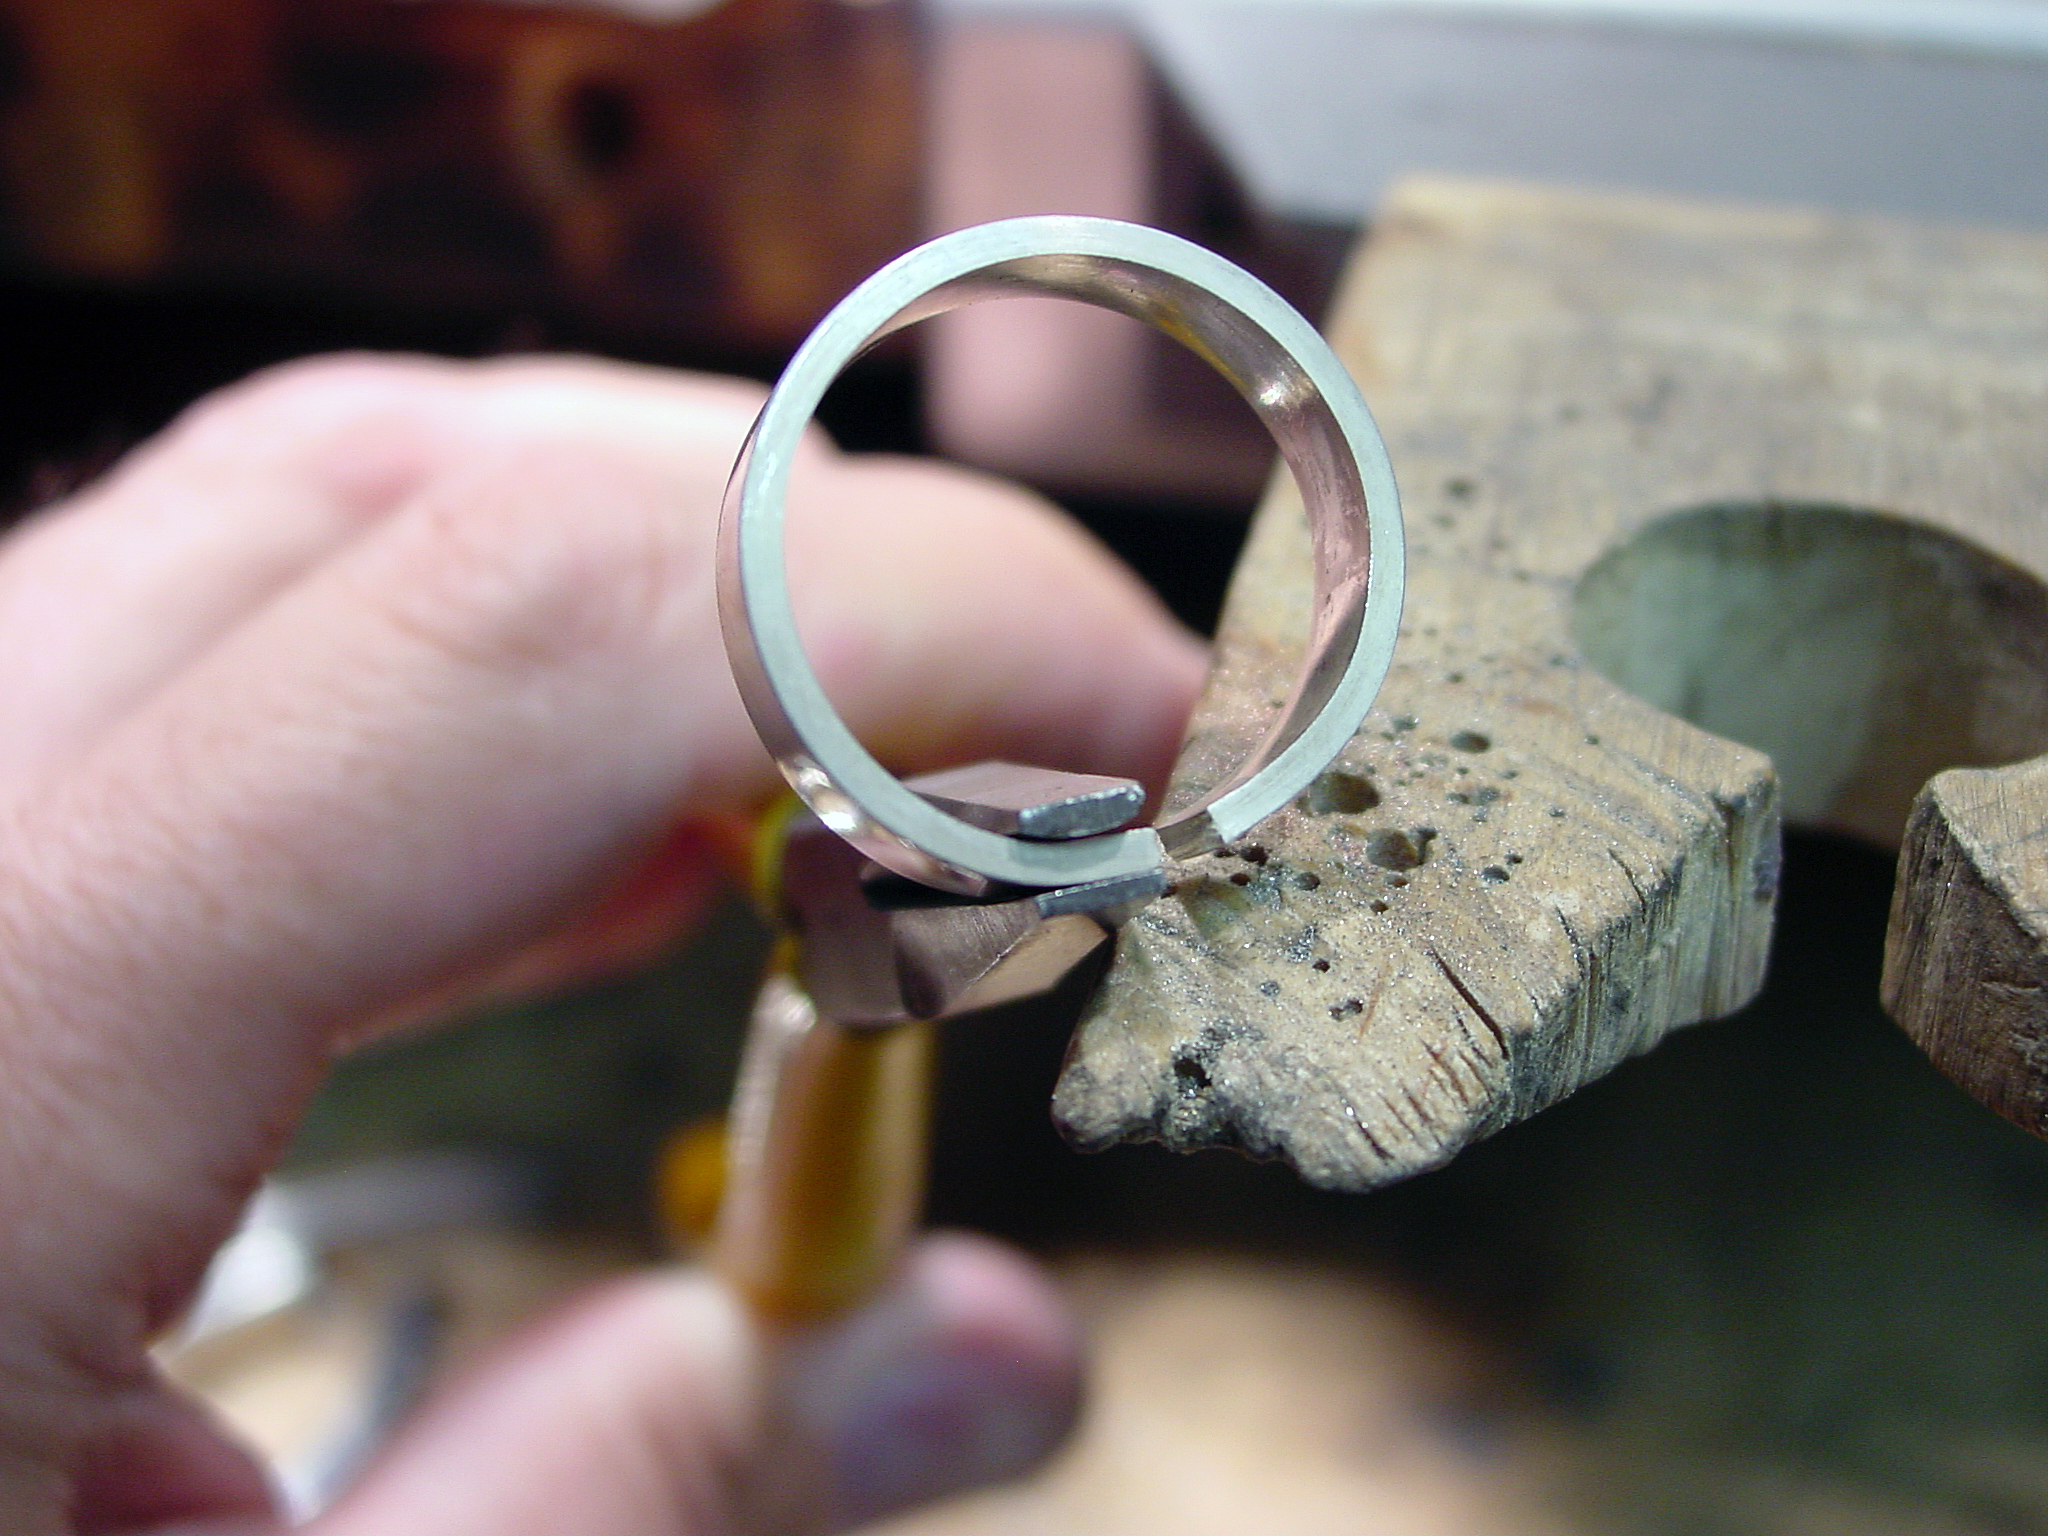
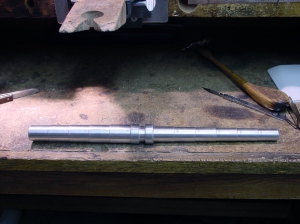
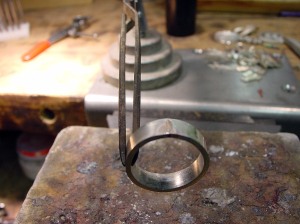
First I cut a piece of sterling silver stock 4mm X 1.5mm and a little over 60mm long for a size 10 ring. I anneal the shank (see Day 9 for annealing tutorial)
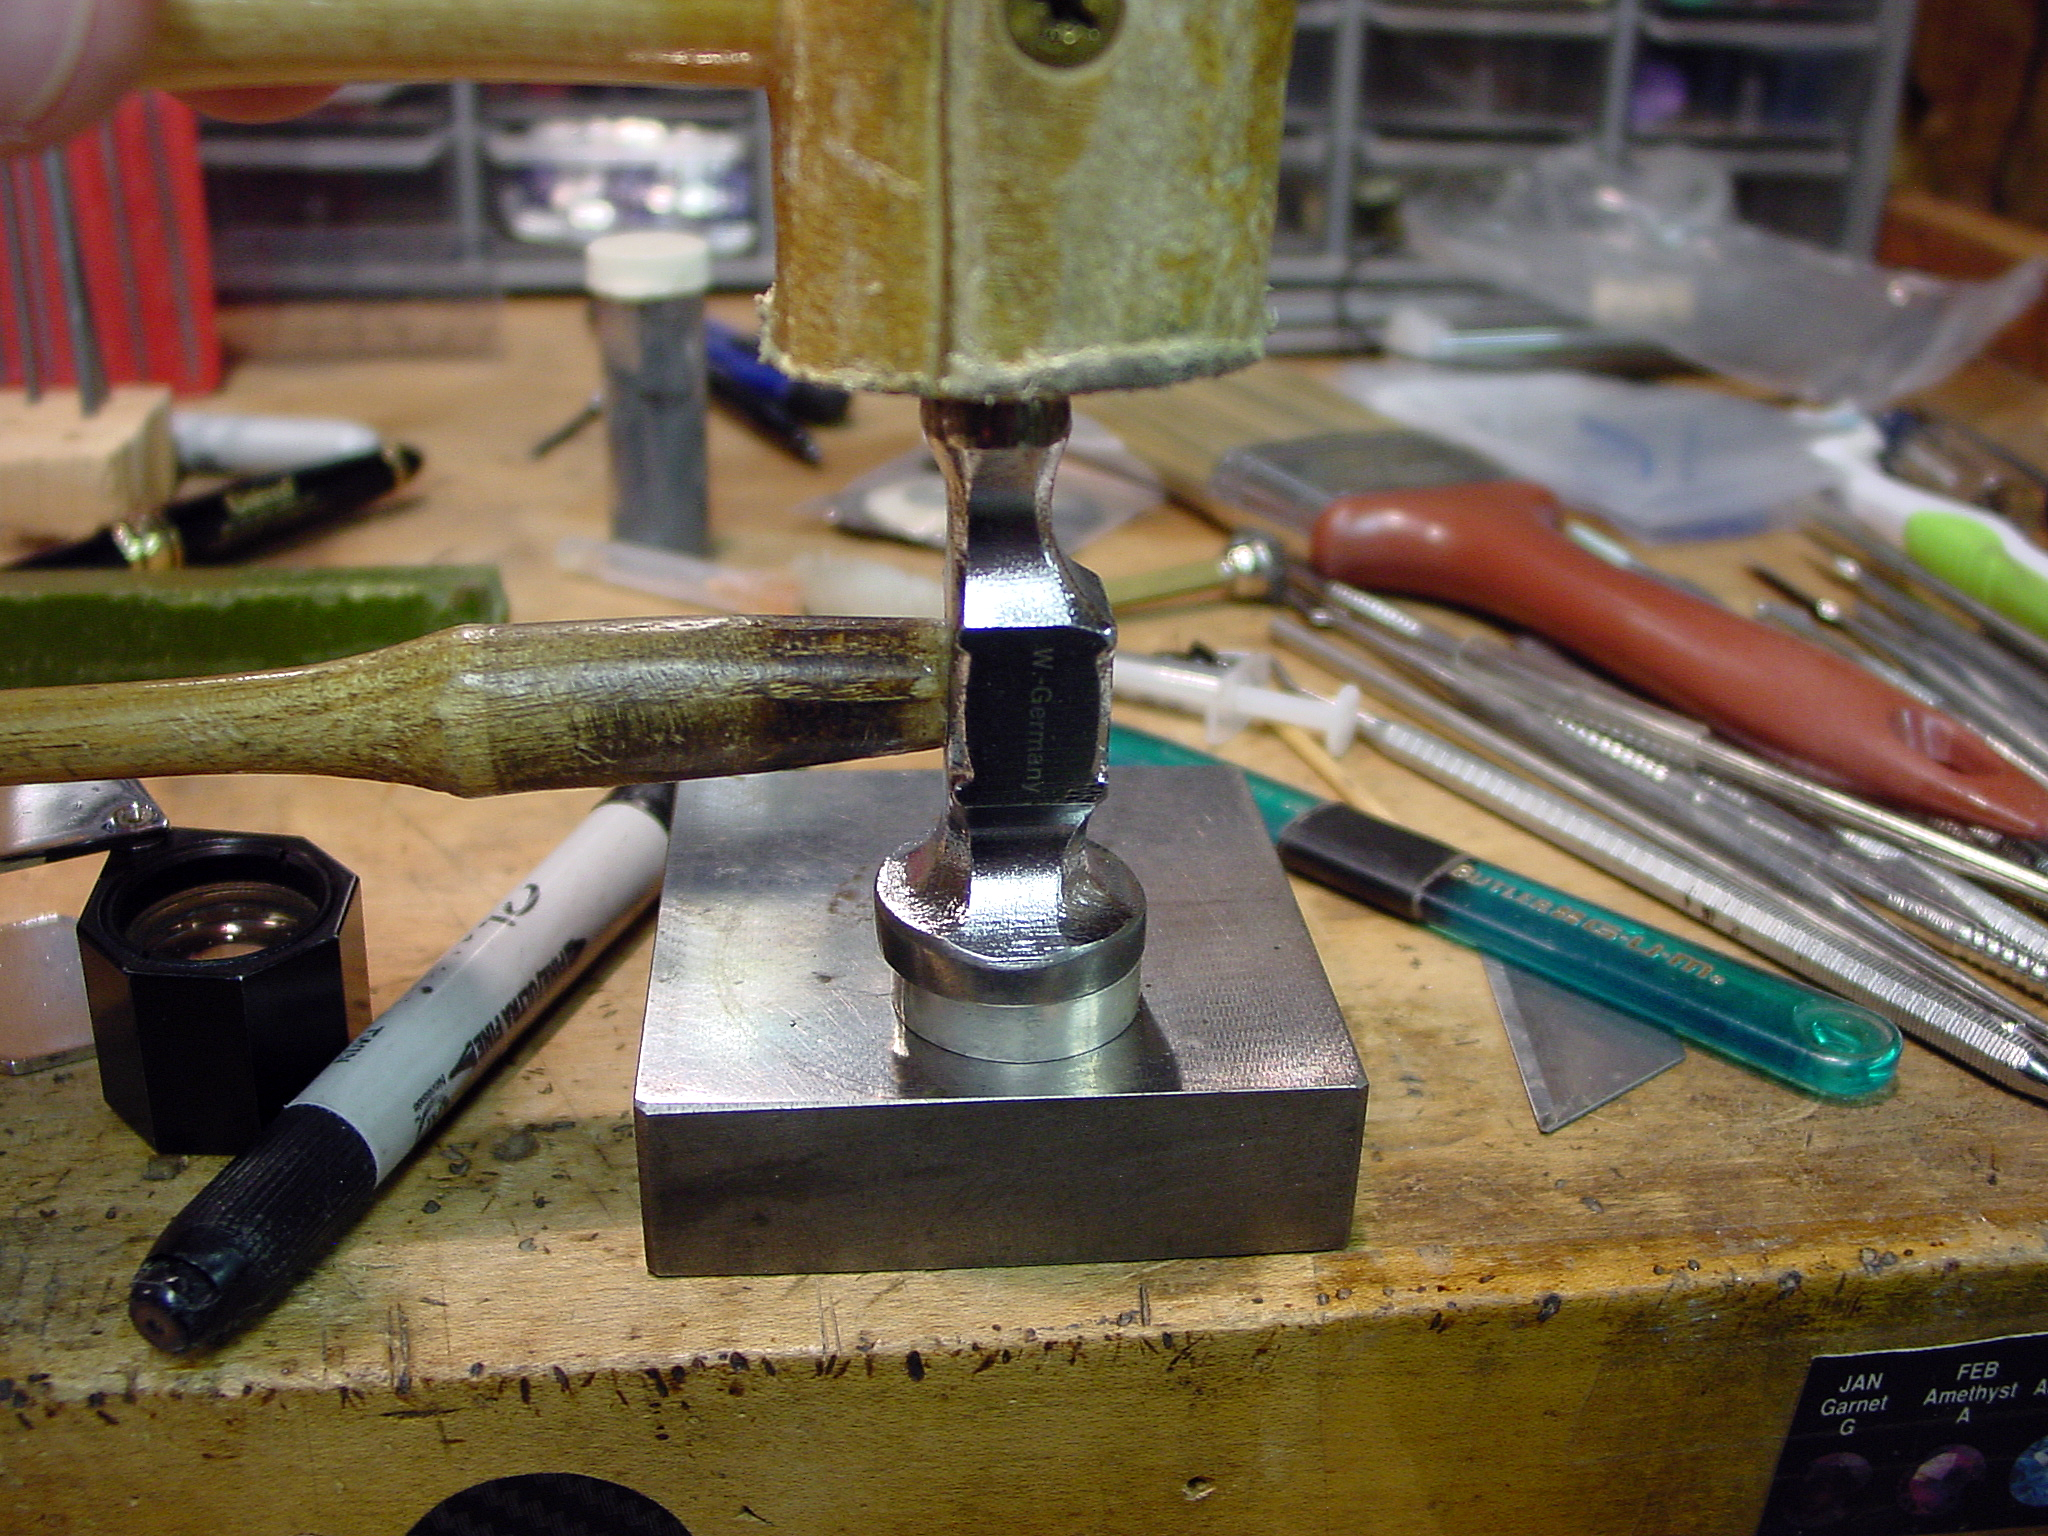
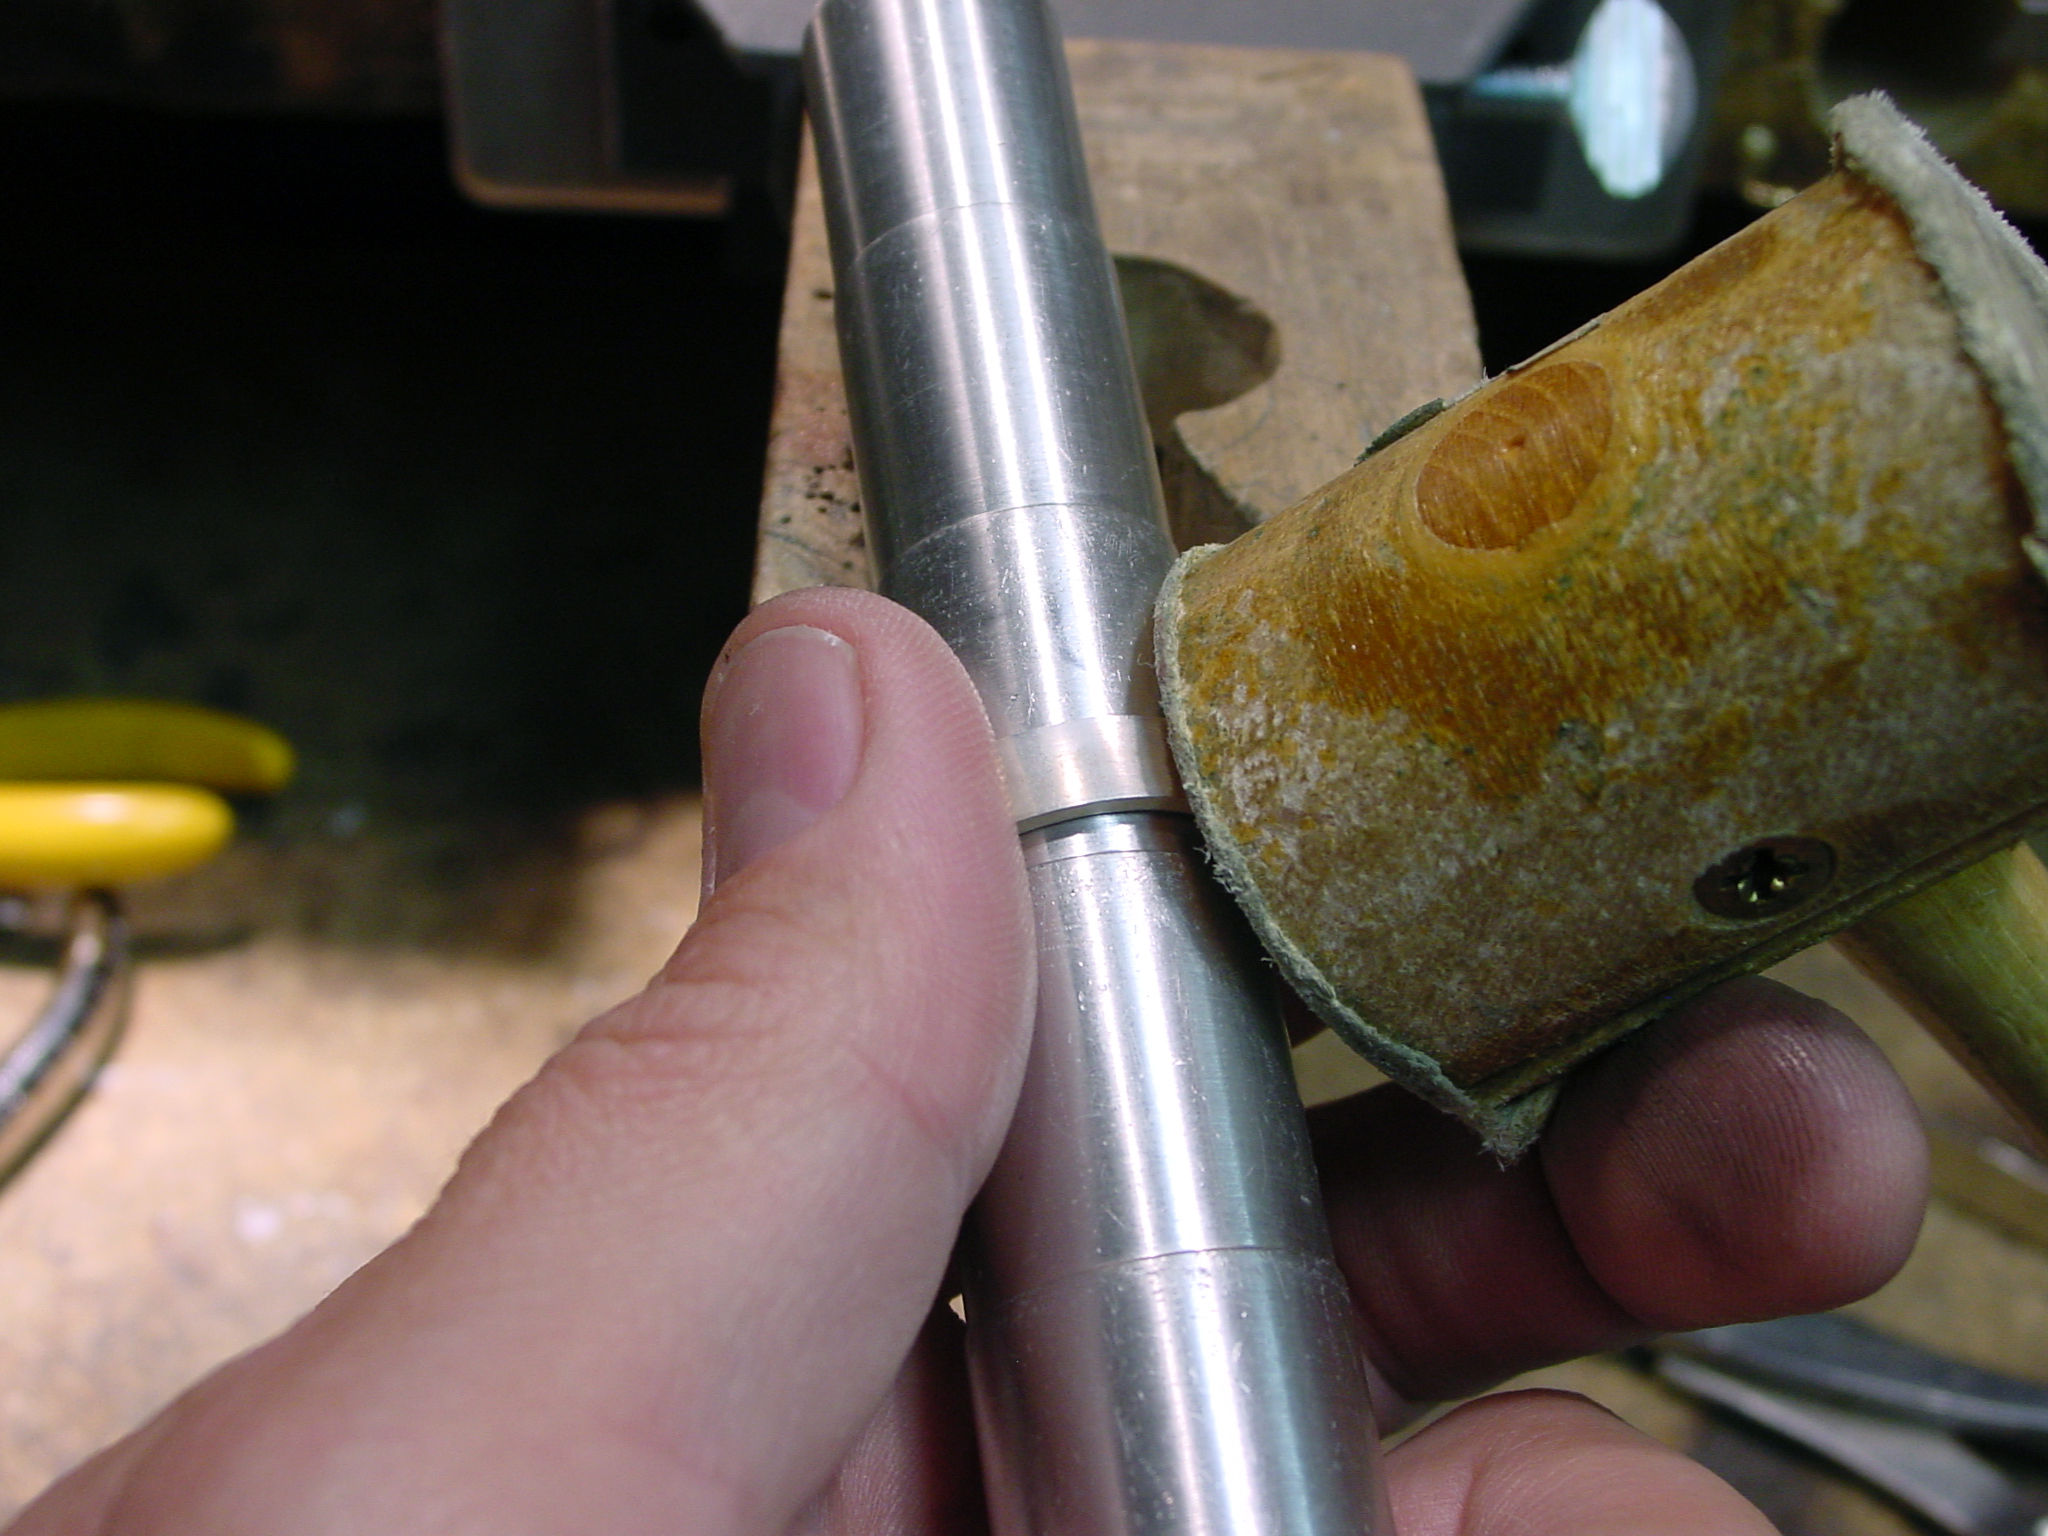
Soldering Basics (1) Soldering Basics (2)

I use a “Stepped Mandrel” to round the shank because it keeps the inside of the shank straight, not tapered like if you rounded it on a regular tapered mandrel, but this can be worked around if you don’t have a step mandrel.

Soldering Basics (3) Soldering Basics (4)

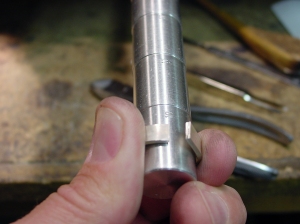
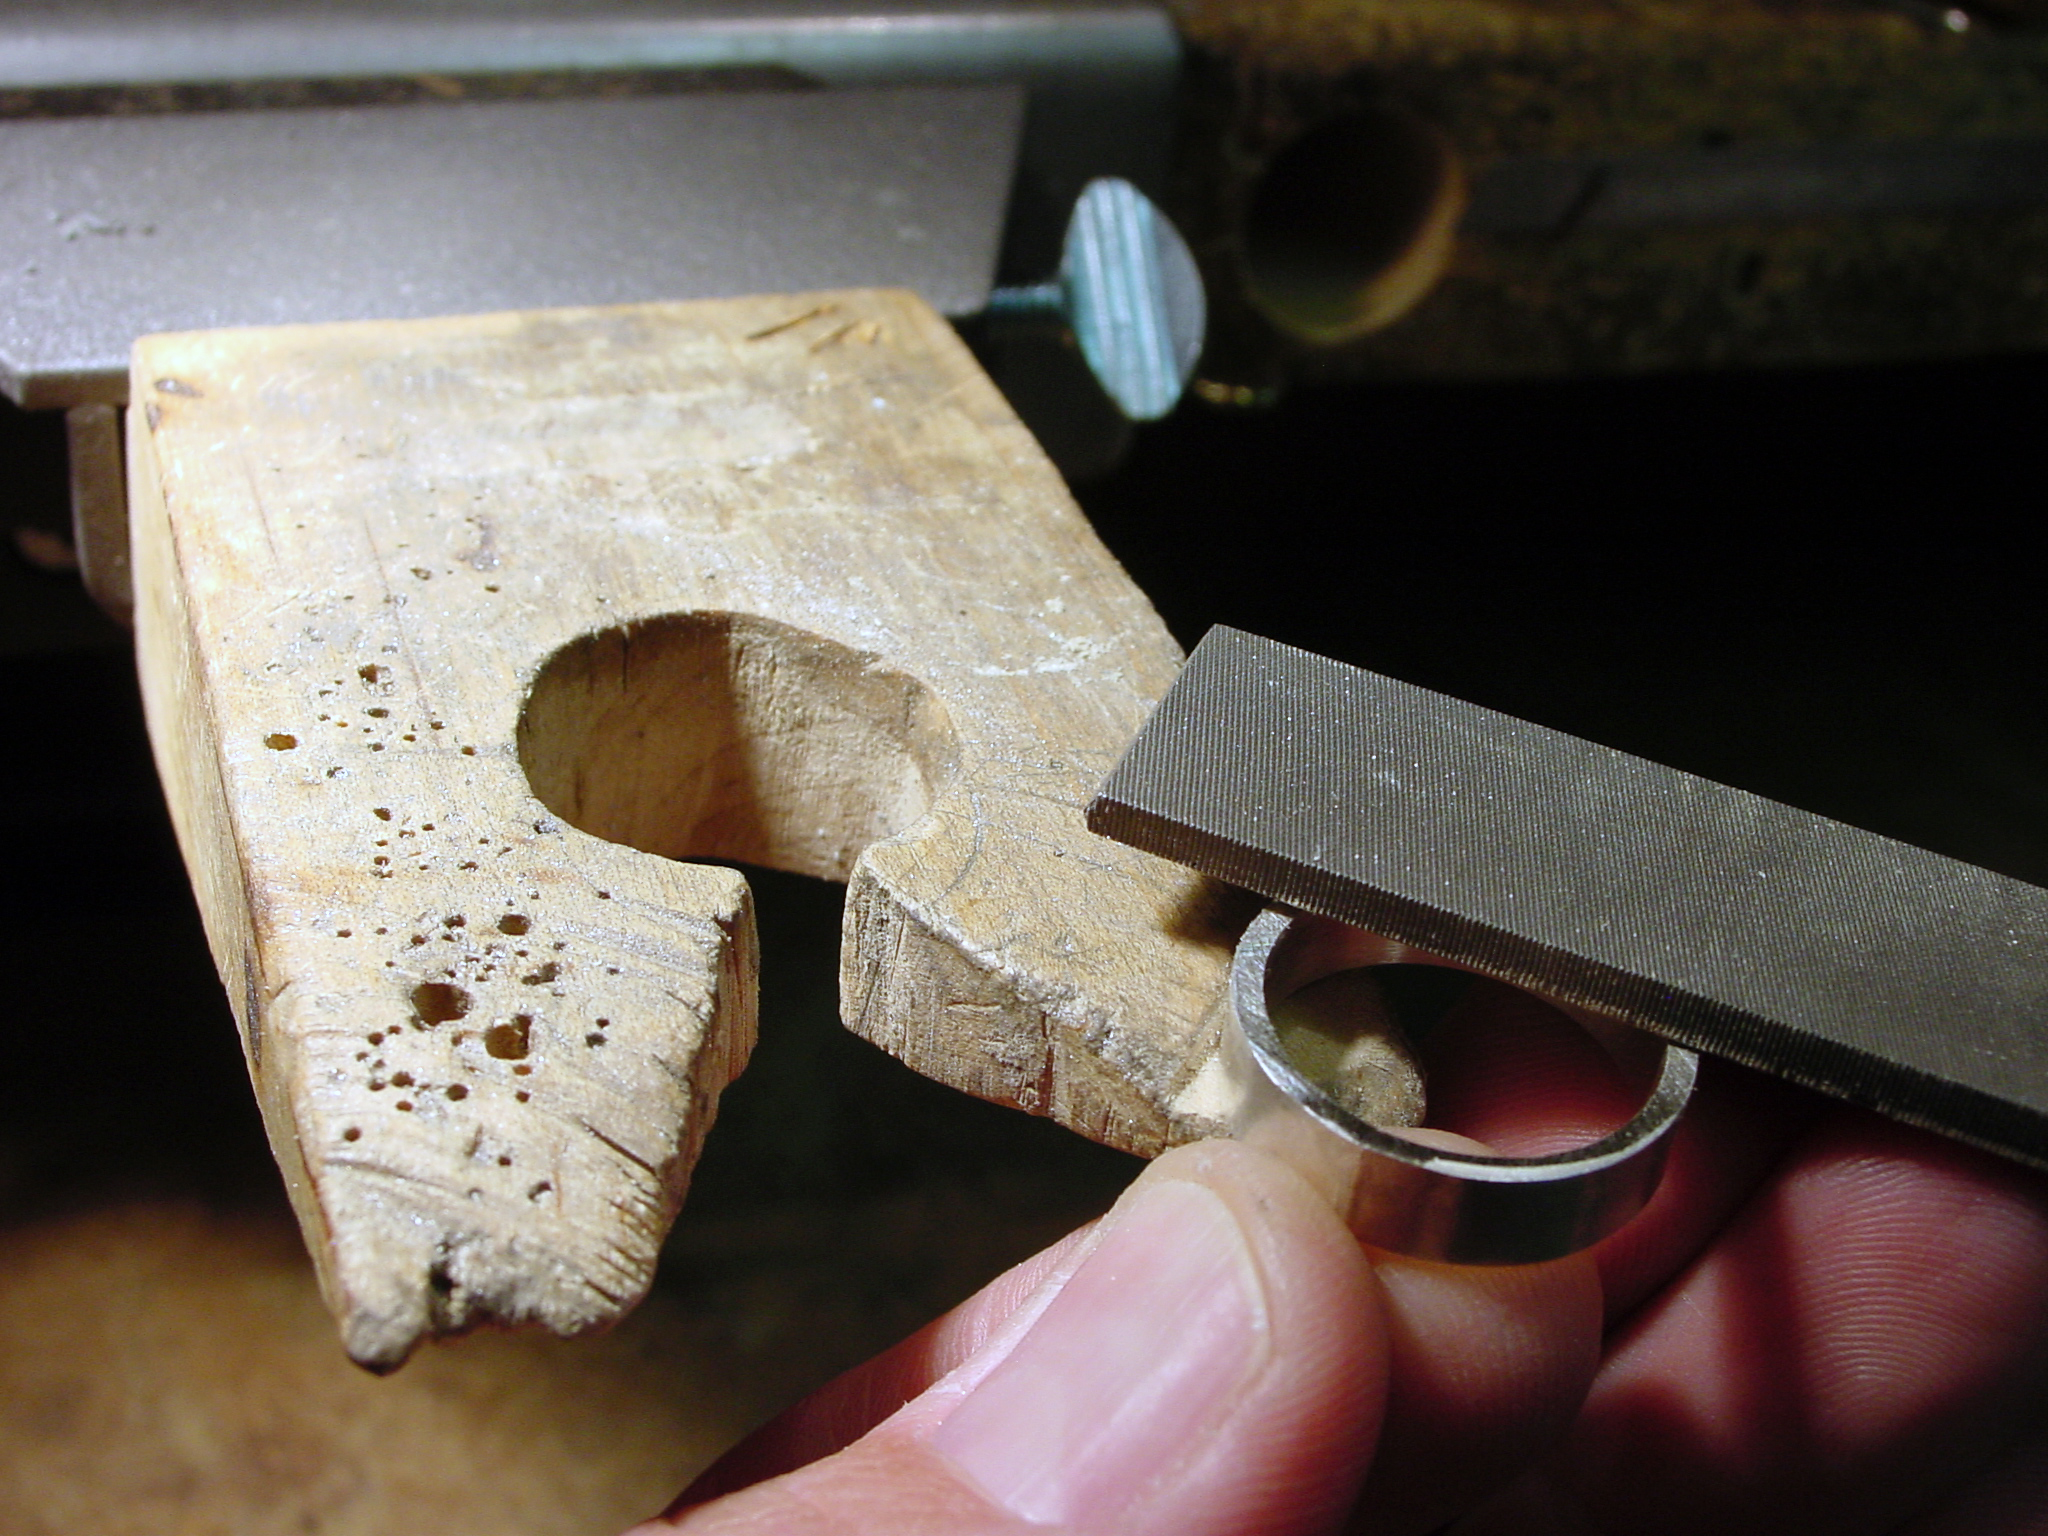
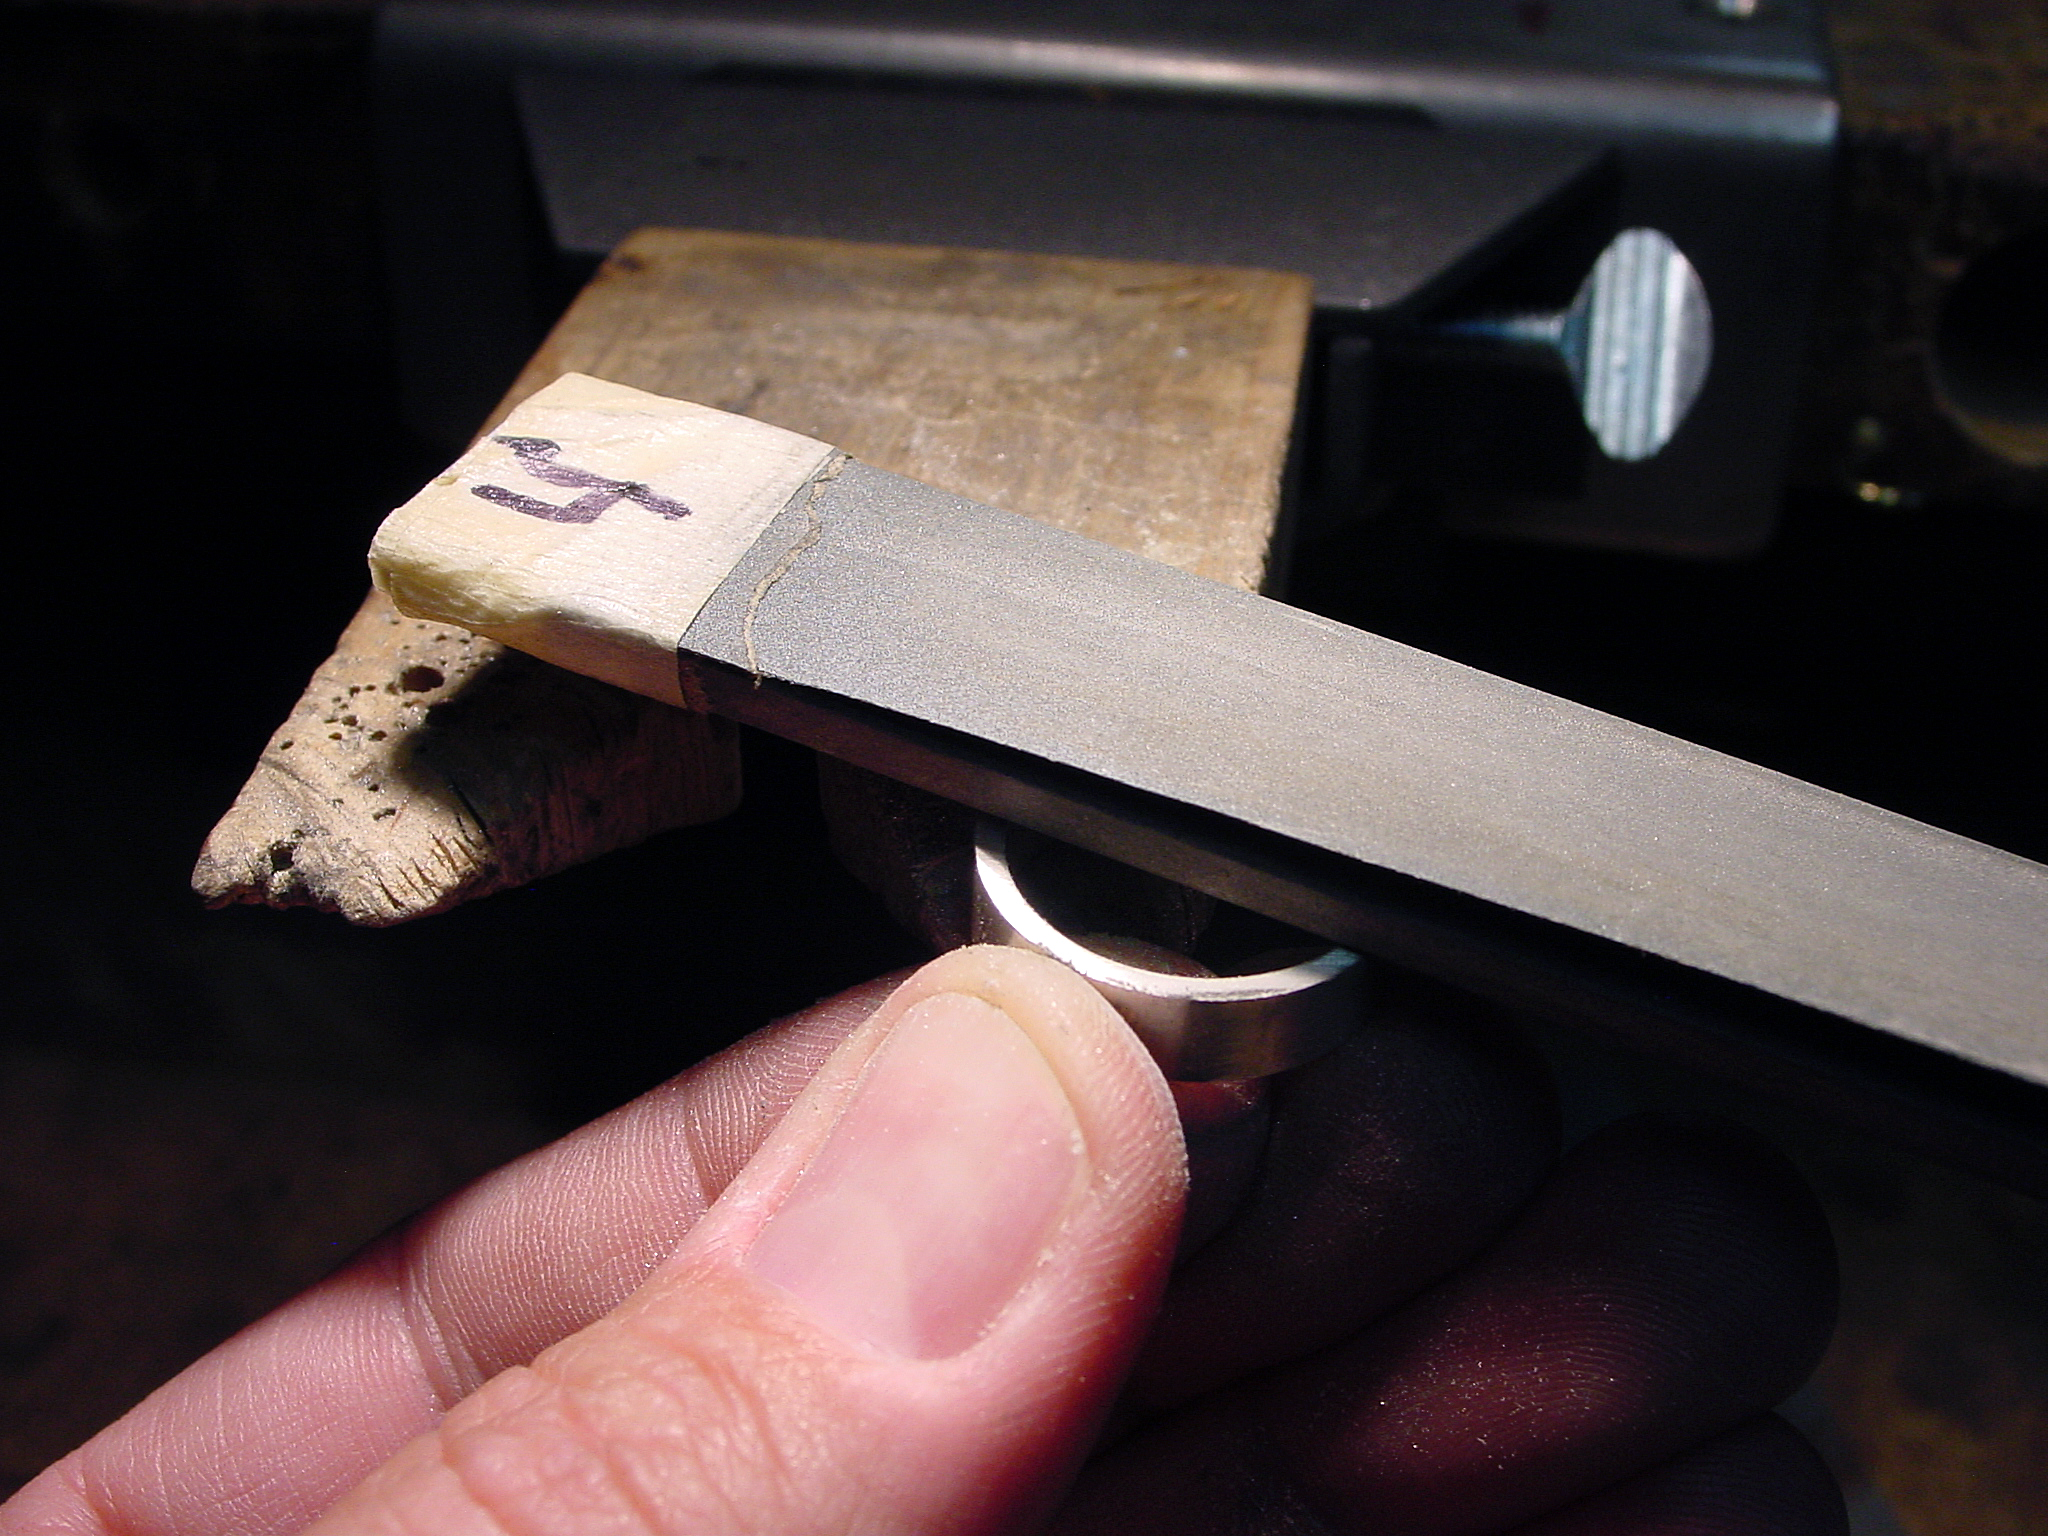
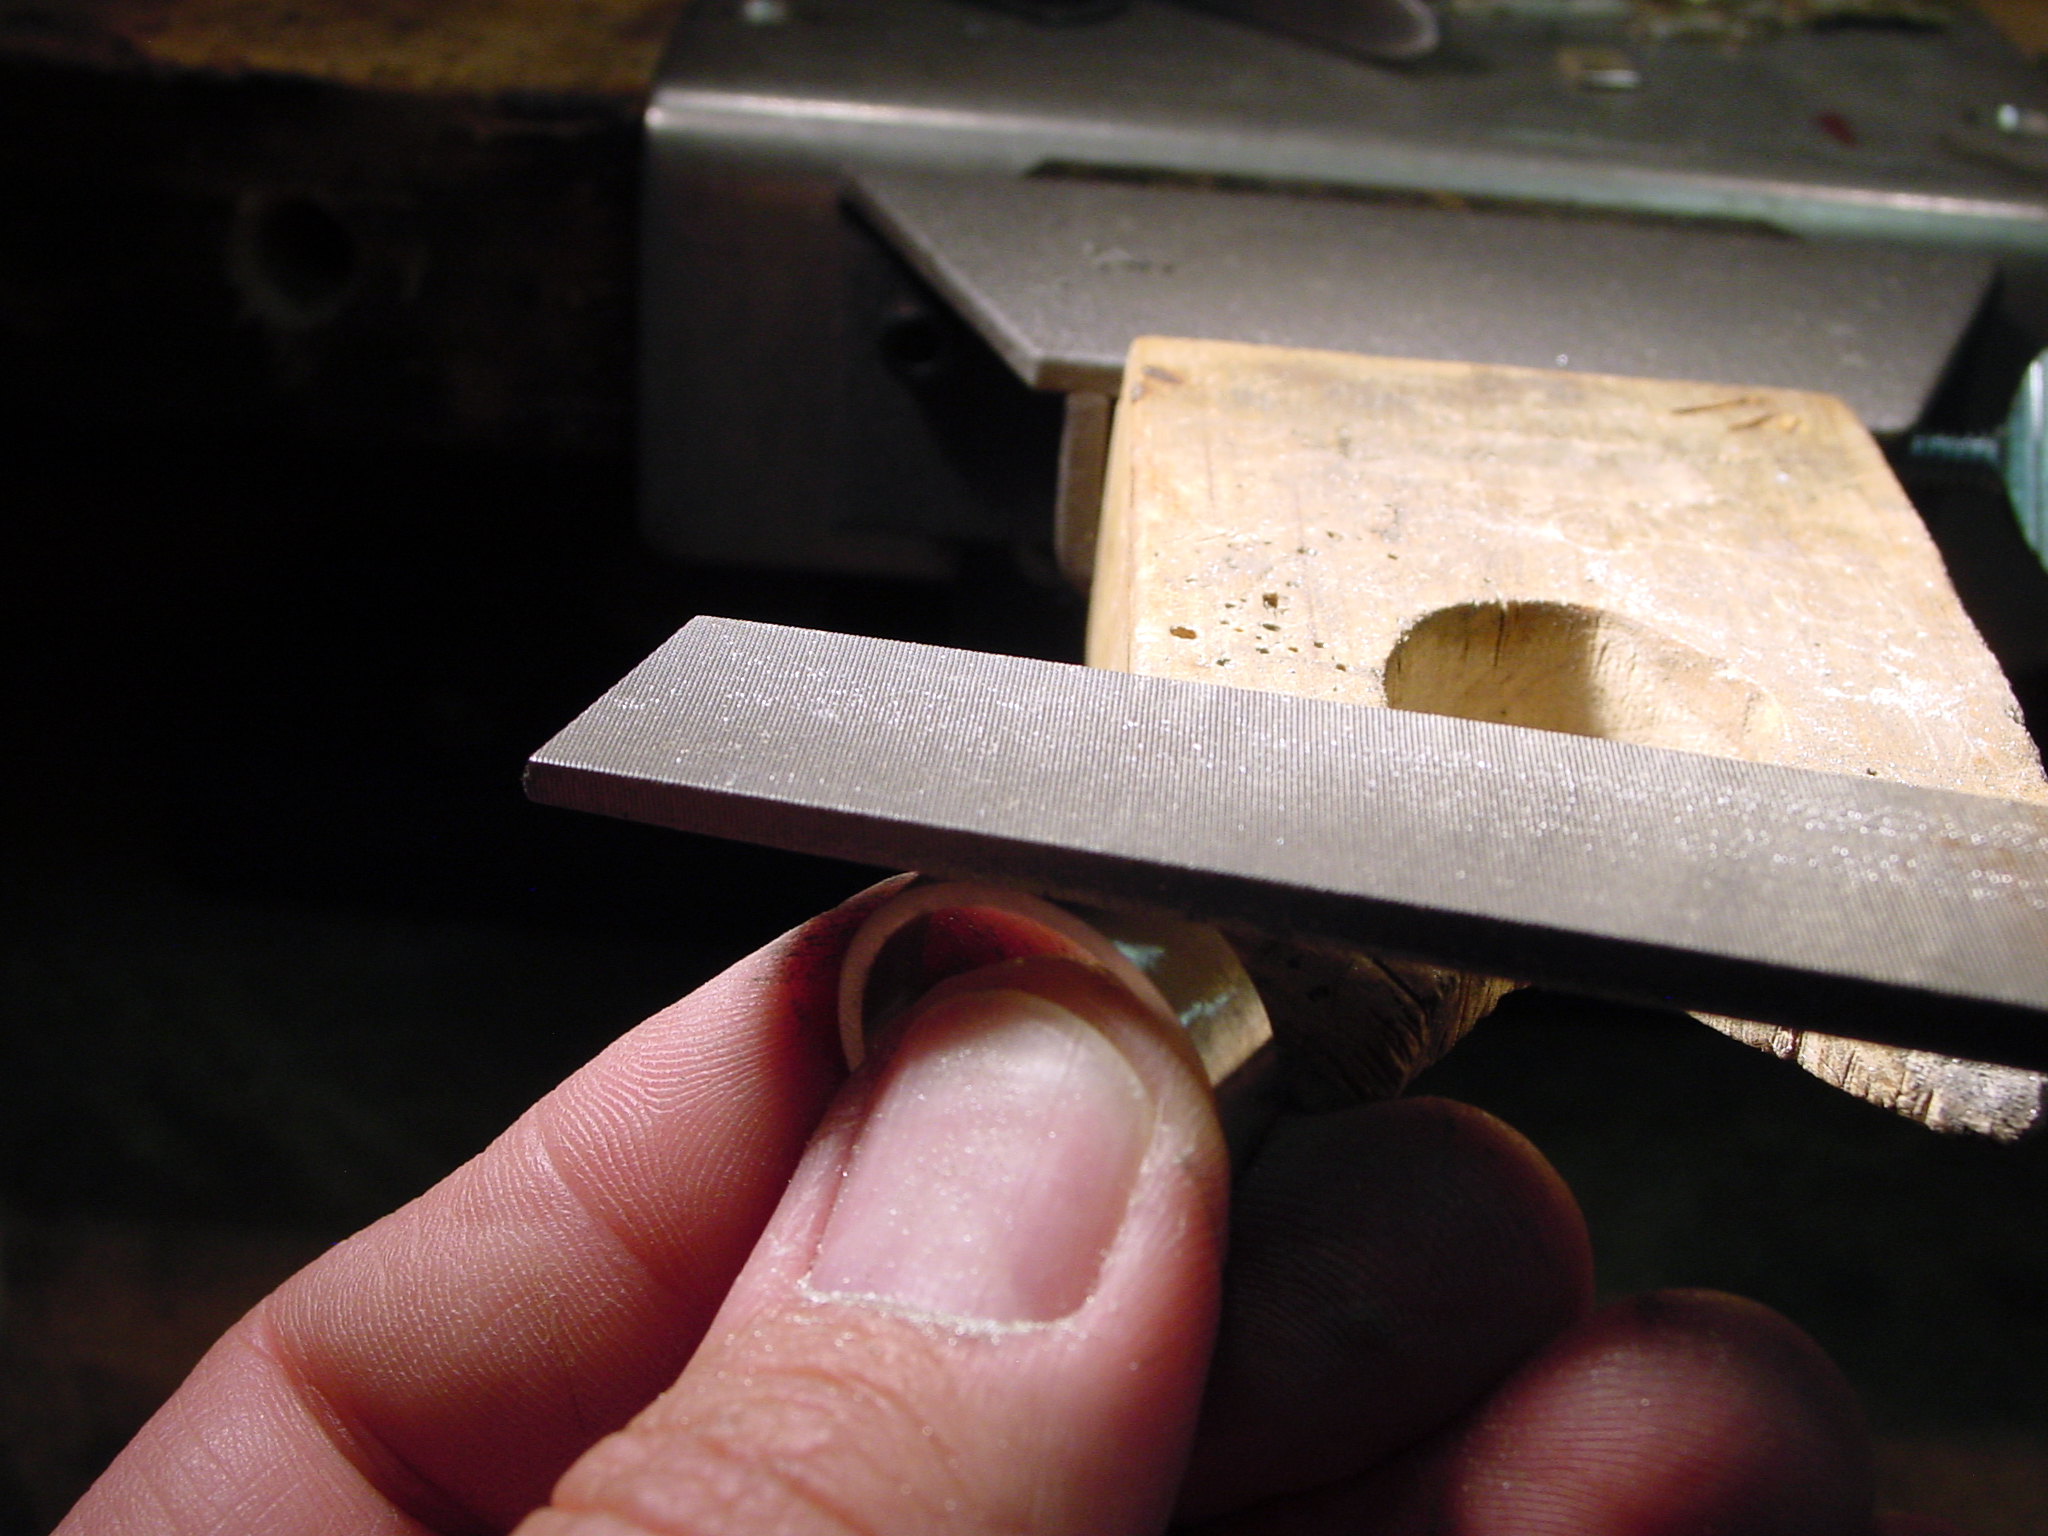
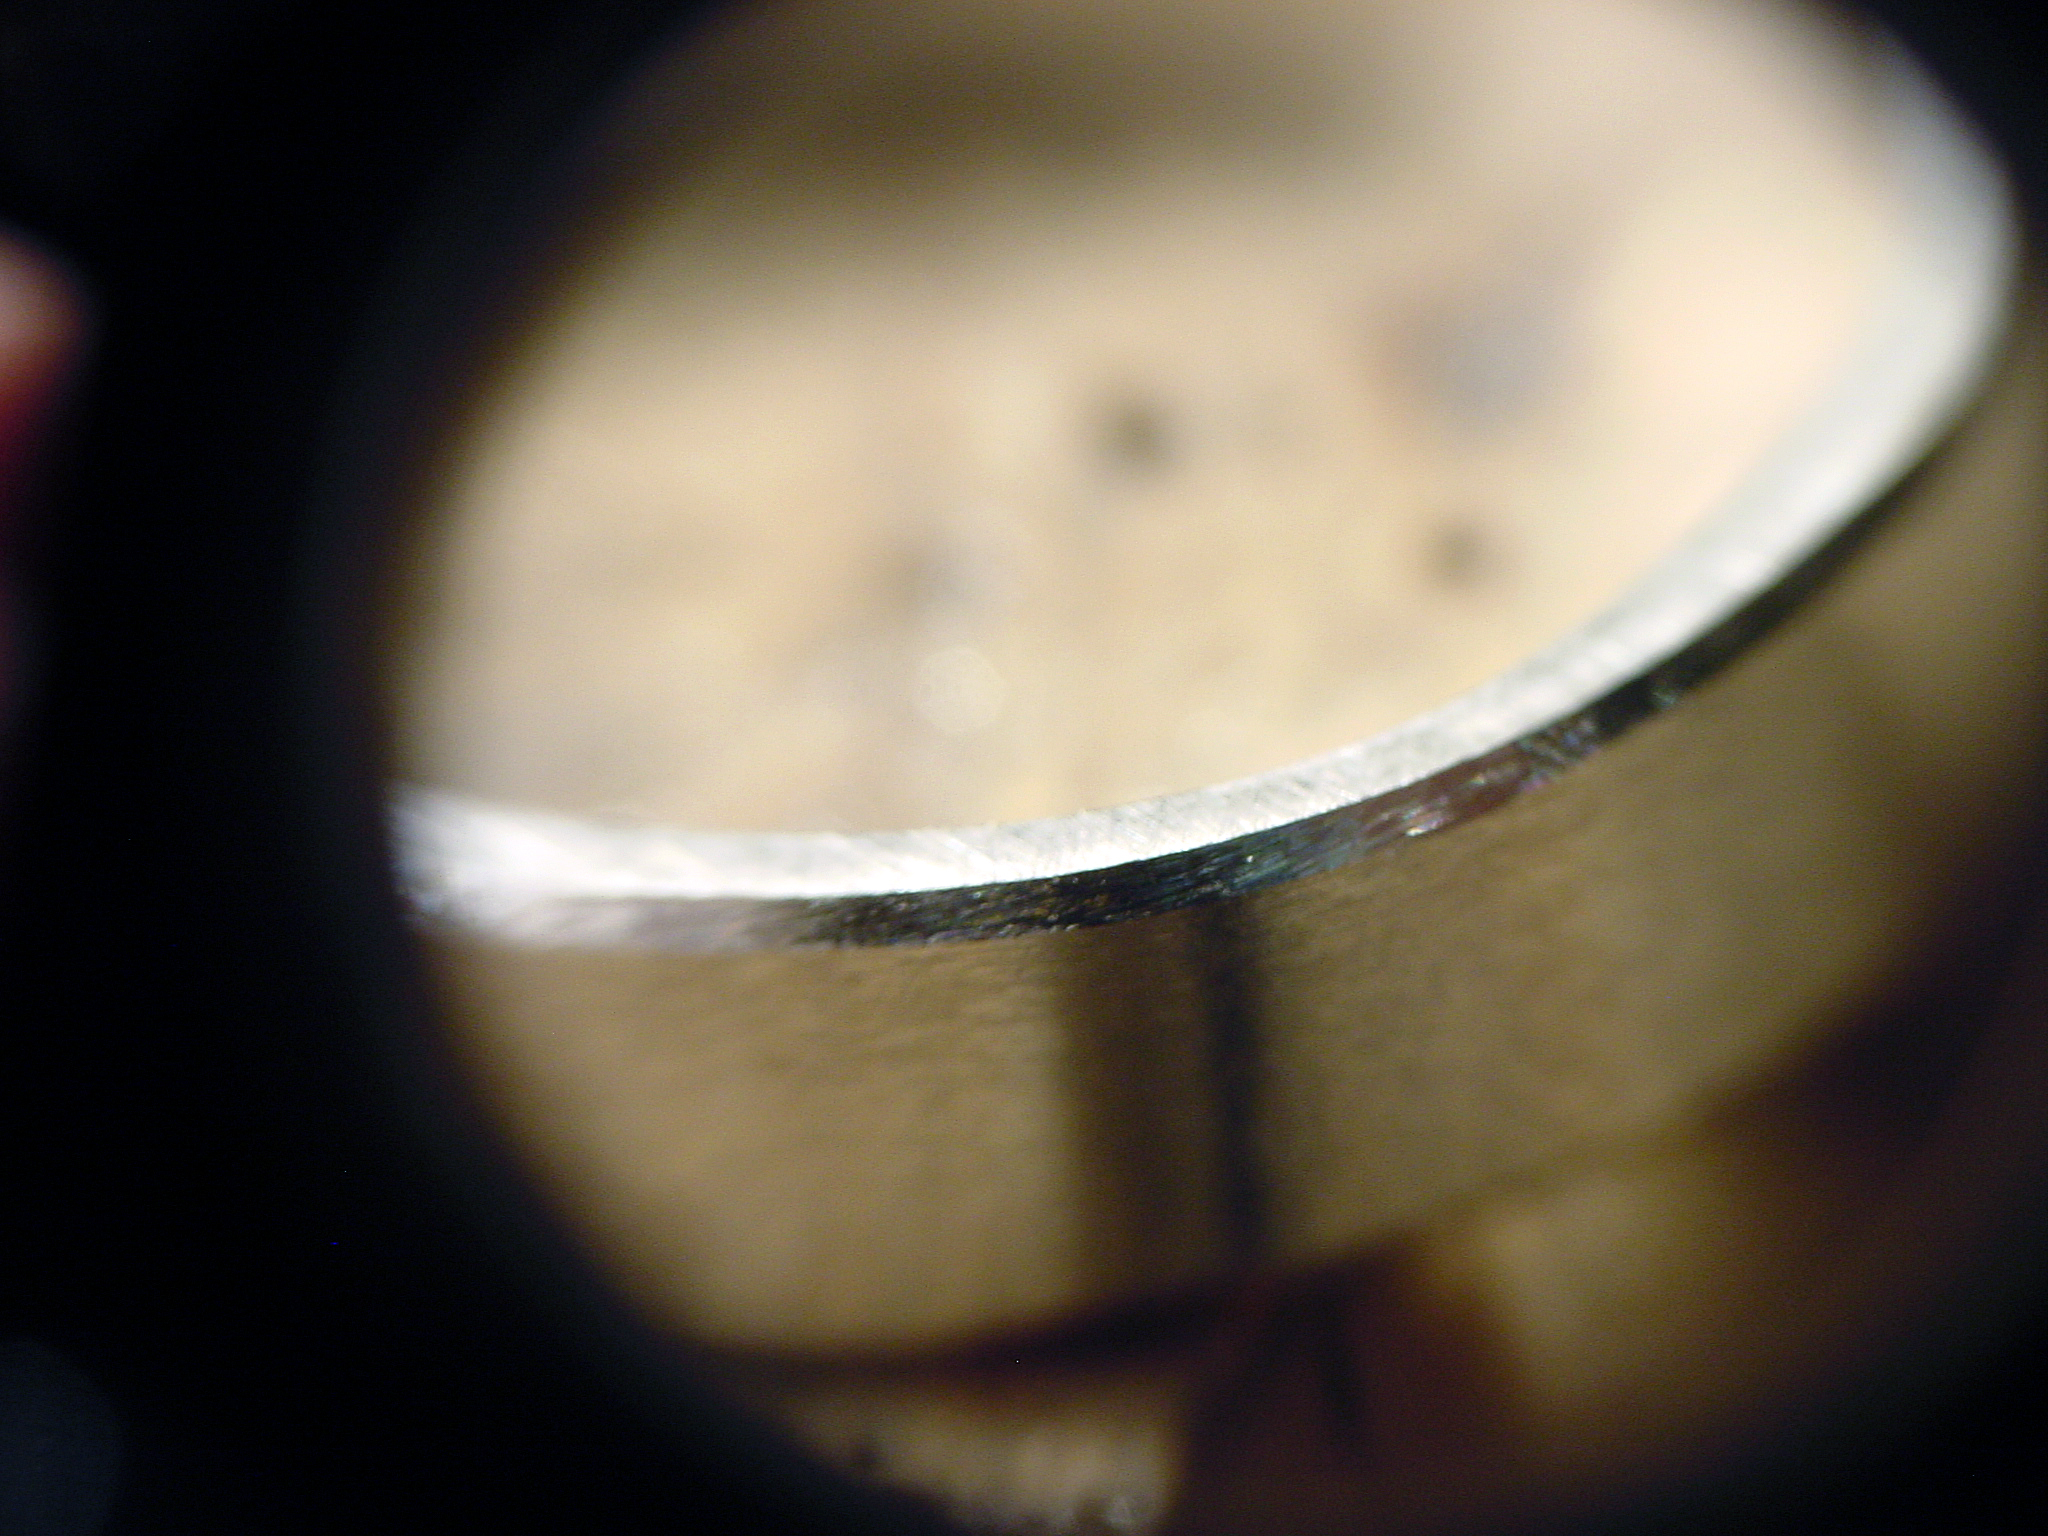
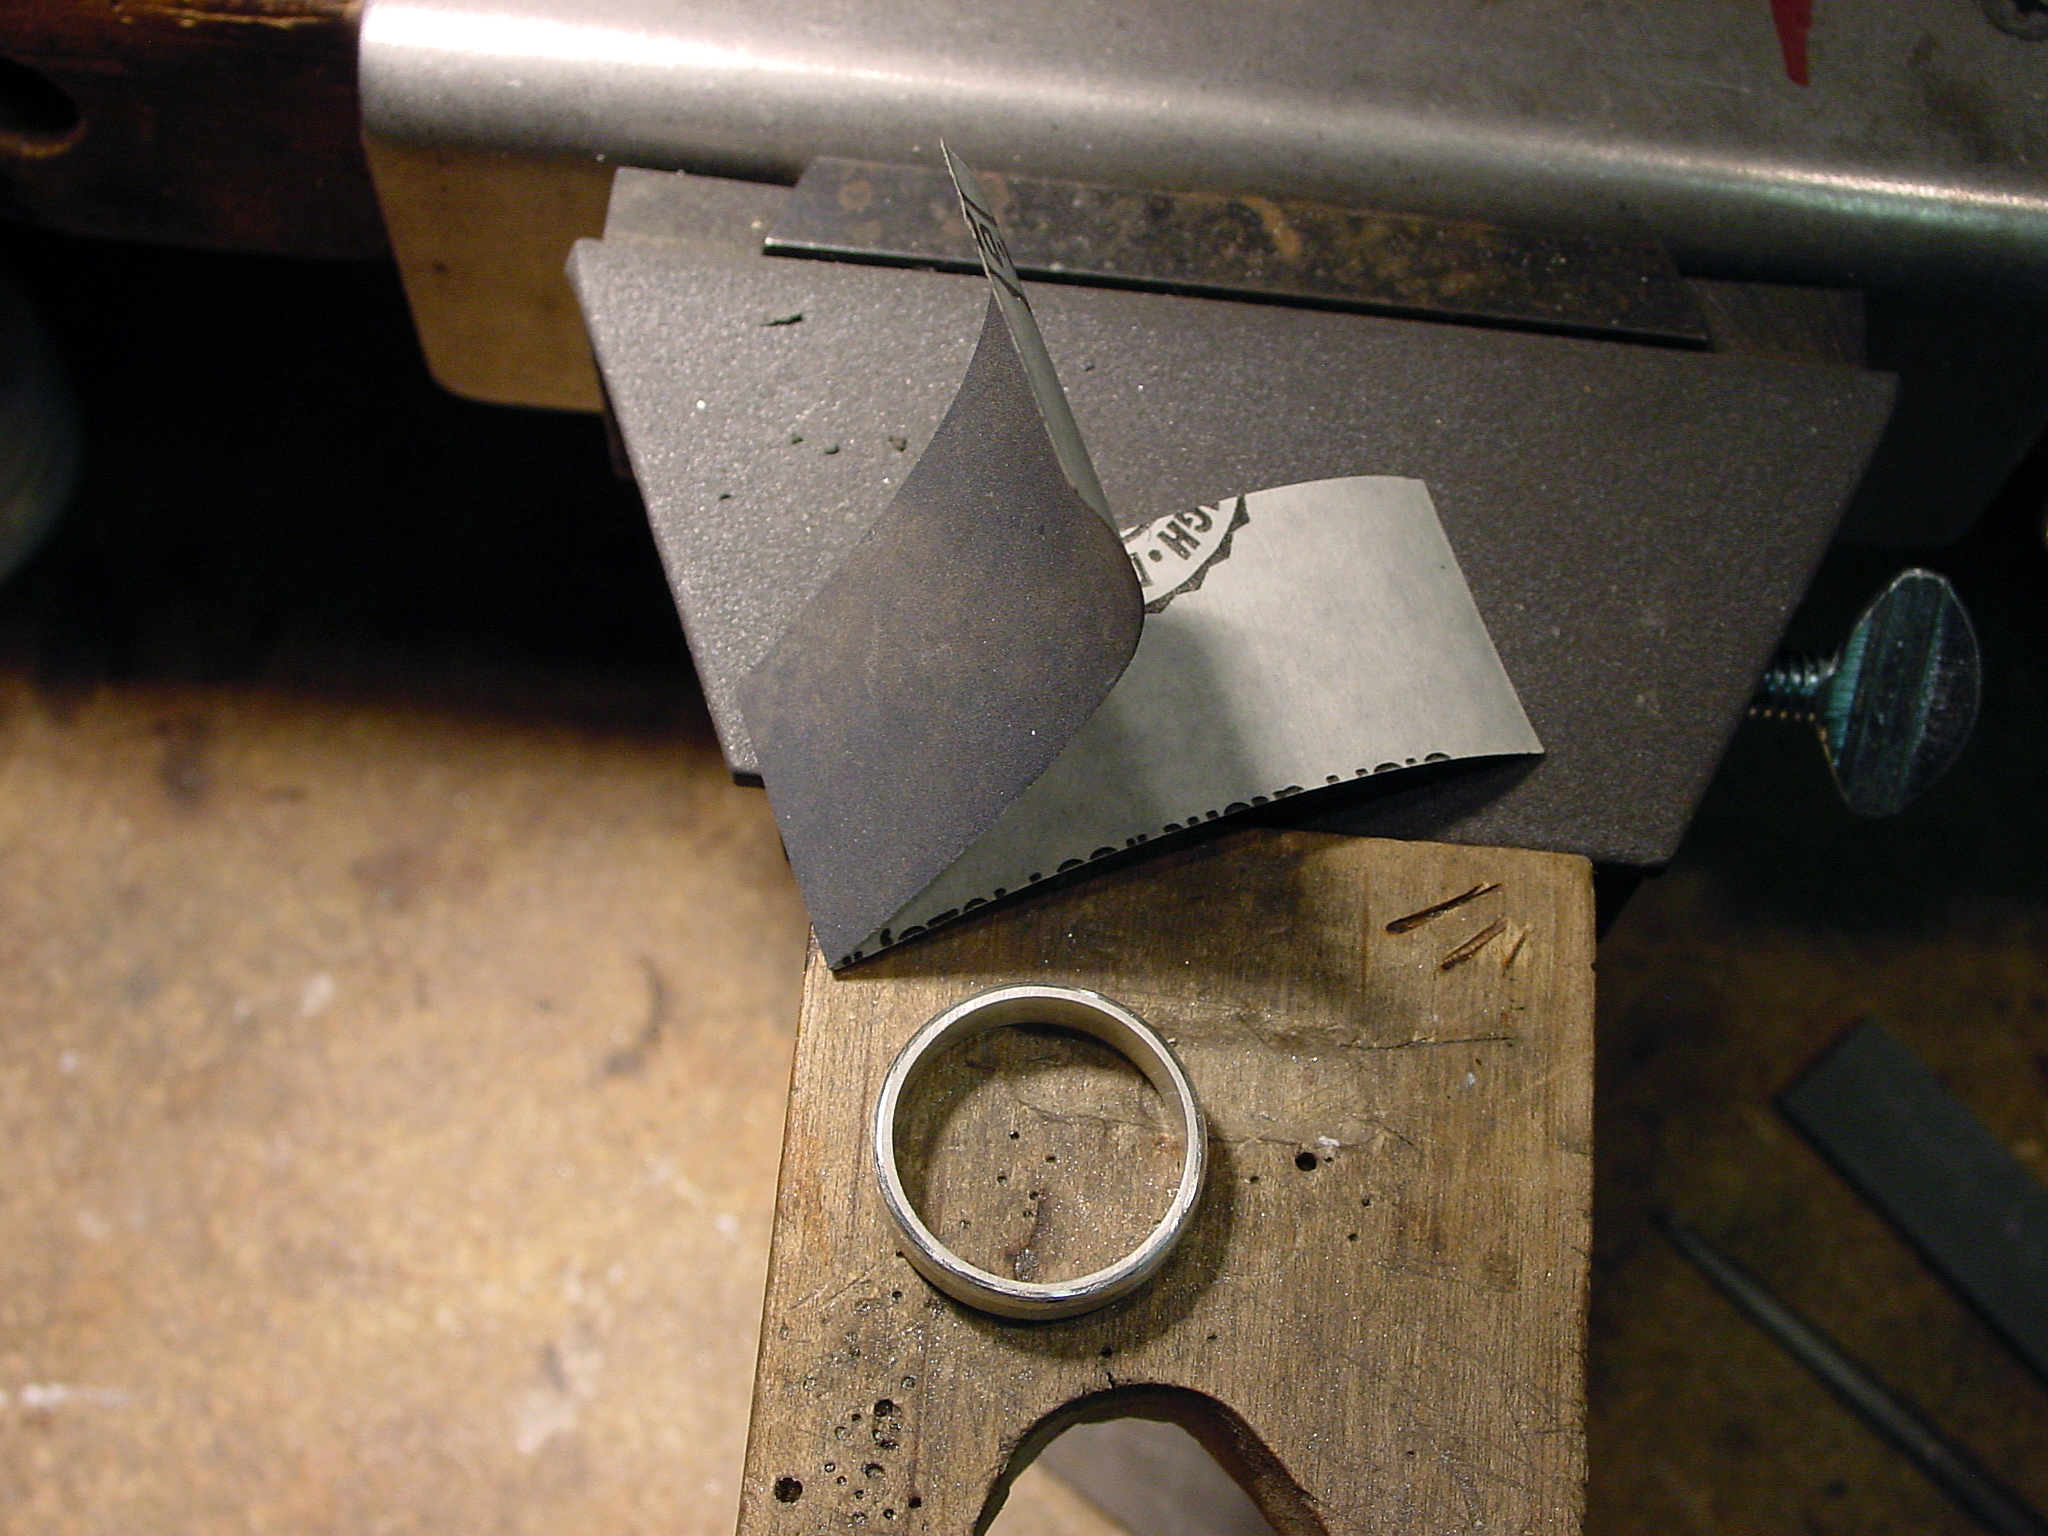
I cut the shank, round the ends with a pair of Flat/Half Round Pliers, tap the shank with a Rawhide Mallet,  and file the ends of the shank with a Equalling Needle File #4, then a Escapement Equalling File #6.

Soldering Basics (5) Soldering Basics (6)

Soldering Basics (7)

Soldering Basics (8) Soldering Basics (9)

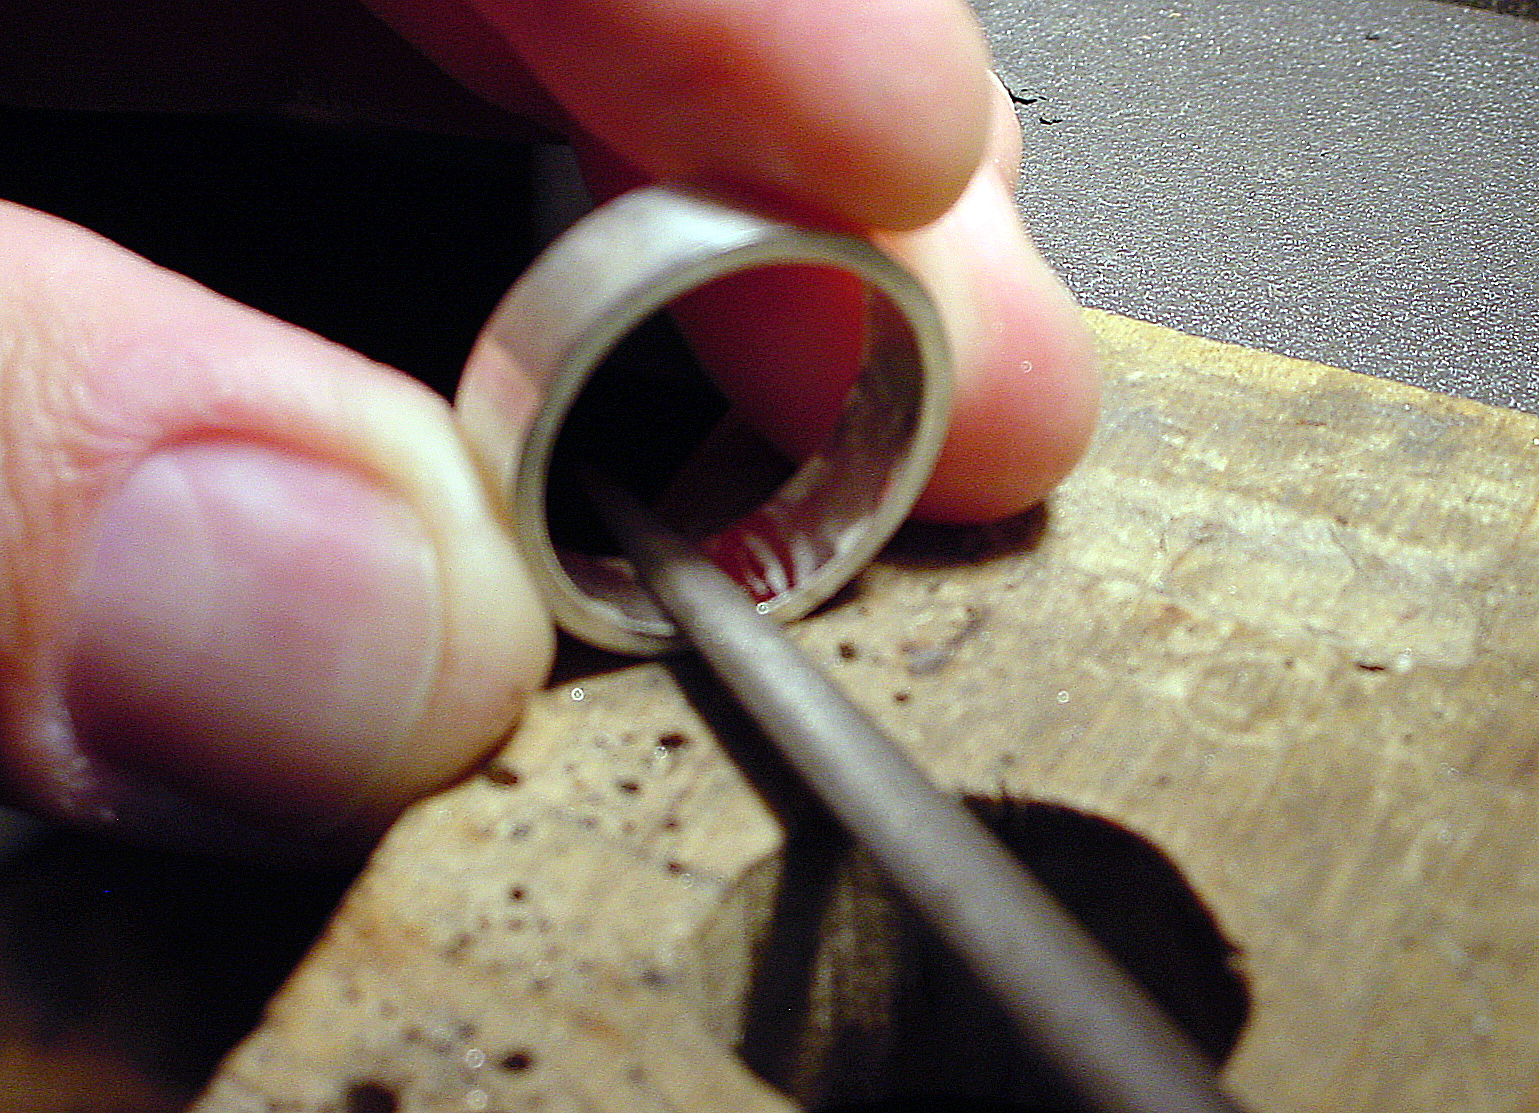
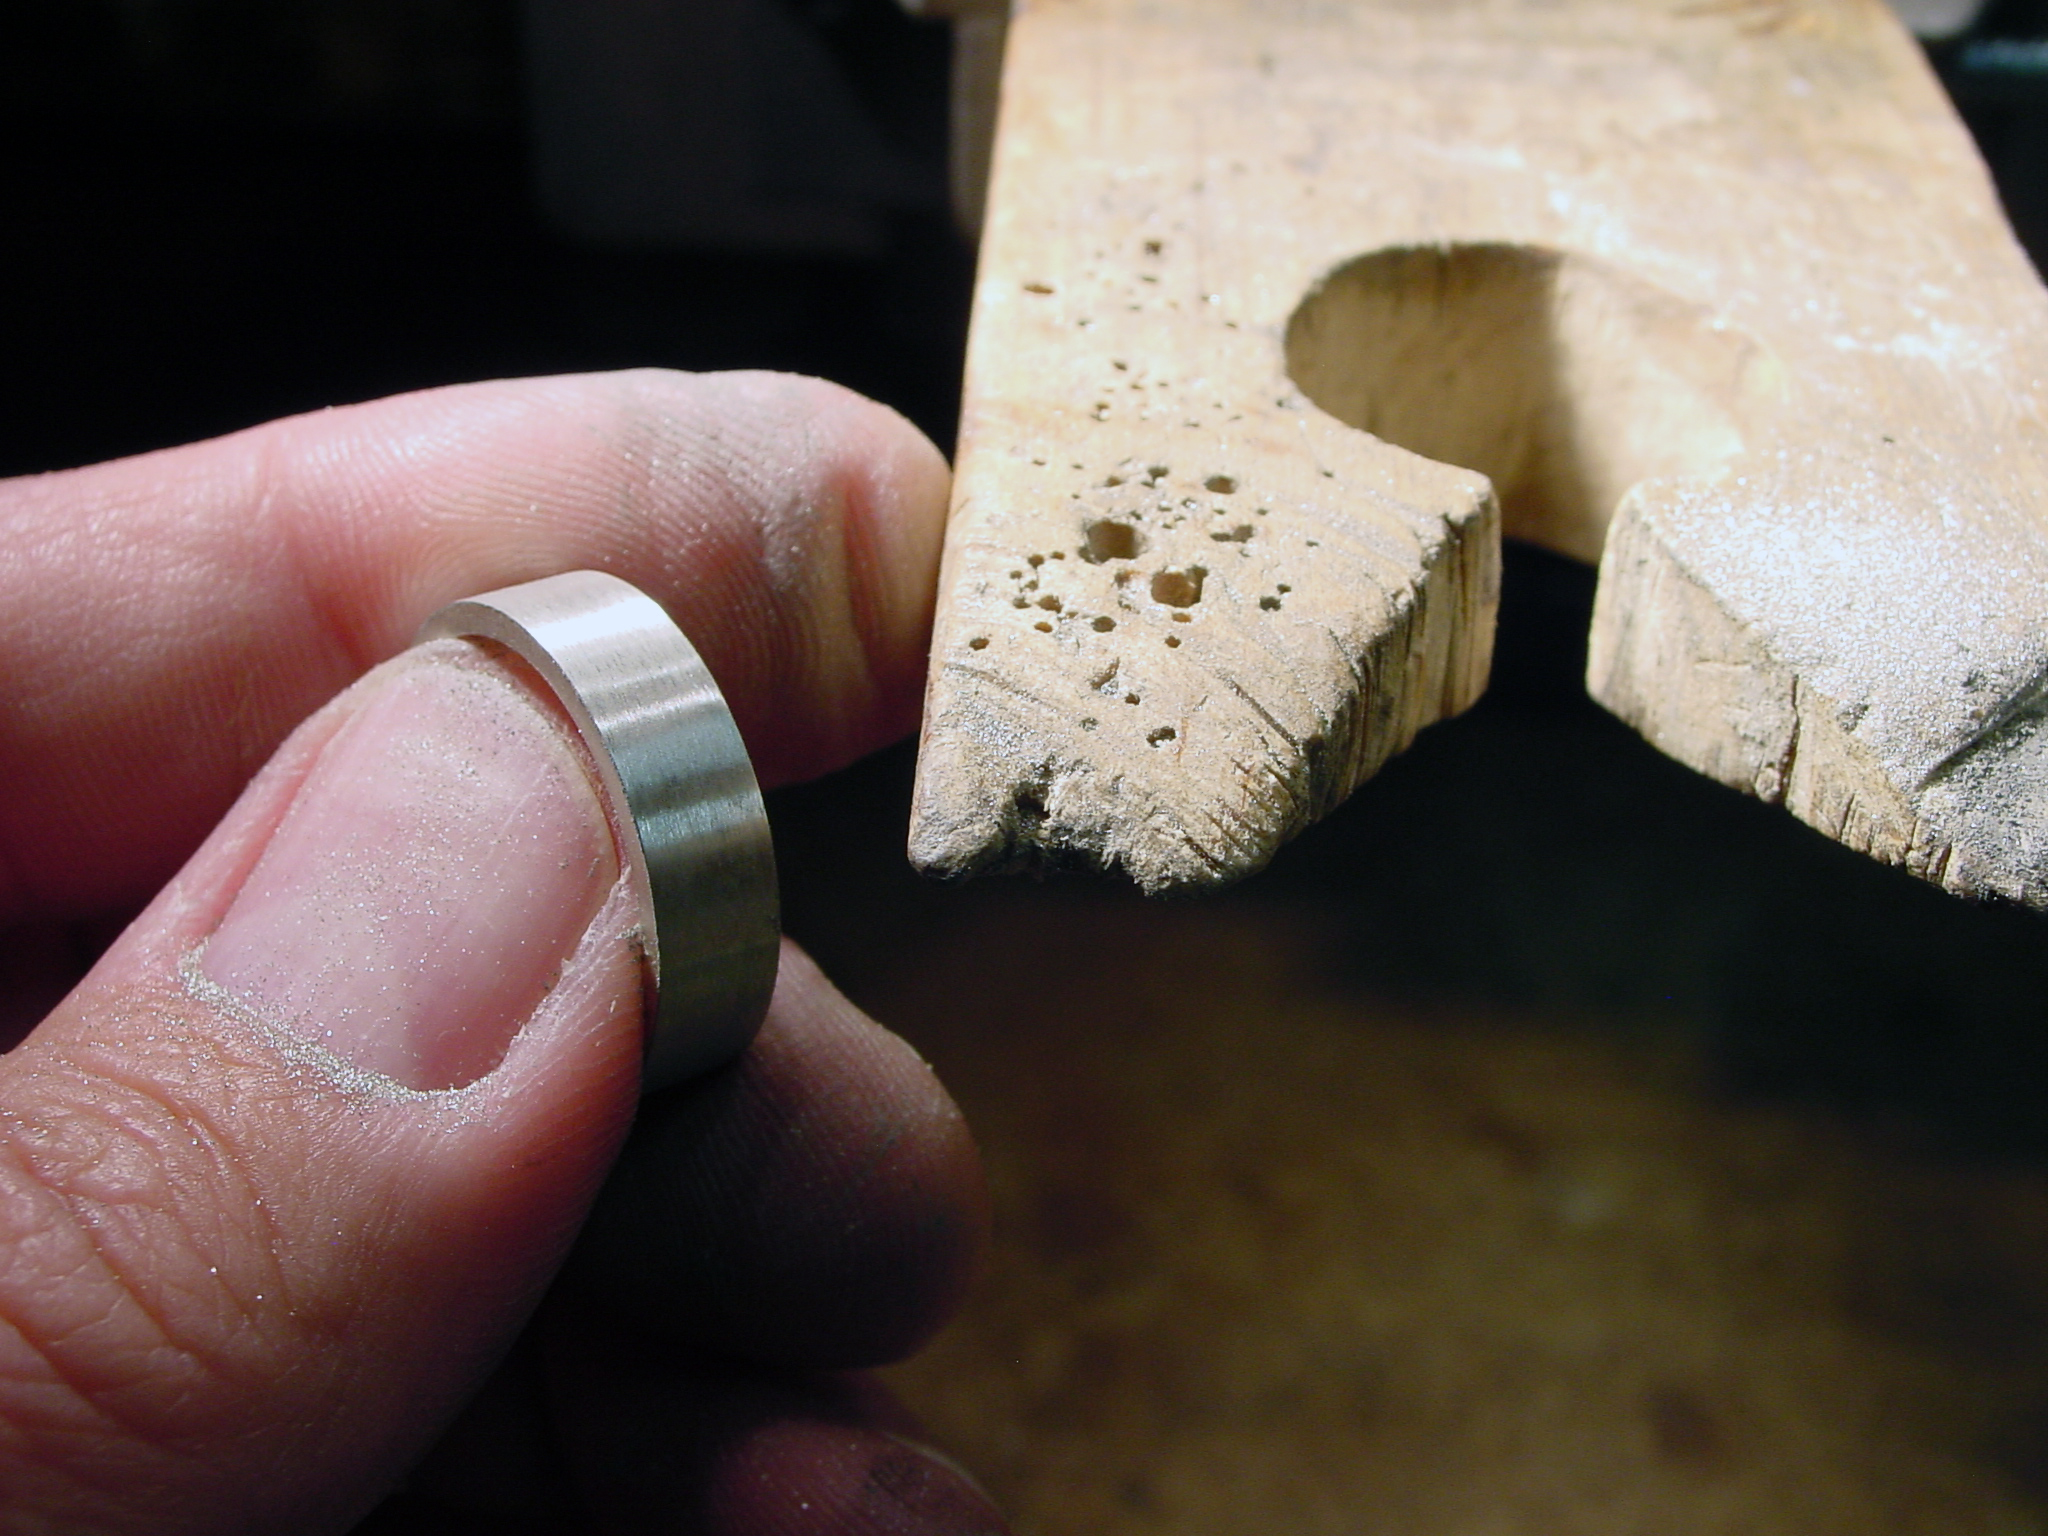
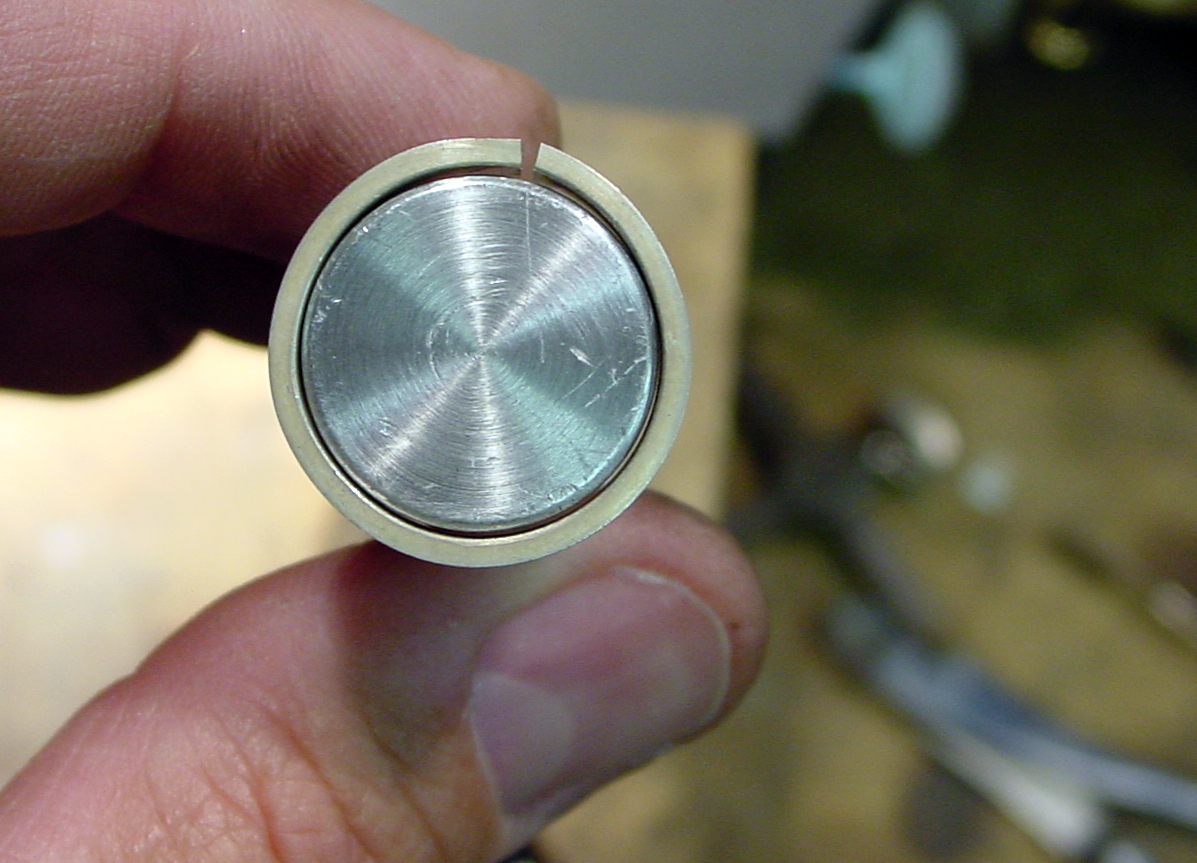
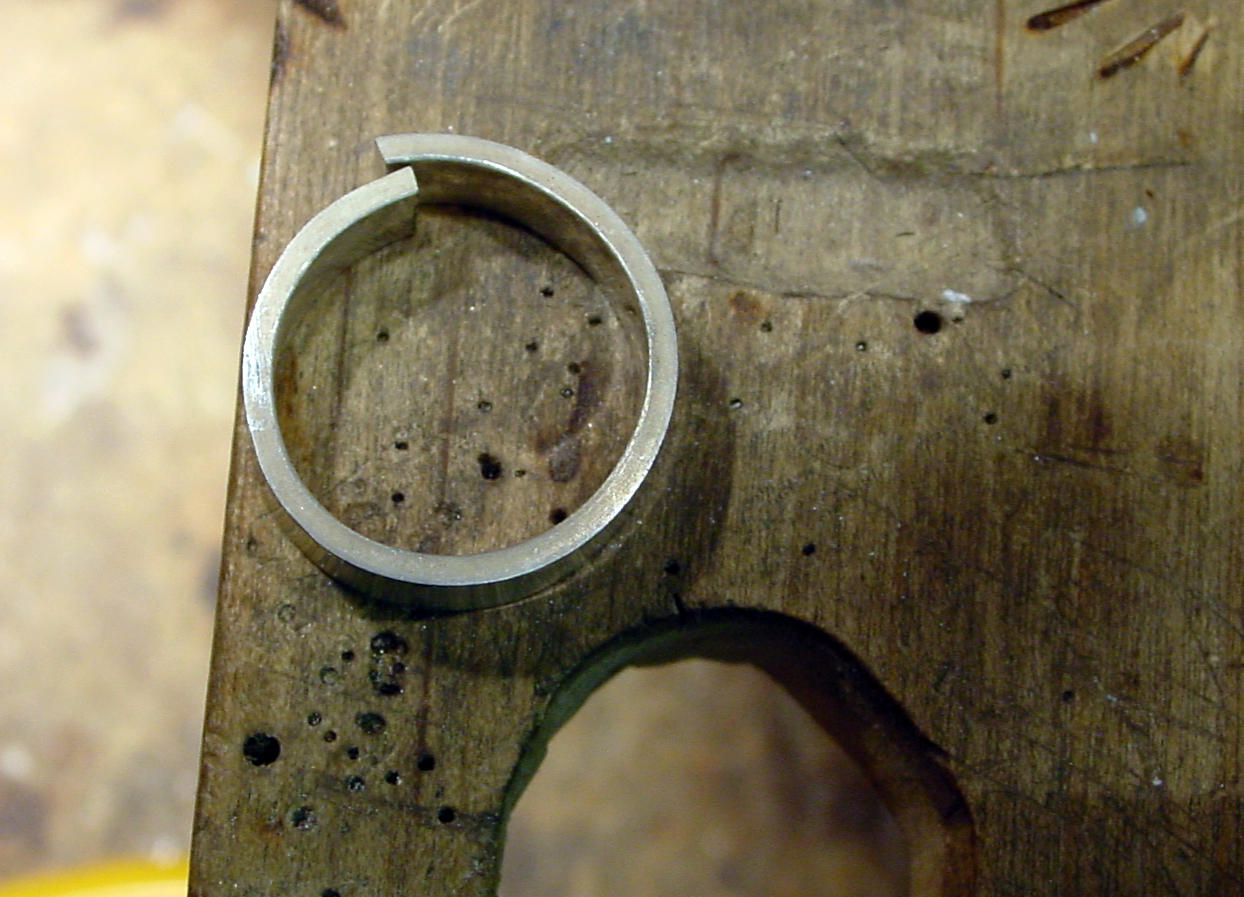
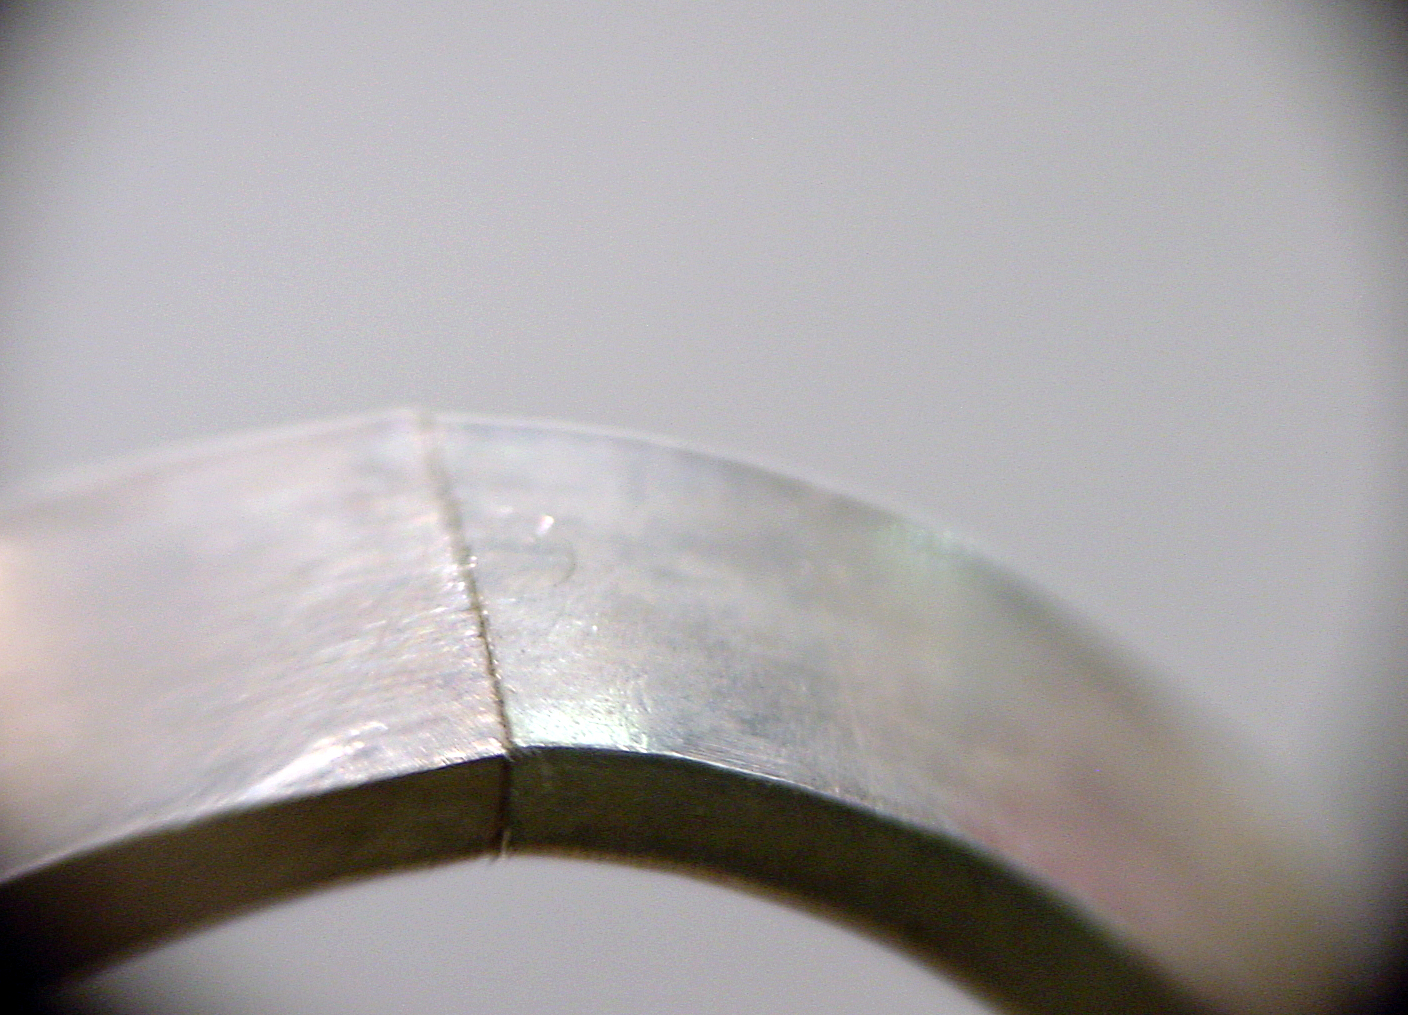
I bend the shank past center to reverse the spring in the shank, (so the tension forces the ends together instead of away from each other), then bend the shank until it matches as close as I can get it.

Soldering Basics (10) Soldering Basics (11)

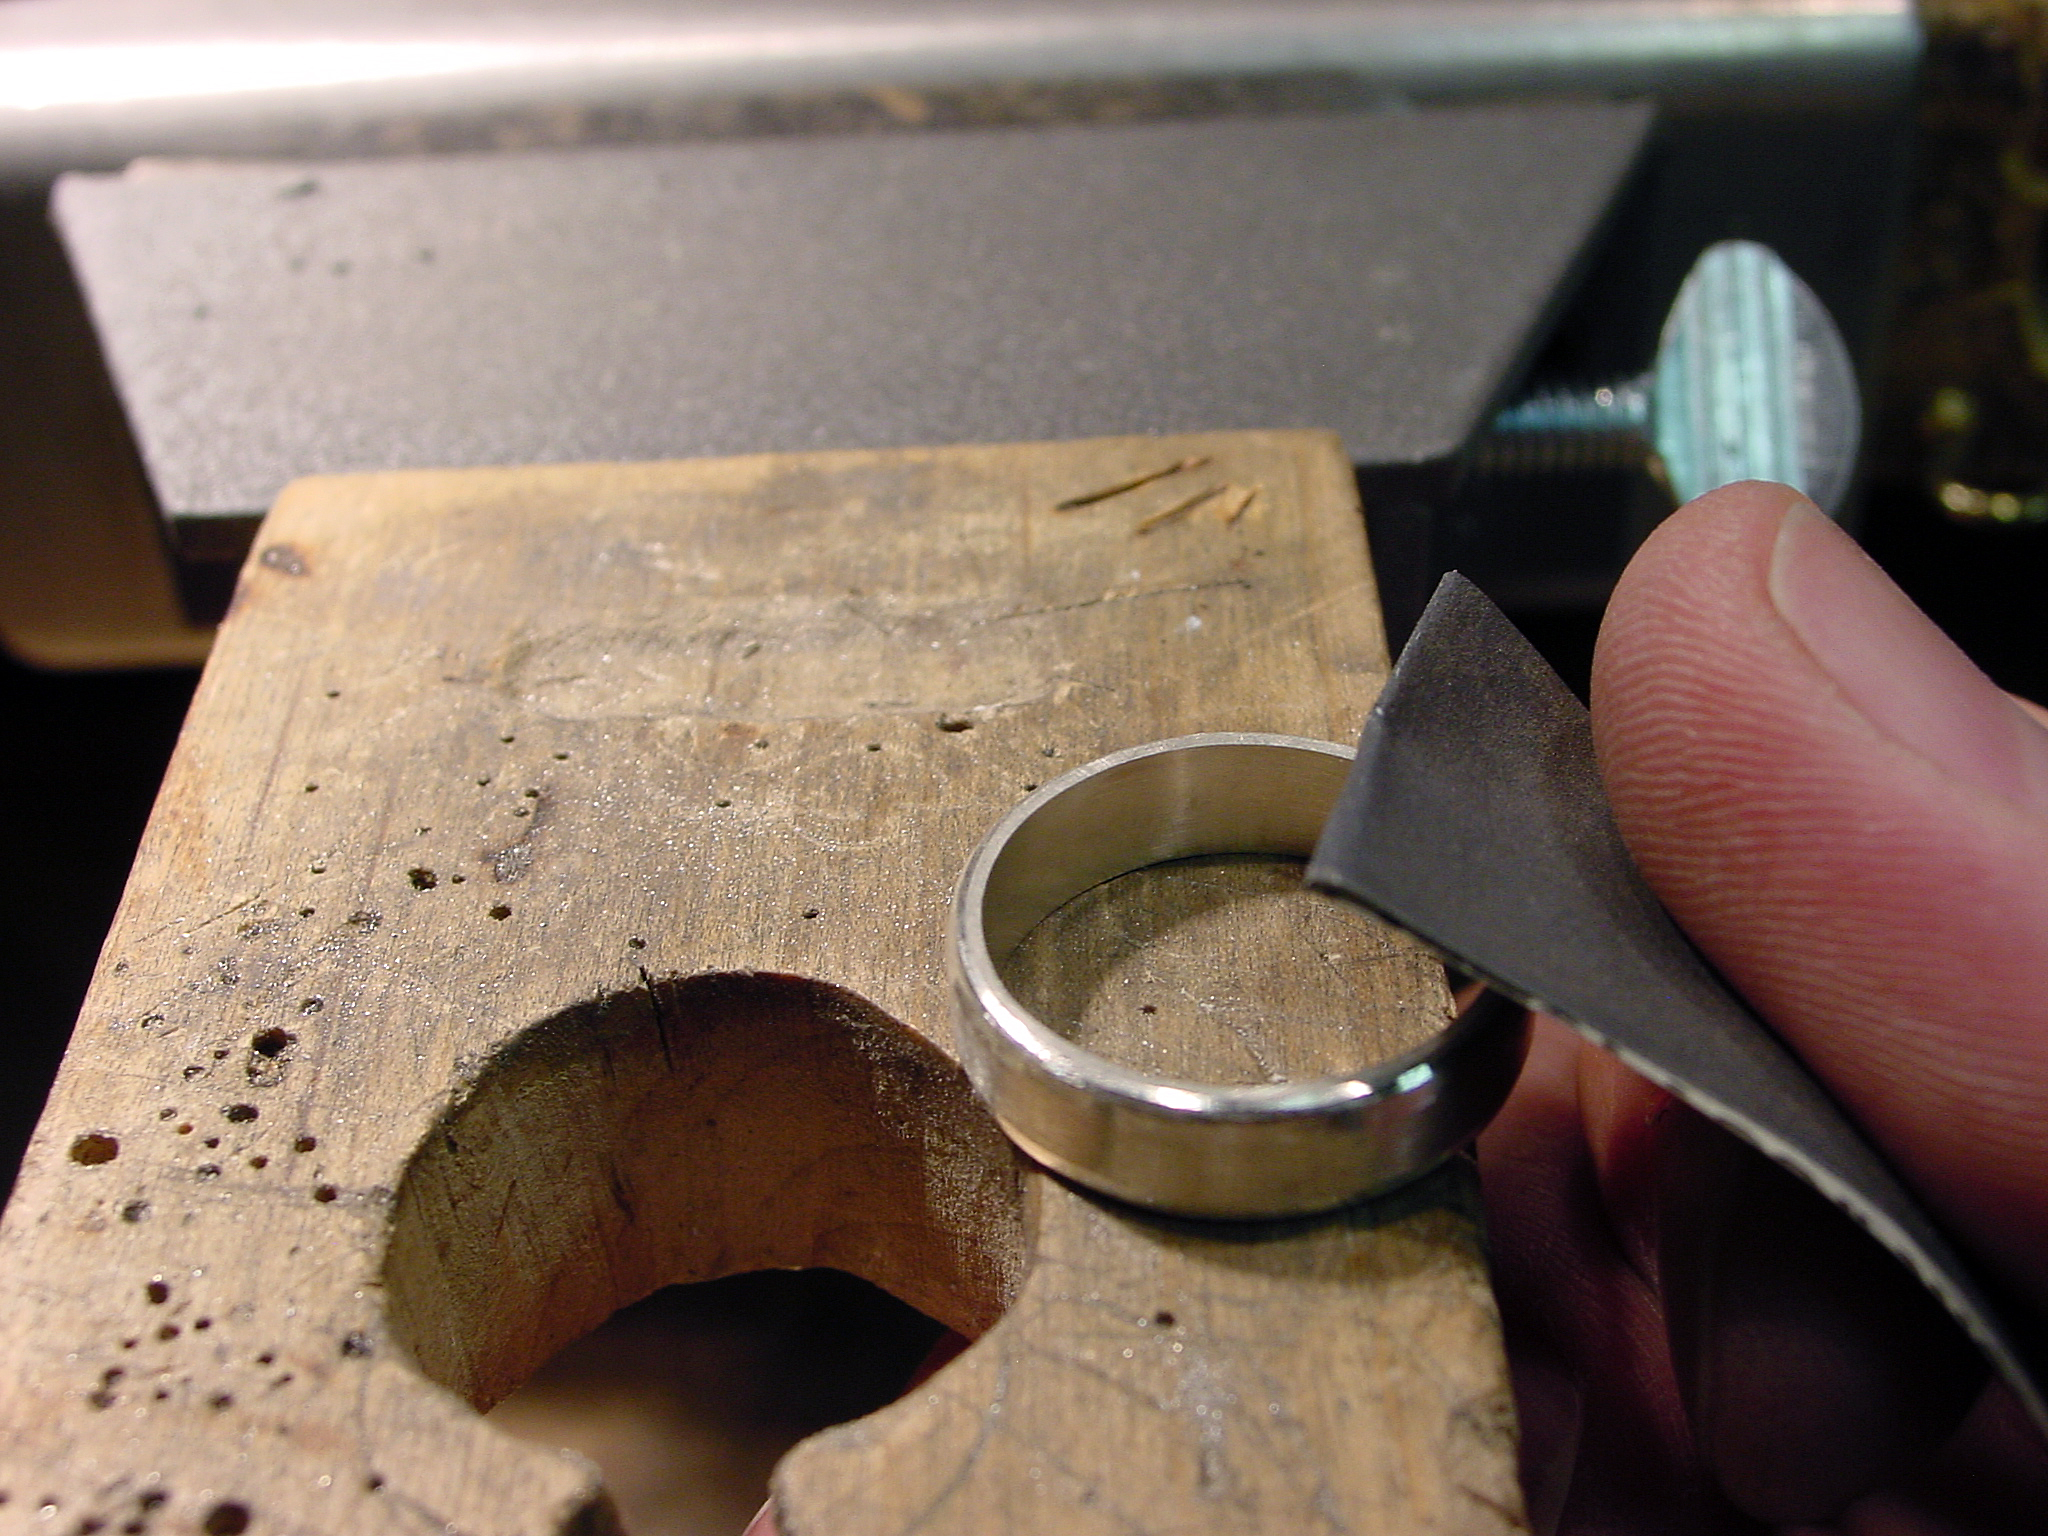
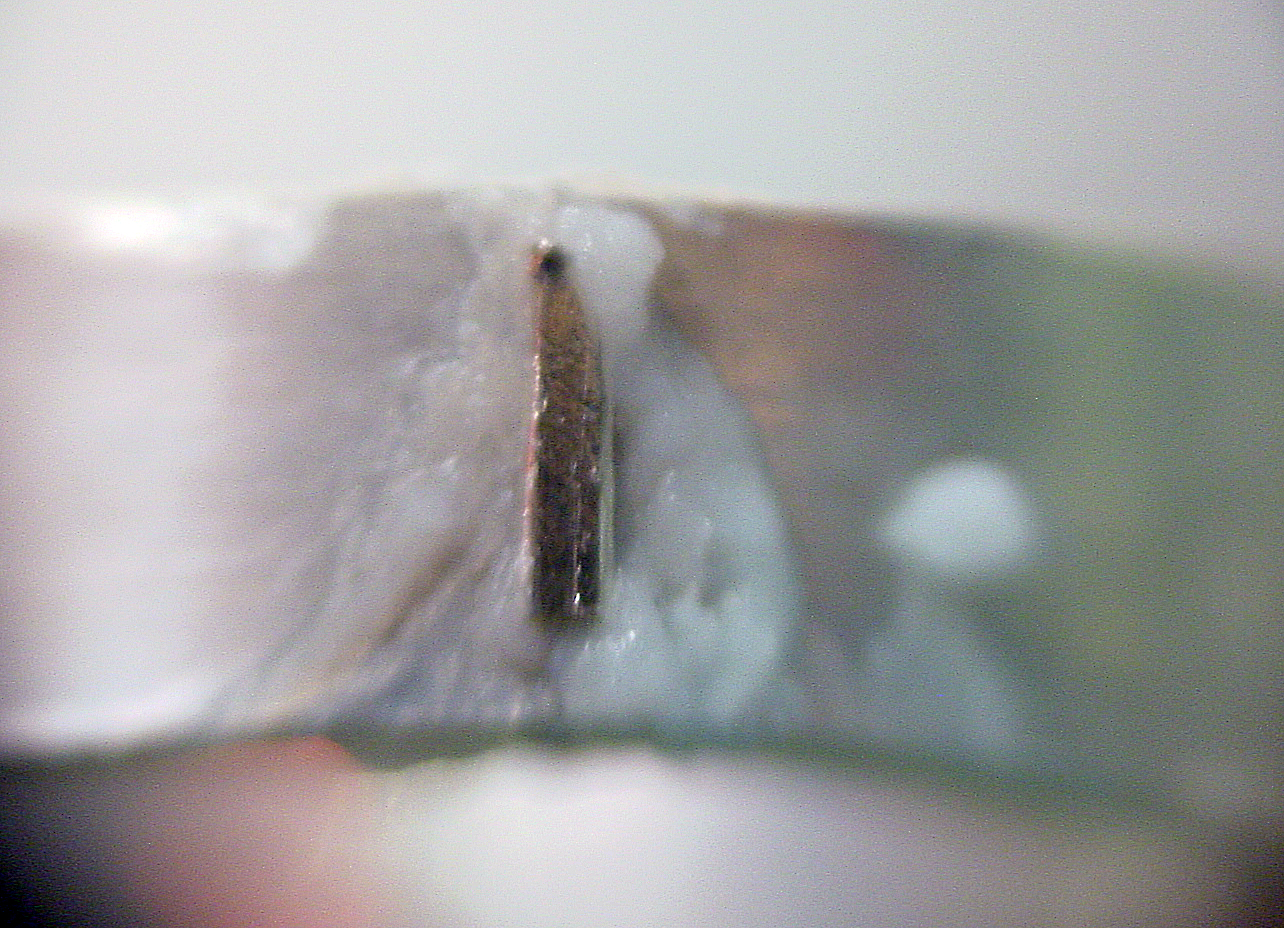
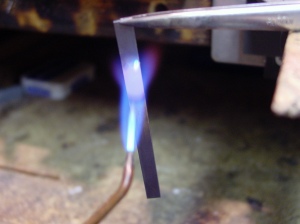
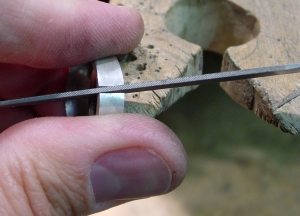
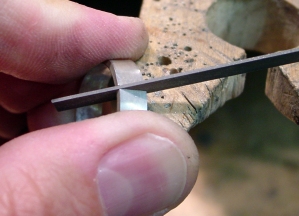
Next I coat the entire soldering joint with Handy Flux and add a piece of silver solder to the top of the joint.

Soldering Basics (12)

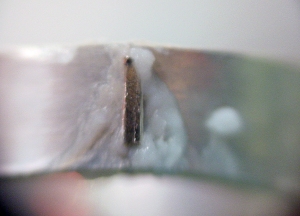
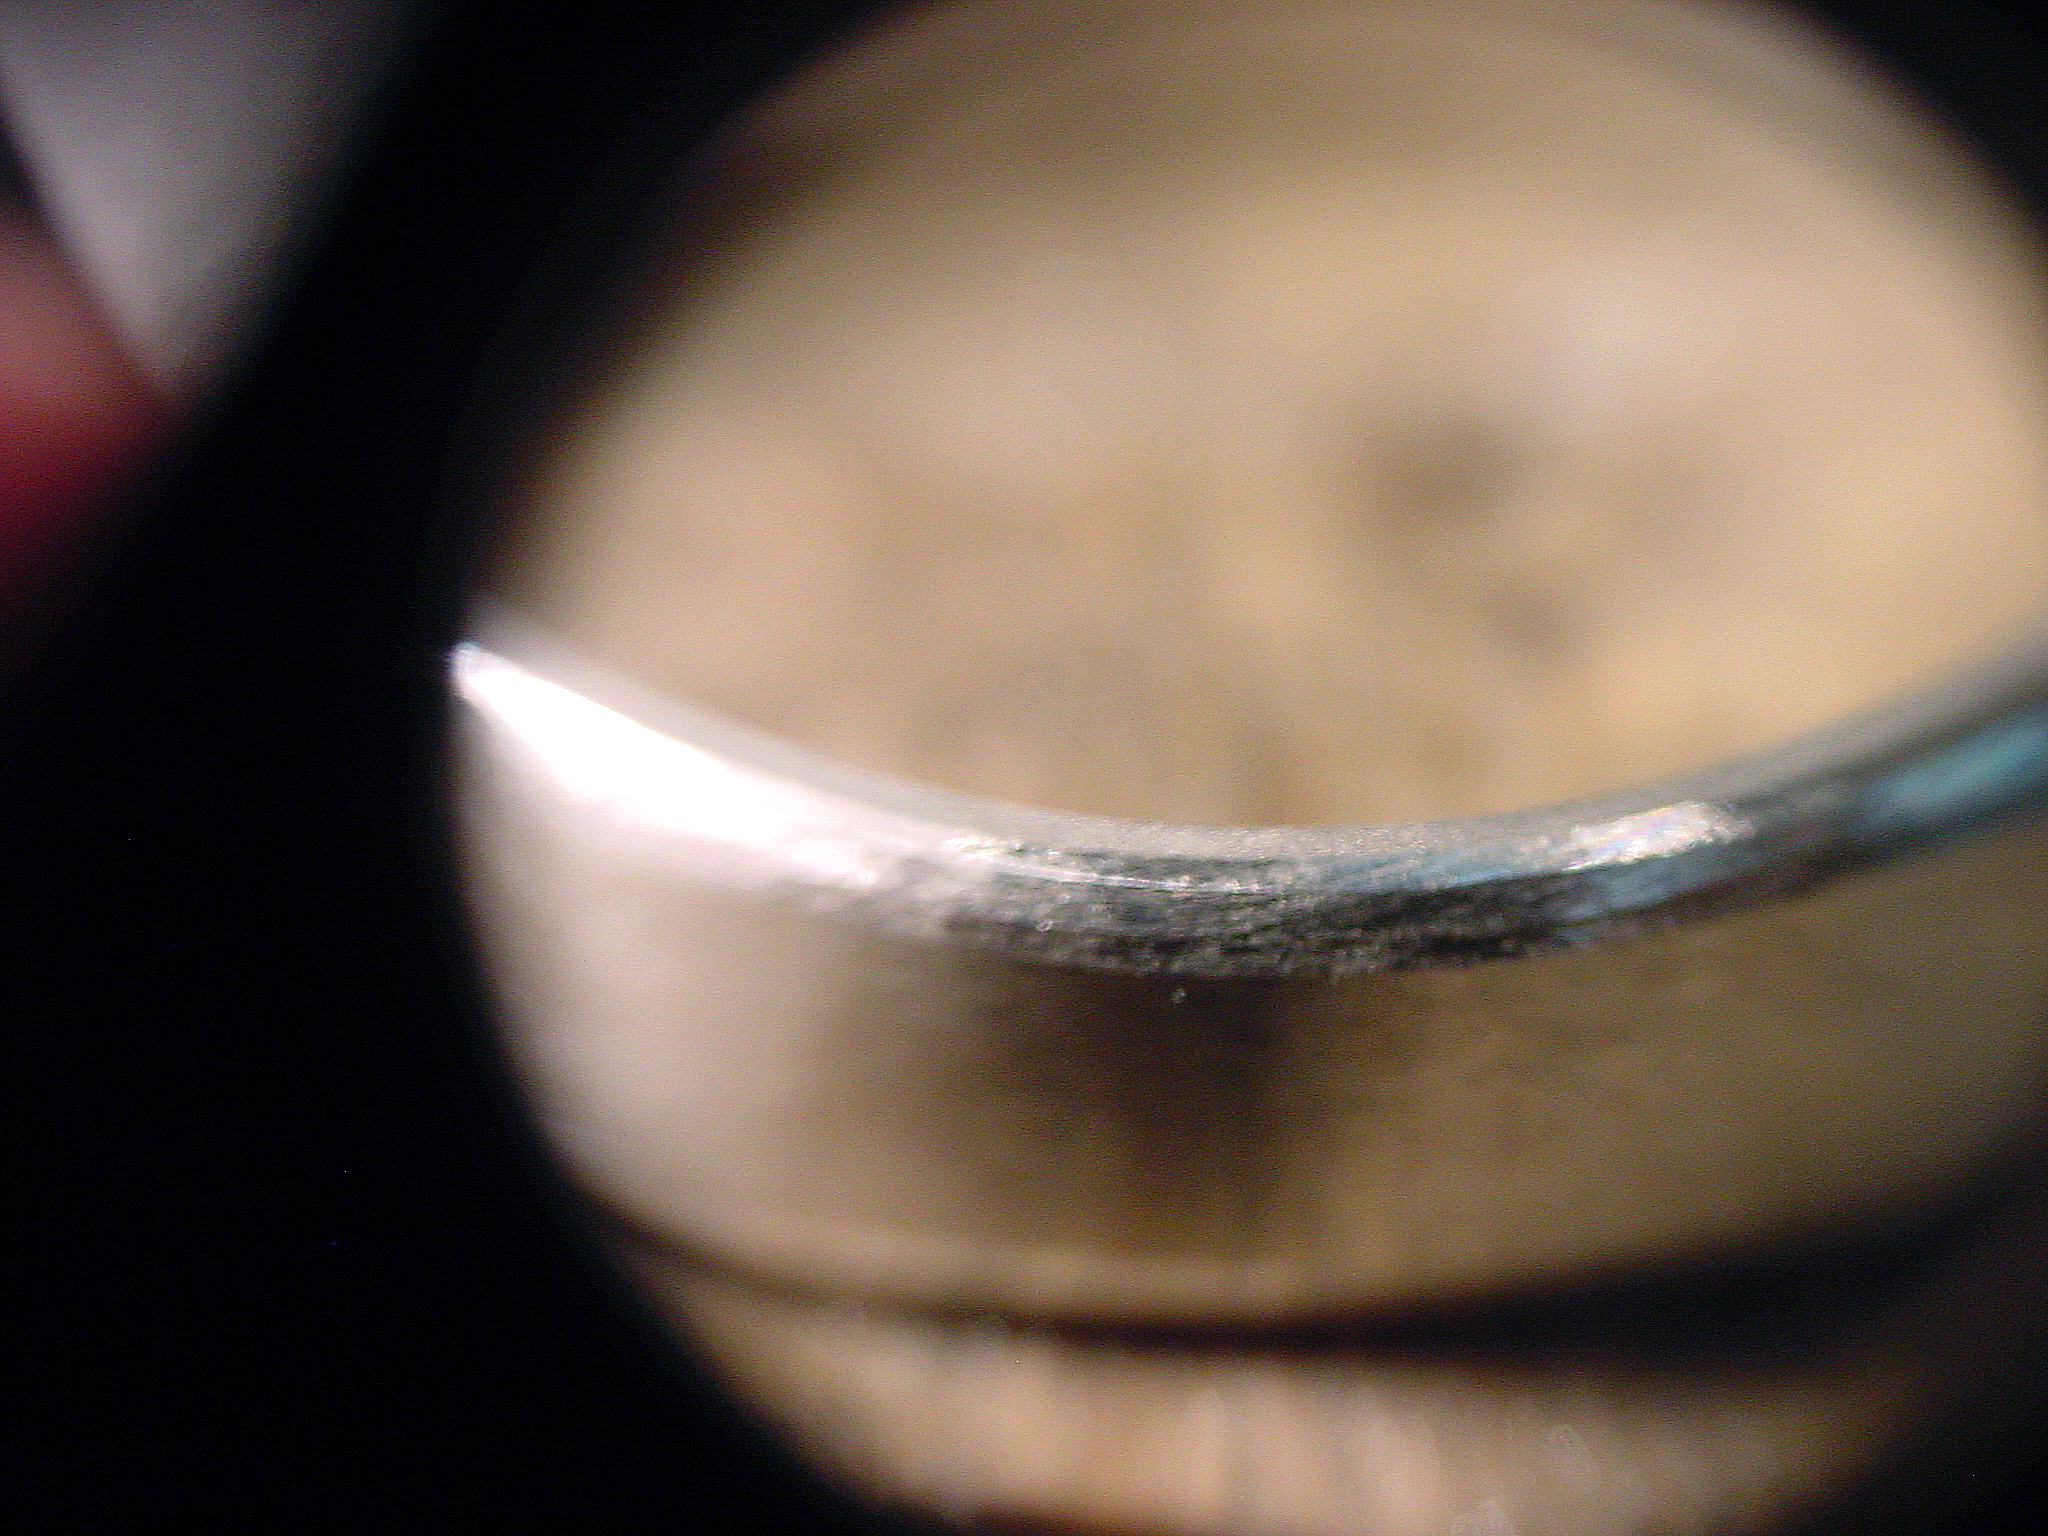
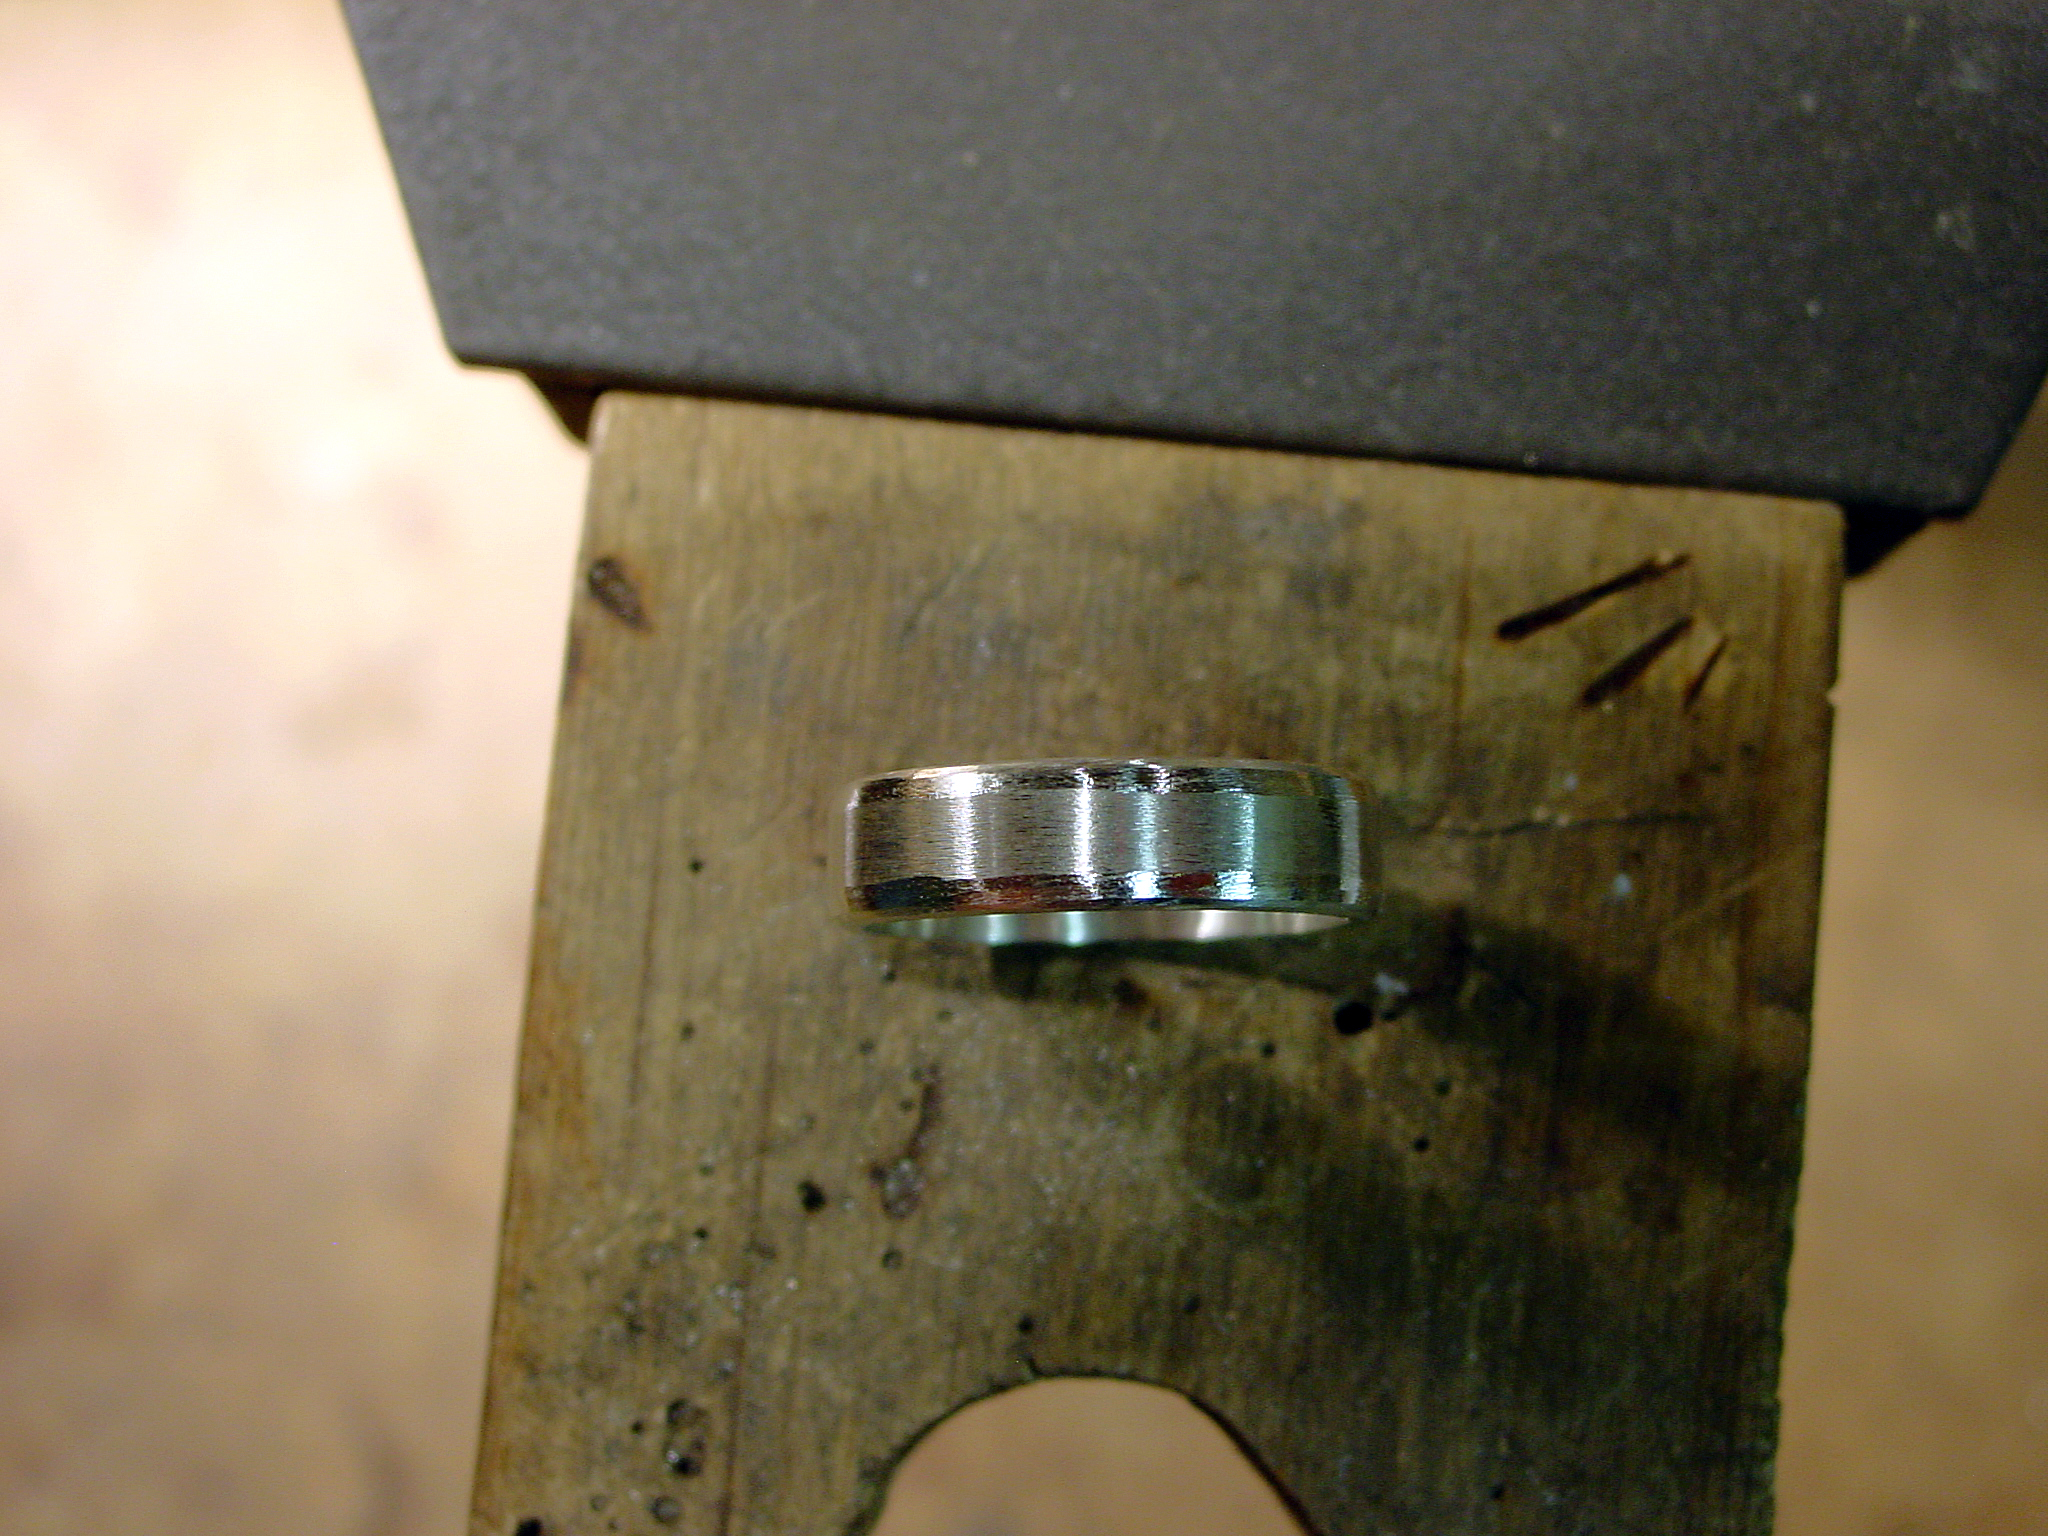
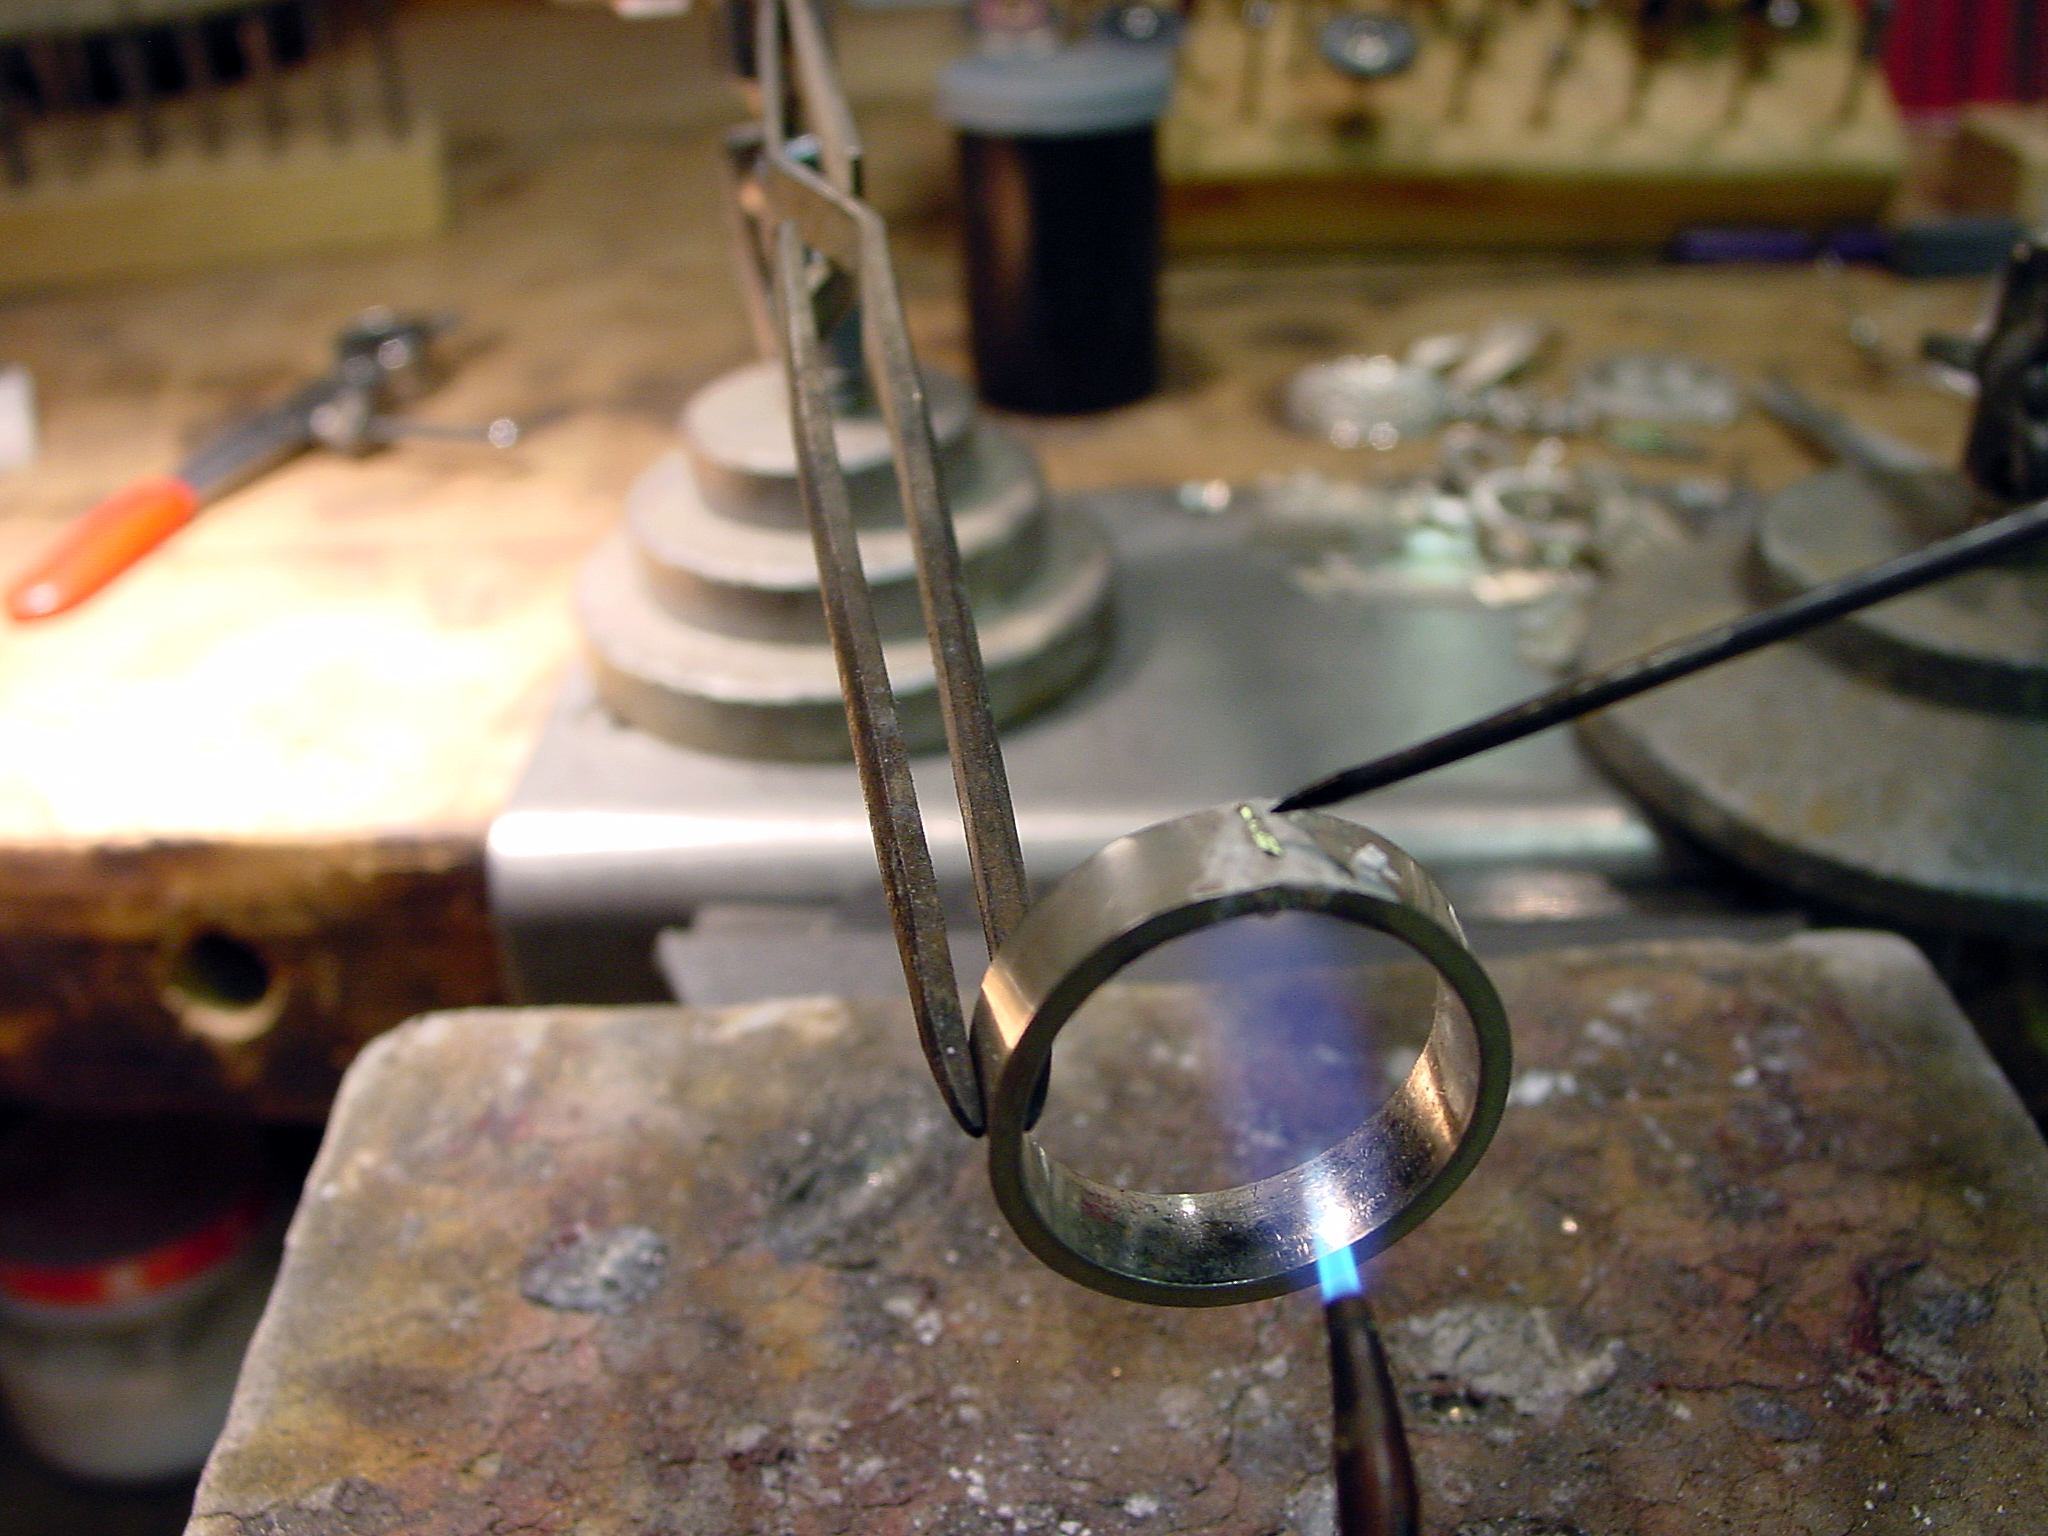
Now, light your torch and get a good flame, not too sharp (pointy blue) and not too bushy (fluffy yellow) and point the torch UNDER the soldering area. You want the flame to be under the shank, to allow the heat to melt the solder, not the flame. Solder follows heat, and if you heat from the underside of the shank, the solder will be pulled “Through” the solder joint. This will make a strong solder joint with less chance for pits. Always remember that solder follows heat, and you want heat to melt the solder, not the flame. If you melt the solder with the flame, you are adding oxygen to the melting solder, adding more chance for pits.

Soldering Basics (13) Soldering Basics (14)

Soldering Basics (15)

We will get more into soldering in future posts, but I want you to get comfortable with the idea of being someone who can tackle this hurdle if you have never soldered, or get into good soldering habits if you are new.

Thanks for making my first month of blogging an enjoyable experience.

Have a good day!

Doug

Day 30 Jewelry Tool Modification

As I was working on the last project, I was reminded of something I usually do, but forgot in this instance, and it “bit” me…… Let me explain:

Screw Mandrel Header

If you have ever gotten new “Screw Mandrels“, it is a happy day and there are so many tools that can be used on them, they are great! But today I will show you a quick tip that might save you some time, actually WILL save you some time someday.

If you look at the end of the screw mandrel, or the “screw” portion, you will probably notice there are some sharp edges and small “burs” on the screw. Now this isn’t a problem until this end comes in contact with the piece of jewelry you are working on while spinning. This will usually leave some pretty good marks if you are lucky, and take small chunks out of your beloved piece of jewelry if you aren’t so lucky.

Screw Mandrel (1) Screw Mandrel (2)

Here is the cure:

I have mentioned before the fact I hate to throw away old burs and such, well the same goes with old files. Take an old Hand File and while the screw mandrel is in your Foredom, rub the end on your file (#4 in this case) cleaning the burs off and rounding the edges of the screw.

Screw Mandrel (3) Screw Mandrel (4)

Now take a small piece of 600 Grit Sandpaper and hold it to the screw end while spinning in your foredom. This will polish it a little more.

Screw Mandrel (5) Screw Mandrel (6)

Now if you….. I mean WHEN you accidently touch the spinning end to your jewelry, it won’t tear it up so badly. It will still leave a little mark, but more manageable.

Screw Mandrel (7) Screw Mandrel (8)

Hope this helps.

Now enjoy your day and make something awesome!

Doug